Activate Your License
An unactivated SafeSquid instance operates with limited features. Activation ties your key to this instance and unlocks your chosen tier (Free or Commercial), enabling full update feeds and commercial features where applicable.
Key Benefits
- Unlock commercial features - threat intelligence, URL categorization database, 365-day DR backup, and email support (see table below).
- Receive updates - subscription and malware definition feeds require successful activation.
- Prove licensing for audits - activation status is visible in the SafeSquid interface for compliance evidence.
SafeSquid offers two licensing tiers:
| Free | Commercial | |
|---|---|---|
| Core proxy and filtering | ✅ | ✅ |
| SSL inspection | ✅ | ✅ |
| Custom policies and profiles | ✅ | ✅ |
| Real-time threat intelligence | ❌ | ✅ |
| URL categorization database | ❌ | ✅ |
| DR backup (365 days) | ❌ | ✅ |
| Email support | ❌ | ✅ |
The free license has no time limit. You can upgrade to commercial at any time through the Self-Service Portal.
Readiness Checklist
Your SafeSquid server needs outbound access to these endpoints. Ensure your firewall allows the traffic.
Required for activation
| Host | Port | Purpose |
|---|---|---|
| api.safesquid.net | 443 | License activation |
Required for ongoing updates (not needed for initial activation)
| Host | Port | Purpose |
|---|---|---|
| swgupdates2.safesquid.net | 443 | Subscription, malware definitions |
| swgupdates.safesquid.net | 80 | Seqrite updates |
| sslupdates.safesquid.com | 443 | SSL certificate updates |
| category.safesquid.net | 443 | Category DB updates |
| download.quickheal.com | 80 | Virus signature updates |
URL Categorization Engines (commercial license)
| Host | Port | Path |
|---|---|---|
| prourl.itsecure.co.in | 8080 | /URLCategorizerService/URLCategorize |
| encurl.itsecure.co.in | 8080 | /URLCategorizerService/URLCategorize |
| klassify.itsecure.co.in | 8080 | /URLCategorizerService/URLCategorize |
| prourl.itonlinesecure.in | 8080 | /URLCategorizerService/URLCategorize |
| encurl.itonlinesecure.in | 8080 | /URLCategorizerService/URLCategorize |
Activation Steps
-
Configure the browser to use SafeSquid as the HTTP proxy (SafeSquid IP, port 8080). See Connect Your Client if the browser is not yet configured.
-
Open the SafeSquid interface by navigating to http://safesquid.cfg/ in your browser (an embedded Rest UI interface built into SafeSquid; accessible only when your client uses the proxy, but NOT resolved by SafeSquid's DNS resolver).
When accessing for the first time, the interface prompts for upload of the activation key.
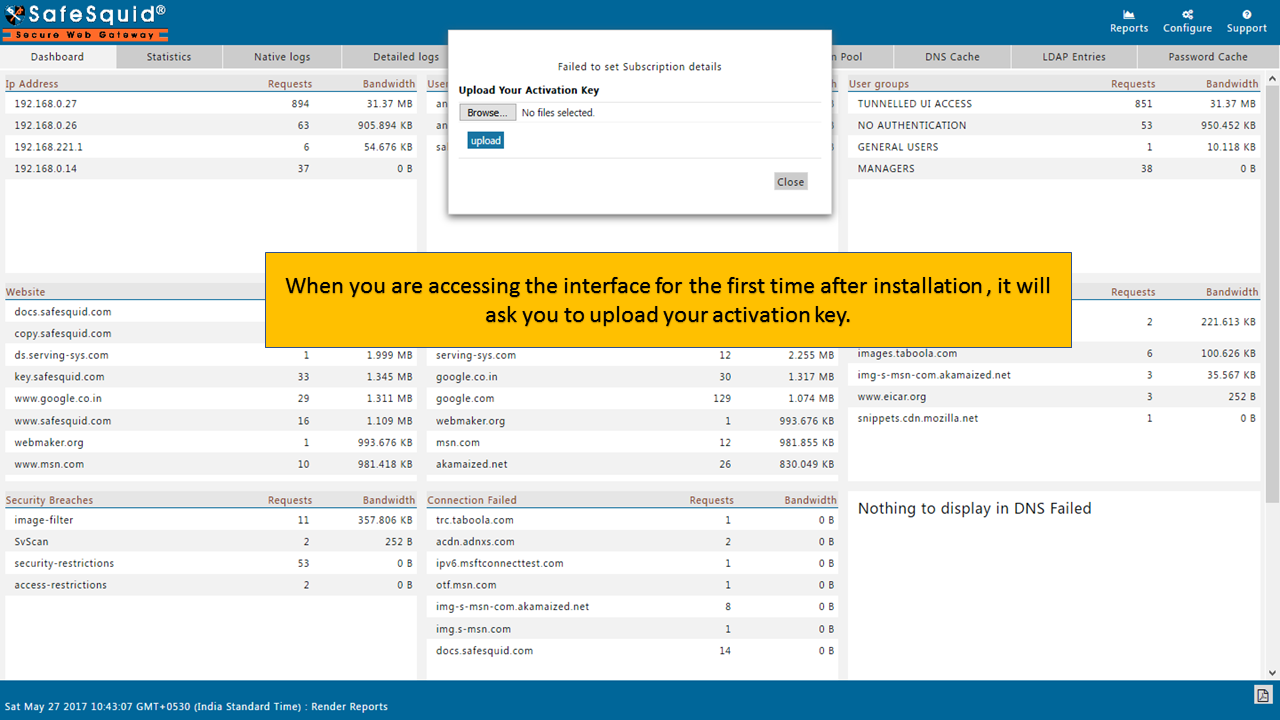 Initial activation prompt in the SafeSquid interface
 -
Select the activation key file and click Upload.
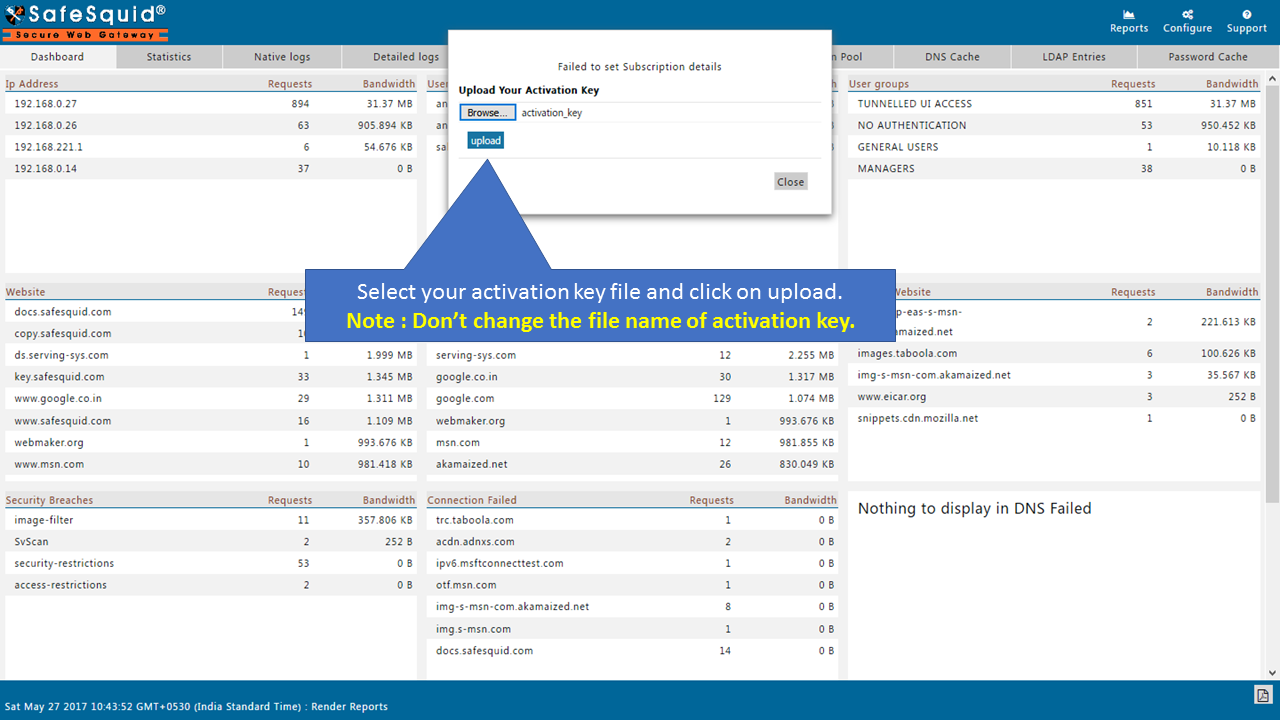 Key upload dialog
 -
Click Restart to apply the license.
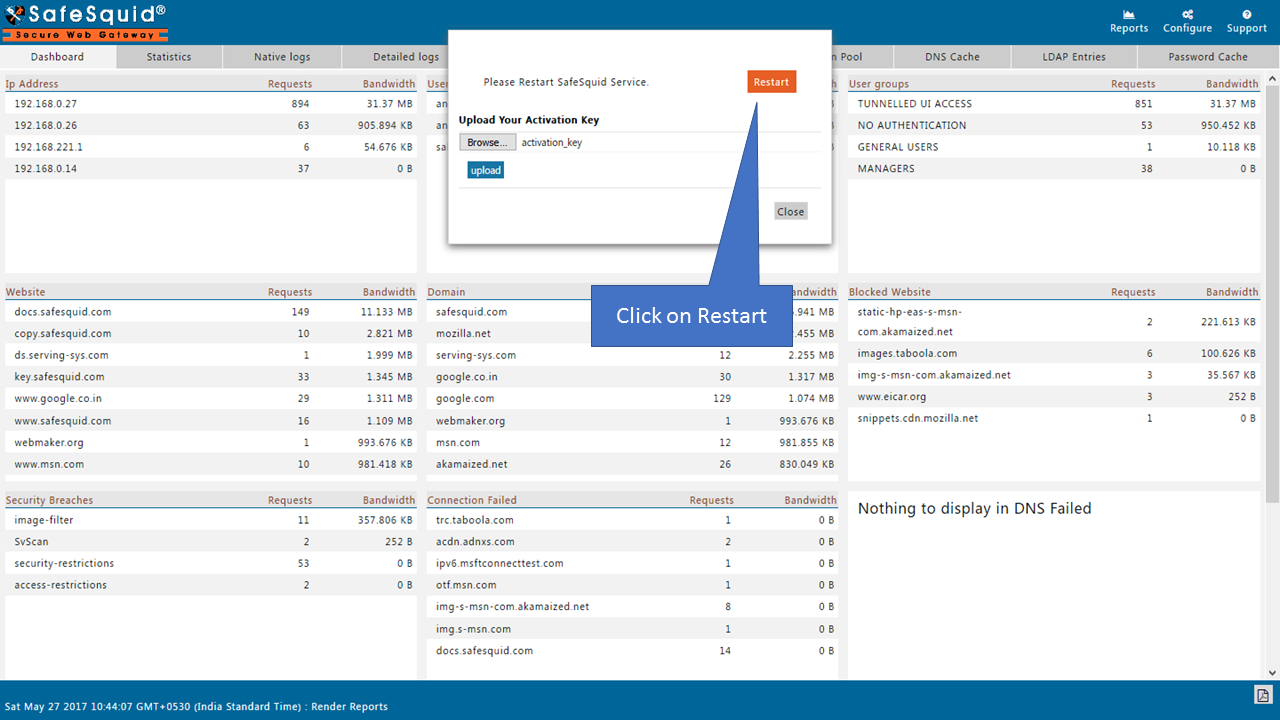 Apply changes and restart notice
 -
Verify activation. After the page reloads, go to Support in the menu.
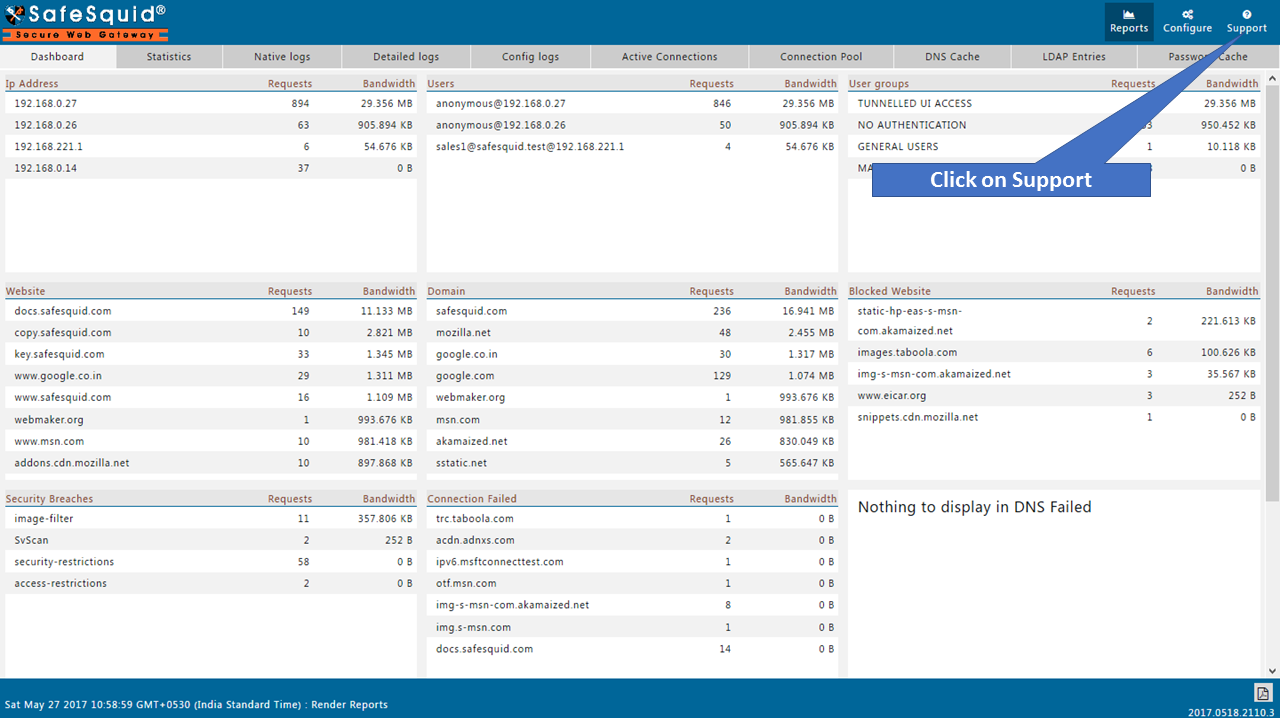 Support and diagnostics menu
 -
Confirm activation details. Ensure the Activation Details section shows your product type, expiry (if applicable), and subscription status.
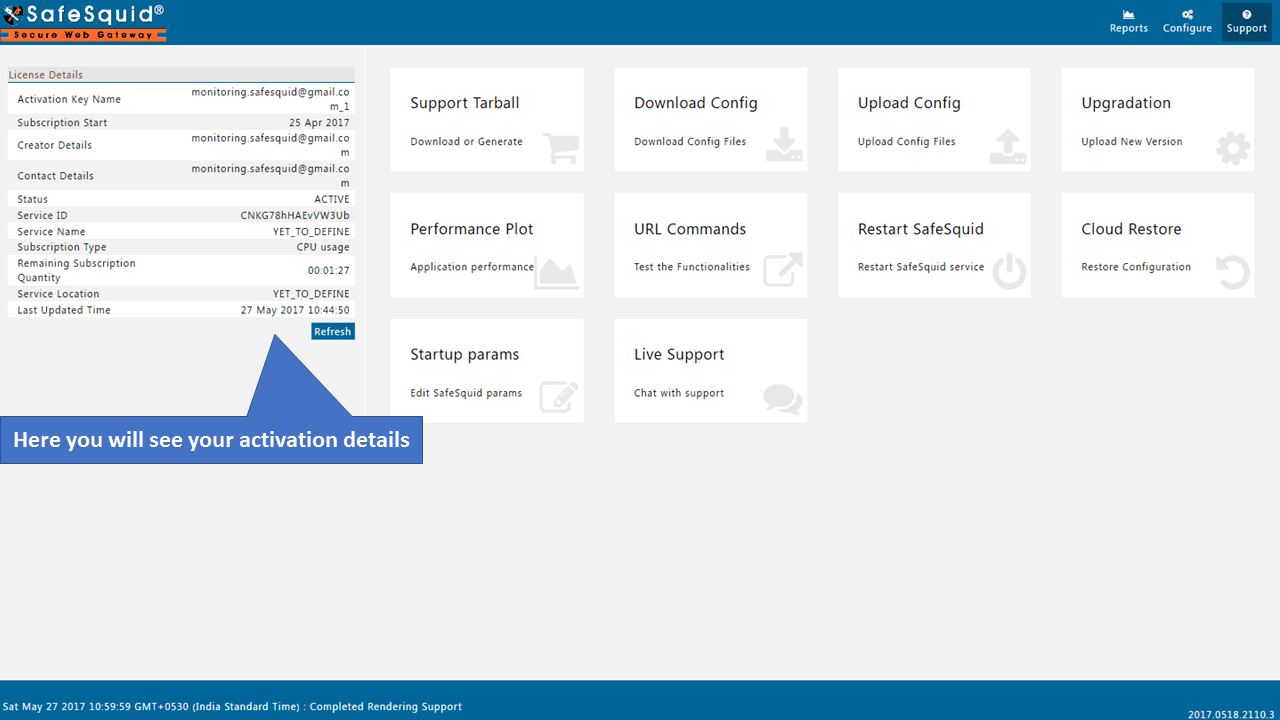 Subscription and activation status display
To synchronize SSL certificates and configuration across a proxy cluster, upload the same activation key on every SafeSquid instance.
After activation and restart, Support → Activation Details shows your product type, status, and expiry. Use this screen for compliance evidence that the gateway is correctly licensed.
Troubleshooting
- Key Not Detected
- Server Unreachable
- Service Not Restarted
- License Expired
- Wrong License Tier
Symptom: After uploading, the interface shows "Failed to set Subscription details."
Cause: The activation key file is missing or misnamed.
Fix:
-
Verify the key file exists:
ls -lrt /usr/local/safesquid/security/Look for a file named
activation_key. -
If missing, re-upload the key through the interface.
-
Restart SafeSquid:
/etc/init.d/safesquid stop/etc/init.d/safesquid start
Symptom: After uploading the key, the browser shows "proxy server refusing connections."
Cause: SafeSquid cannot reach the subscription server.
Fix:
-
Test connectivity:
ping swgupdates2.safesquid.netnslookup swgupdates2.safesquid.net -
If DNS or connectivity fails, check firewall rules against the endpoint tables above.
-
Restart after fixing:
/etc/init.d/safesquid start
Symptom: Subscription details remain empty after uploading the key, or the browser shows the proxy is refusing connections.
Cause: SafeSquid was not restarted after the key upload.
Fix:
-
If Monit is configured, it should restart SafeSquid automatically. Otherwise, restart manually:
/etc/init.d/safesquid stop/etc/init.d/safesquid start
Symptom: SafeSquid displays "subscription expired" banner in the interface.
Cause: Commercial subscription has expired. Free licenses do not expire.
What happens after expiration:
- Core proxy and filtering continues to work
- Security update frequency reduces to free-tier schedule:
- Anti-virus engine: weekly
- Web categorization: weekly
- SSL security updates: weekly
- Application/content signatures: monthly
- Commercial features (real-time threat intel, DR backup, email support) become unavailable
Solutions:
Option 1: Renew Subscription
- Visit key.safesquid.com and sign in
- Go to Manage Account → Renew Subscription
- After payment, download the updated activation key
- Upload the new key in SafeSquid interface (same steps as initial activation)
Option 2: Extend Conservation Period (3-day grace period)
If you need time before renewing:
- Visit key.safesquid.com and sign in
- Go to Manage Account
- Click Extend Conservation Period (adds 3 days to your subscription)
- The "expired" banner will disappear during the conservation period
- Restart SafeSquid from the web interface for changes to take effect

Extend Conservation Period button in the Self-Service Portal
The conservation period can be extended multiple times, each extension adding 3 days. However, this is a temporary measure — renew your subscription for continued commercial feature access.
Symptom: Activation succeeds but commercial features (URL categorization, threat intel) don't work.
Cause: Free license uploaded instead of commercial, or key expired.
Fix:
-
Check Activation Details in the SafeSquid interface:
- Product Type should show "Commercial" if you purchased a commercial license
- Expiry should be in the future
-
If showing Free or expired:
- Download the correct key from the Self-Service Portal
- Re-upload following the steps above
-
Contact support if you purchased commercial but still see Free tier.
Next steps
- Connect Your Client - configure at least one browser or client to use the proxy.
- Verify Your Setup - run smoke tests to confirm the proxy is receiving traffic.