Keep all proxy nodes in sync with master configuration
Without configuration synchronization, each proxy node must be updated manually. Inconsistencies cause policy gaps, vulnerabilities, and extra maintenance. SafeSquid configuration sync propagates policy and settings from the master to slave nodes so all nodes stay uniform and administrative overhead is reduced.
What gets synced
Synchronized from master to slaves:
- Access policies (Access Restriction, Content Security, etc.)
- User groups and identity rules
- SSL Inspection settings
- Application signatures and web categories
- Extended policies (DLP, Anti-Virus, etc.)
NOT synchronized (local to each node):
- Network interface settings (IP, ports)
- System logs (each node logs independently)
- Performance counters
- Startup parameters (including master IP/port on slave)
How sync works
- Trigger: Sync occurs automatically when you make configuration changes on the master and apply them
- Frequency: Near real-time (within ~1-5 minutes after applying changes on master)
- Mechanism: Slaves poll master at regular intervals for configuration updates
- Restart required: Some changes (e.g., startup params, network settings) require slave restart to apply
Prerequisites
- Master and slave instances already connected (see Master-Slave setup)
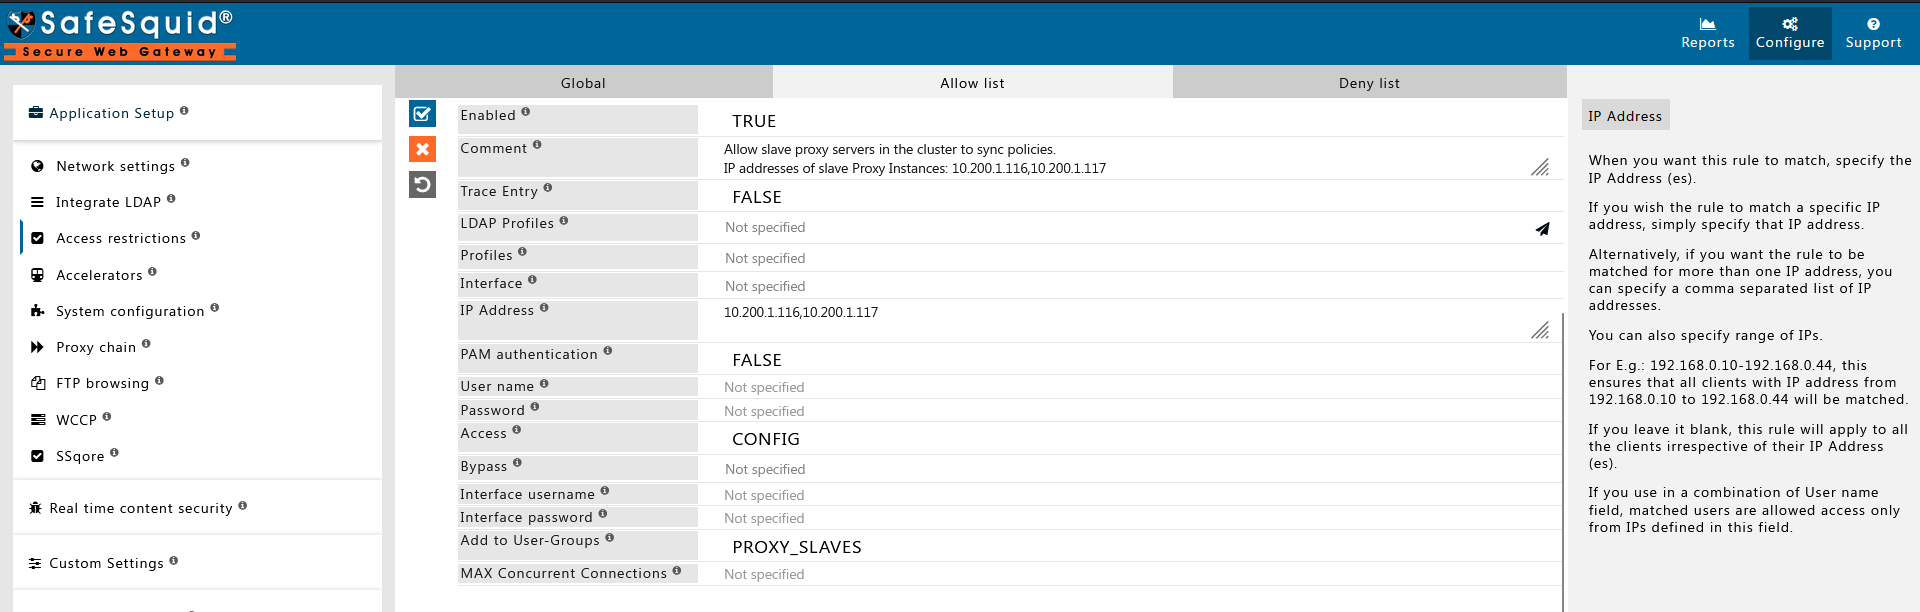
- If authentication is enabled on master, slave IP must be in Access Restriction → Allow list
Important: If proxy authentication is required for all network traffic, create an allow-list policy on the master for the slave proxy IP. Otherwise the slave cannot reach the master Configuration Portal to sync policies.
Below is an example of creating a user group for the slave proxy instance:
Configure sync on slave server
Perform these steps on each slave server to enable configuration sync from the master.
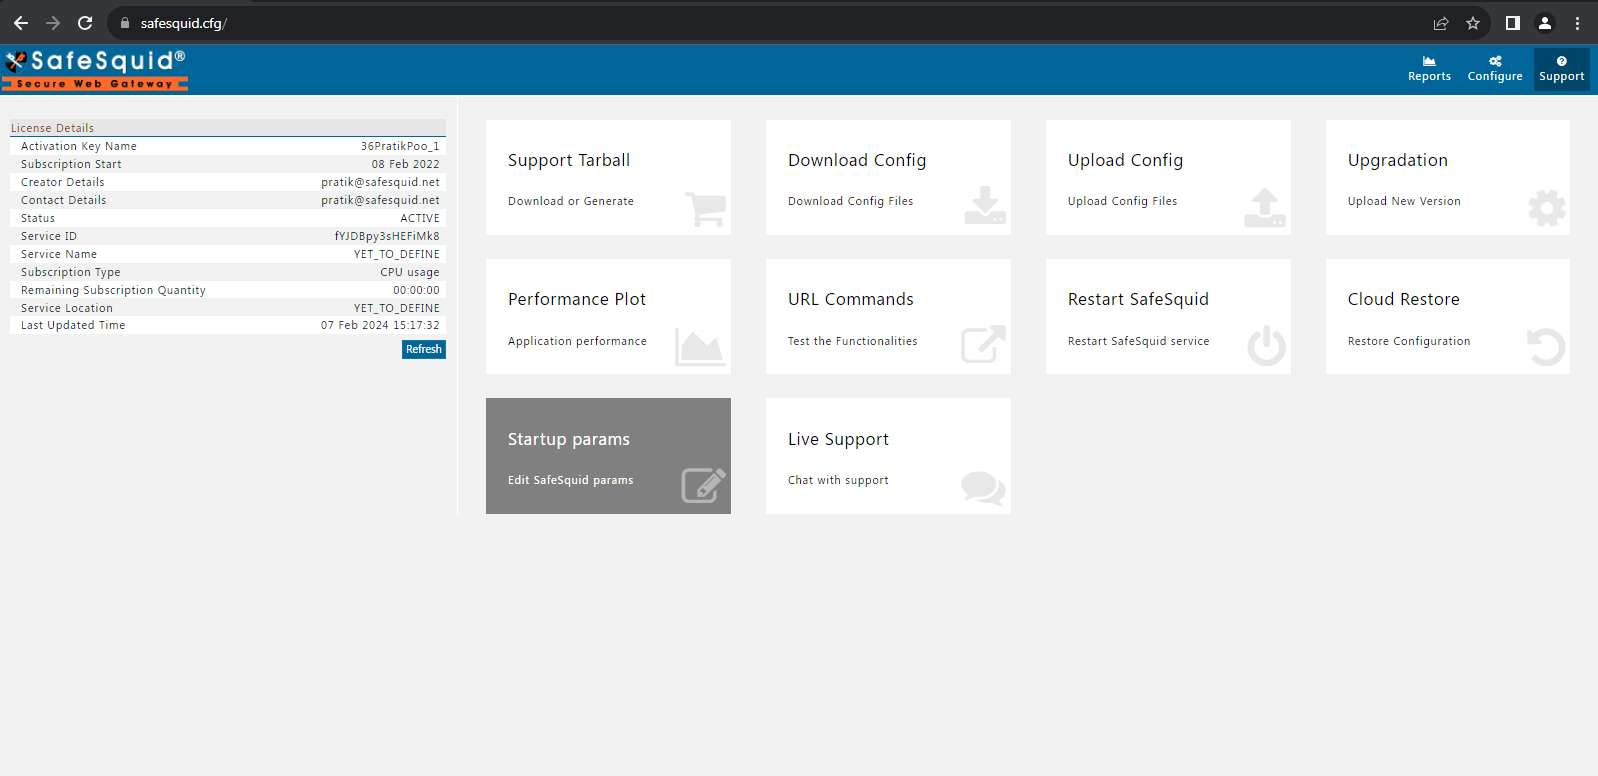
Access the web interface and go to Support

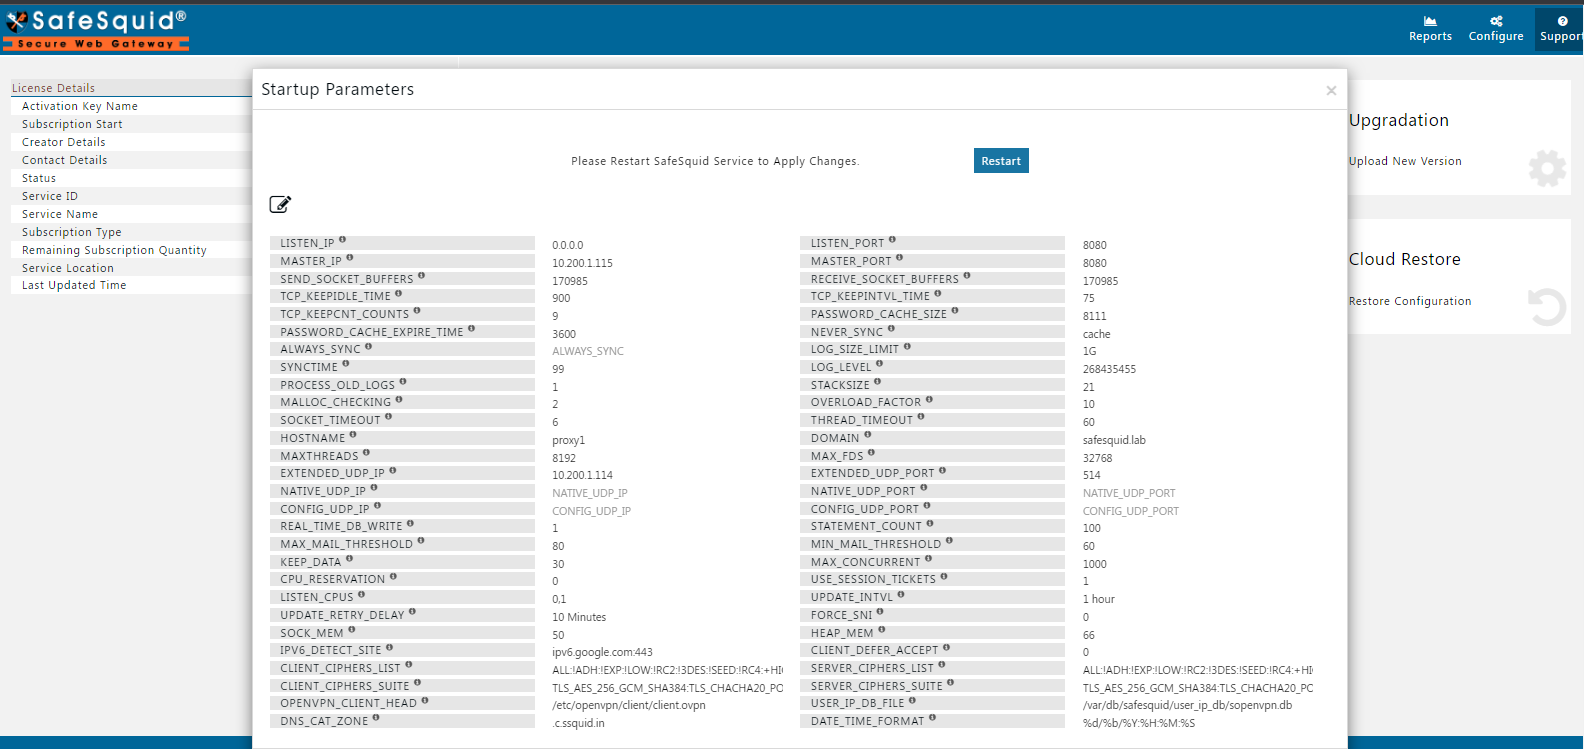
Select Startup Params
Click on the edit button.
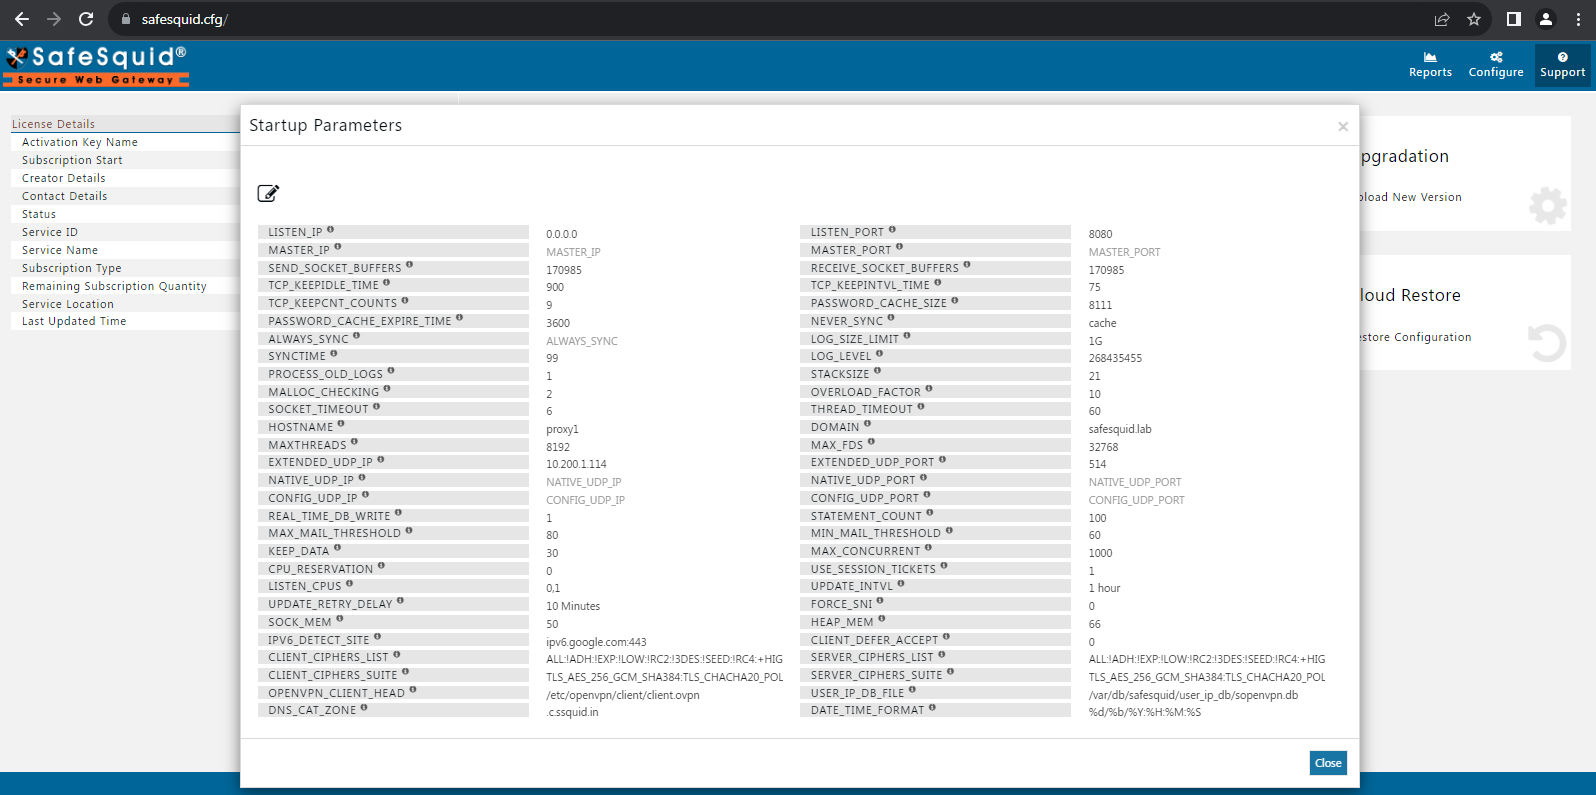
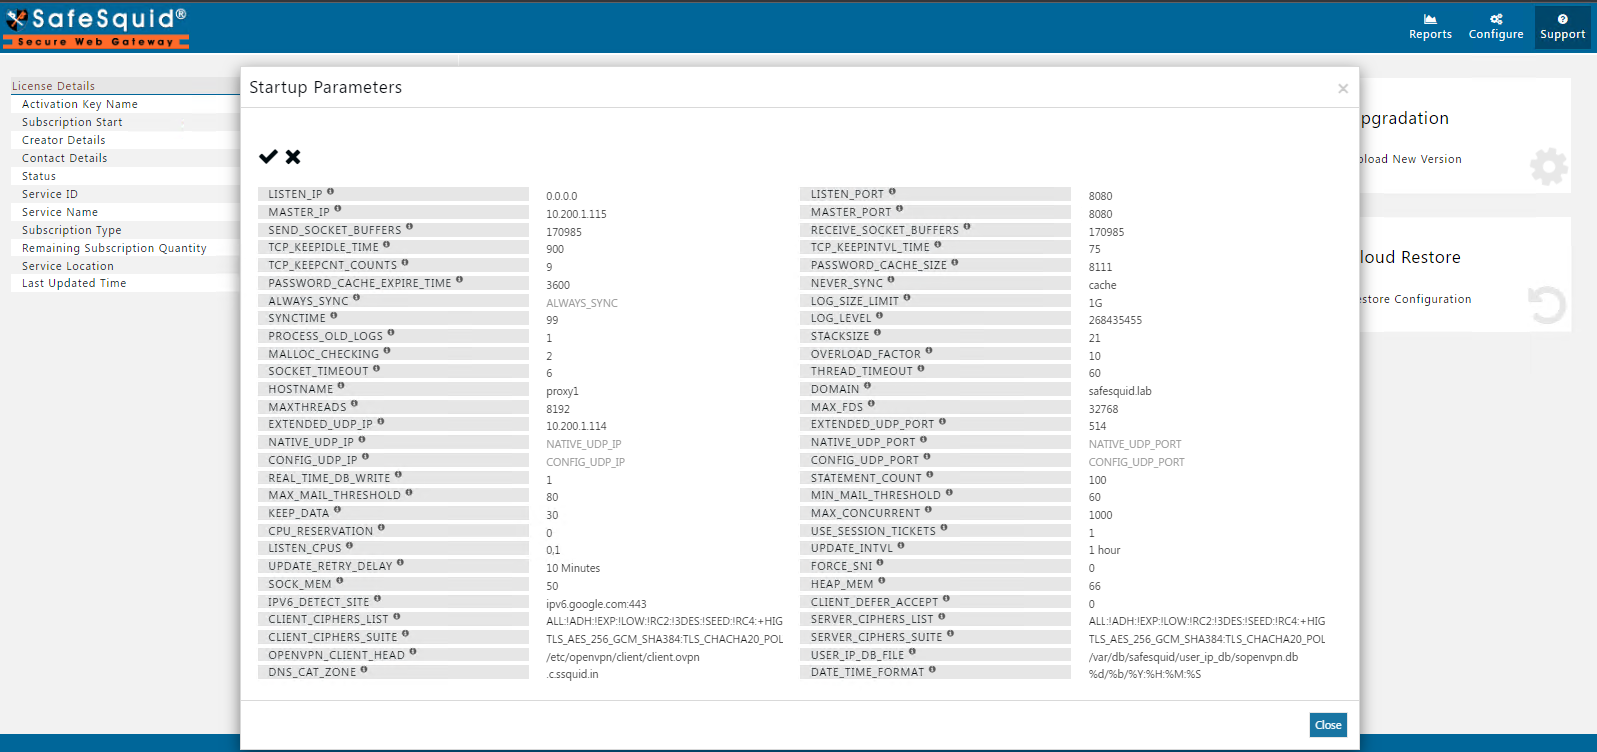
Add the master proxy server IP address

Add the master proxy server port number

Now click on the correct icon to save the configuration.
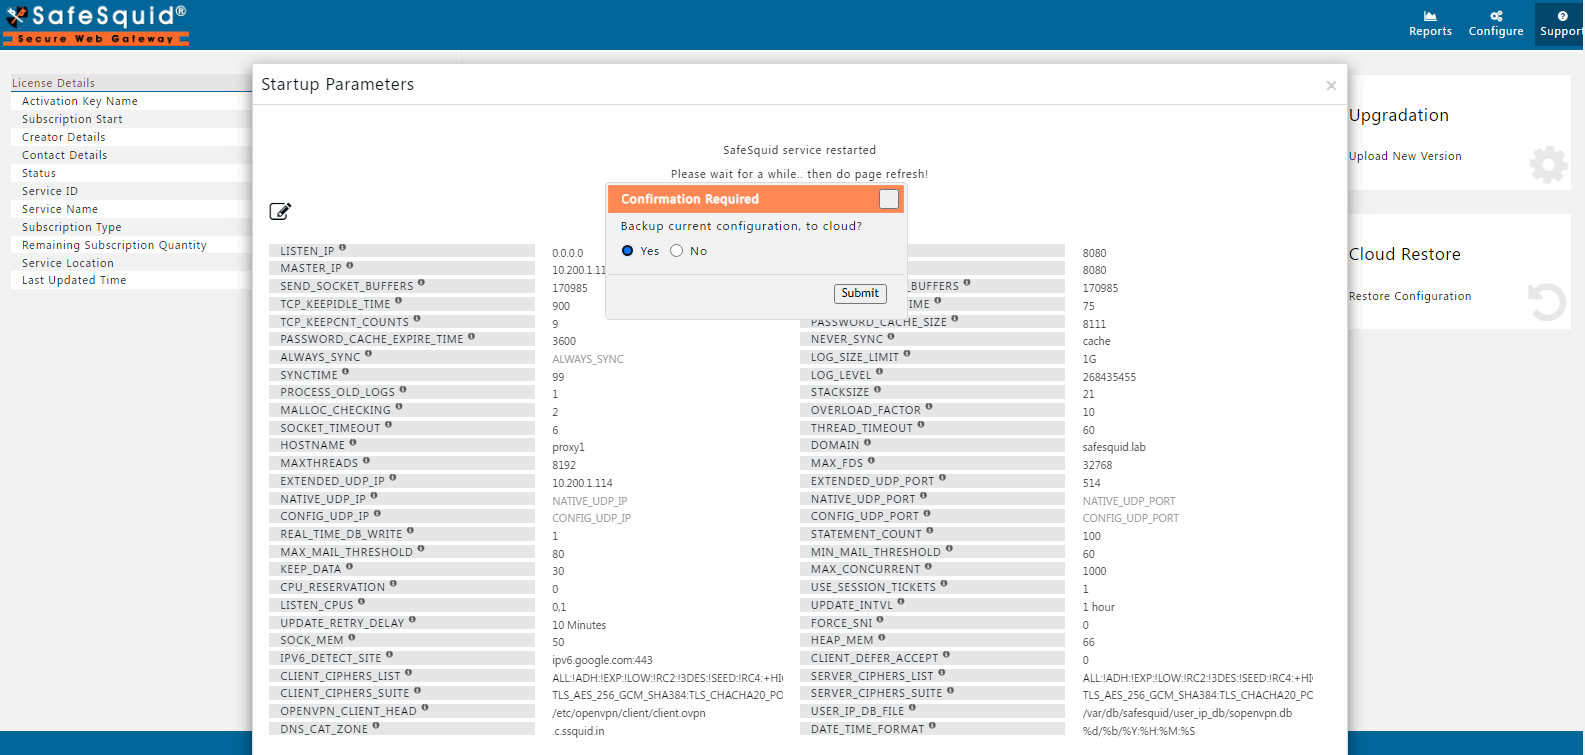
Now click on restart for applying changes.
Click Yes to back up SafeSquid configuration to the cloud, or No to skip cloud backup.
Click Submit after selecting the appropriate option.
After restart, the slave begins syncing configuration from the master. Policy changes made on the master will propagate to this slave automatically.
Verify sync is working
- Make a test policy change on the master (e.g., add a test user group)
- Apply the change: Configuration Portal → Support → Restart SafeSquid (on master)
- Wait 1-5 minutes
- Open Configuration Portal on the slave
- Verify the test policy appears on the slave
Expected result: Changes made on master appear on slave within a few minutes without manual intervention.
Troubleshooting
Policies not syncing to slave:
- Verify slave Startup params show correct master IP and port: Configuration Portal → Support → Startup Params
- Check network connectivity from slave to master:
telnet <master-ip> 8888 - If authentication enabled, verify slave IP in master Access Restriction → Allow list
- Restart slave: Configuration Portal → Support → Restart SafeSquid
Sync is slow (>10 minutes):
- Check network latency between master and slave:
ping <master-ip> - Verify master is not overloaded (CPU/memory usage)
- Check slave logs for sync errors:
tail -f /var/log/safesquid/extended.log
Changes sync but don't apply:
- Restart slave to apply configuration changes: Configuration Portal → Support → Restart SafeSquid
- Some changes (network settings, startup params) require manual restart
Related: Master-Slave setup, Configuration Portal, Troubleshooting