Access Restriction
Overview
Use Access Restriction to Allow/Deny access to SafeSquid's service for specific user/user groups. Allows you to specify the Access rights for various users and to profile the users into user groups for being uniquely processed in other sections.
In SafeSquid versions that support Windows Integrated Authentication, the Global Section allows you to explicitly Enable or Disable NTLM authentication. By setting this to "Disabled", you can explicitly switch off the support for Windows Integrated Authentication. If this option is enabled, SafeSquid offers authentication headers that encourage the client's browser to use Negotiate, NTLM or Basic Authentication, depending upon the browser's capabilities and the user's system configuration.
Prerequisites
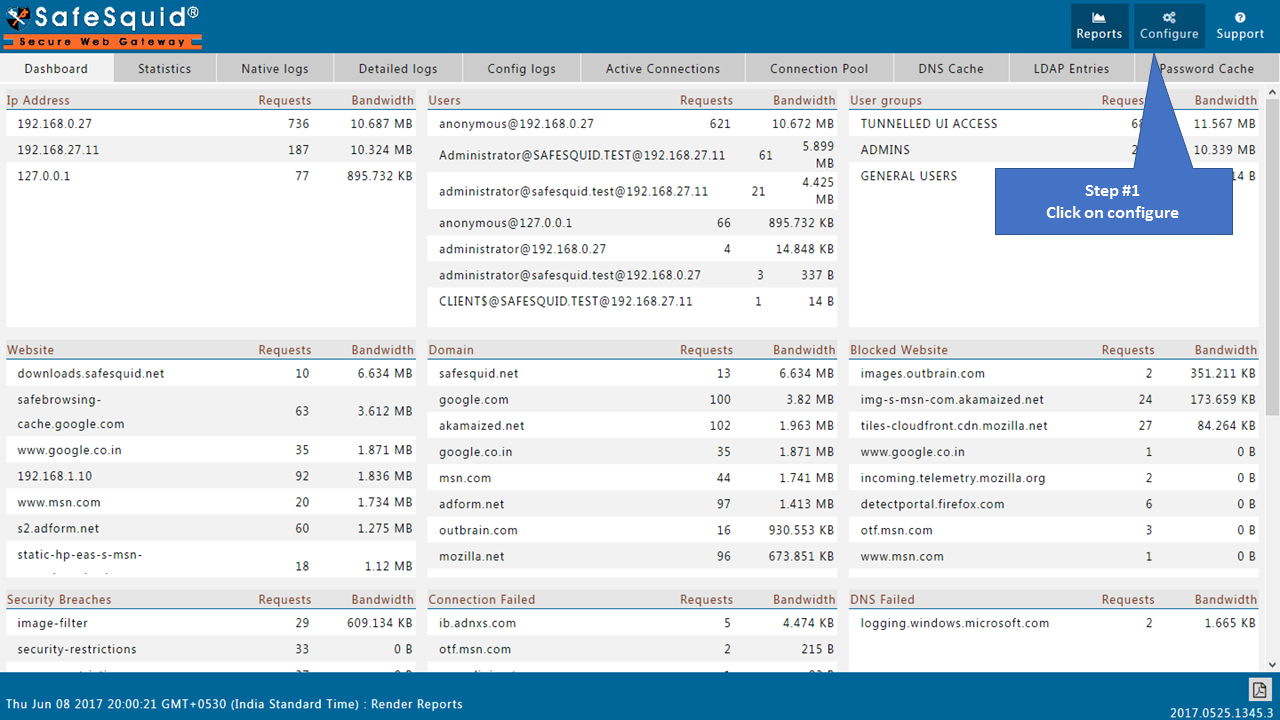
Access SafeSquid interface
Go to Configure Page
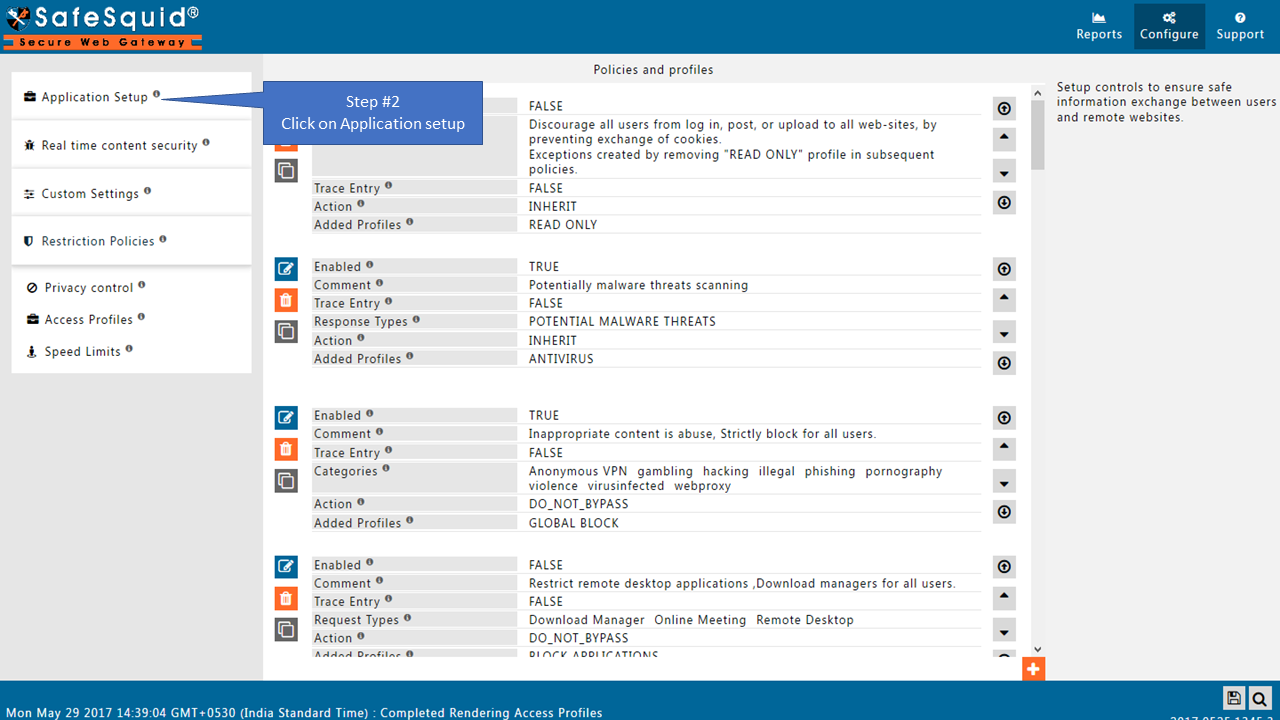
Go to Application Setup
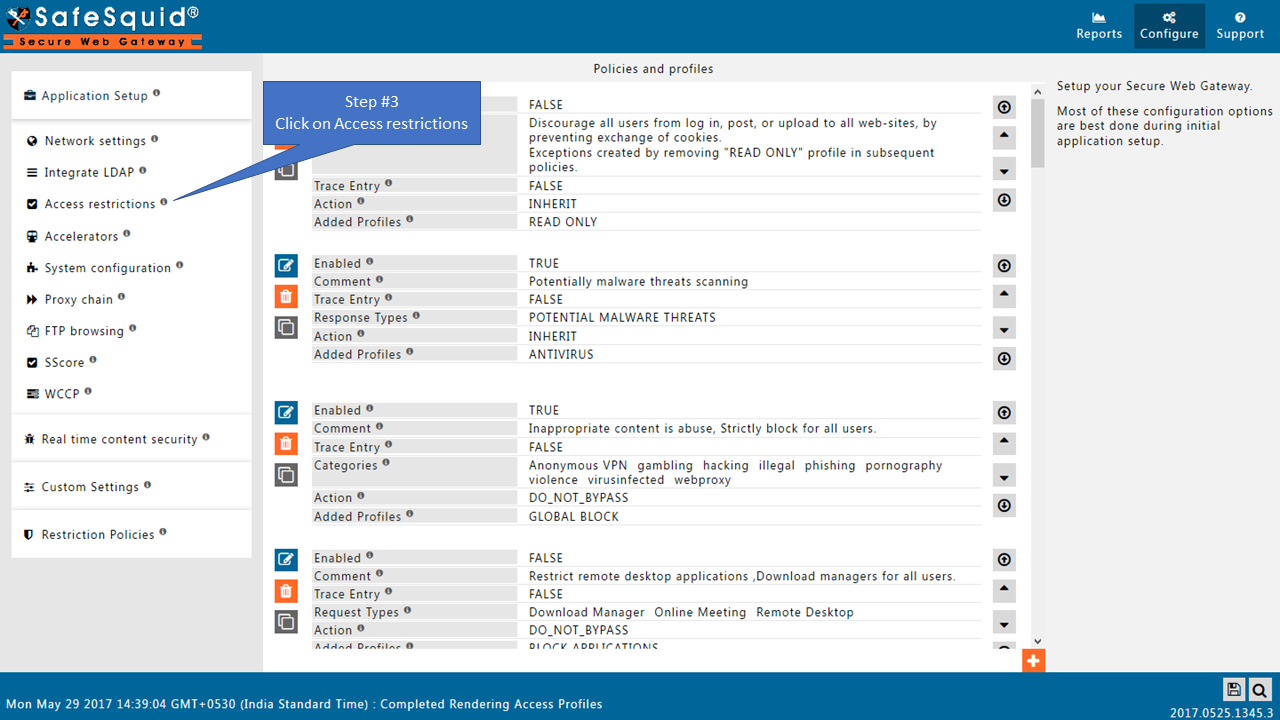
Go to Access Restrictions
Global
Default Access Policy
You can set your Default Access Policy to either Allow or Deny. When you set your Default Access Policy as allow, all requests are allowed. Those that match an entry in the Deny Sub-Section are not allowed.
Conversely, if you set the Default Access Policy set to deny, all requests are blocked. Those that match an entry in the Allow Sub-Section are not allowed.
If you set the default policy to Deny, you must create entries in the Allow sub-section. You do this to specify which users should be allowed access.
Conversely, if you set the default policy to Allow, you must create entries in the Deny List Sub-Section. This is to specify which users should be denied access.
ALLOW: When Policy is set to Allow, a request is allowed access, when no matching entry is found.
DENY: When Policy is set to Deny, a request is denied access, if no matching entry is found.
SSO
Enable or Disable SSO Authentication.
TRUE: Select this if you want to use NTLM Authentication.
FALSE: Select this if you DO NOT want to use NTLM Authentication.
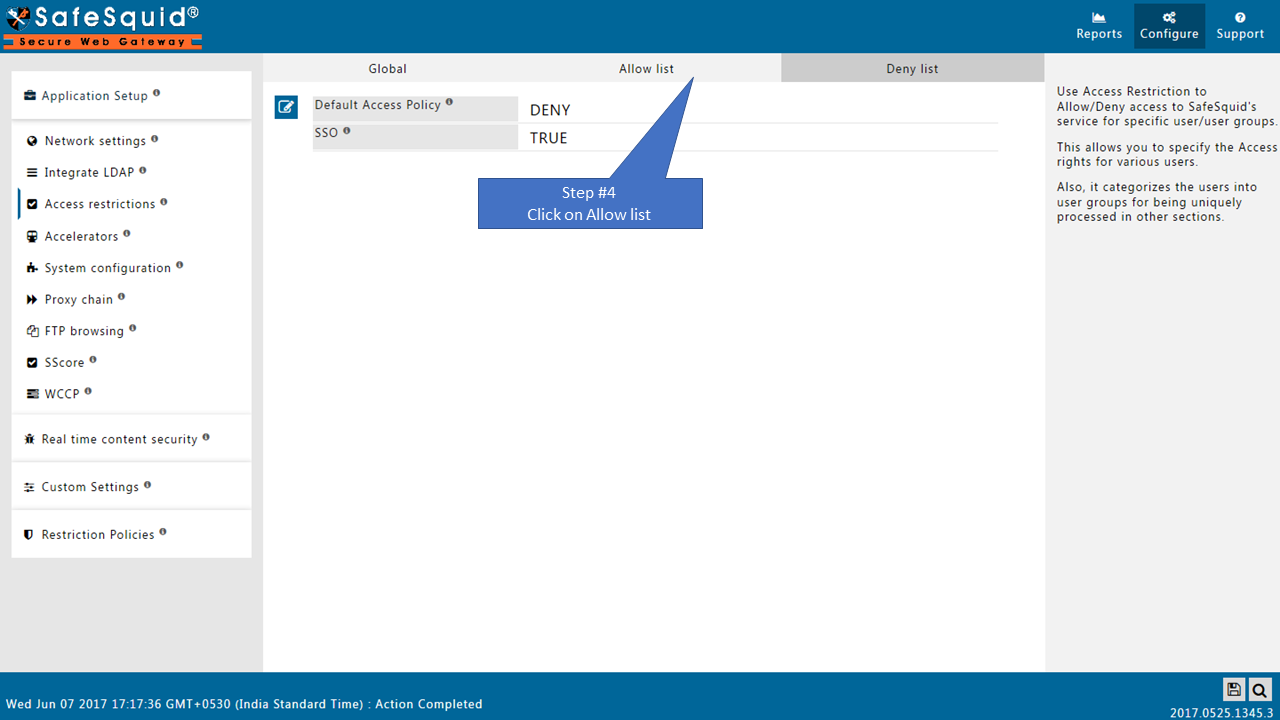
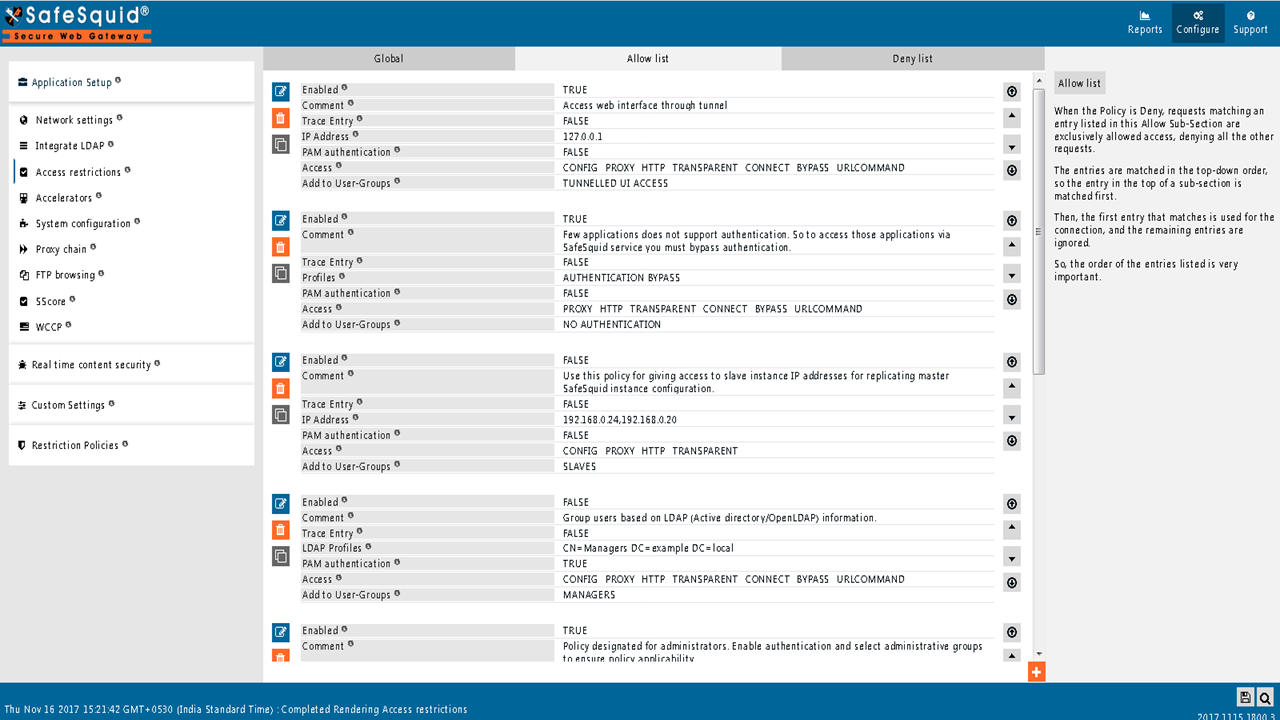
Allow list
When the Policy is Deny, requests matching an entry listed in this Allow SubSection are exclusively allowed access, denying all the other requests.
The entries are matched in the top-down order, so the entry at the top of a sub-section is matched first.
The first entry that matches is used for the connection, and the remaining entries are ignored. So the order of the entries listed is very important.
Your Default Access Policies are as follows:
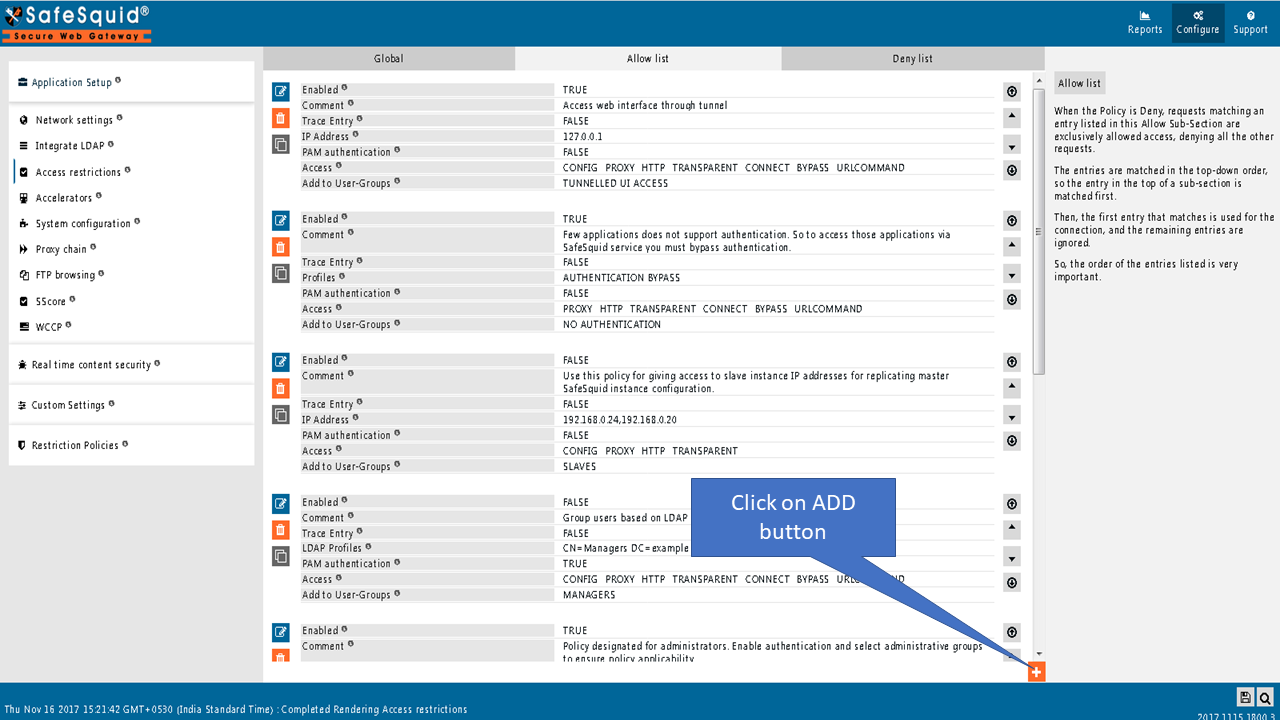
Create new policy
Enabled
Enable or Disable this entry
TRUE: Enable this entry.
FALSE: Disable this entry.
Comment
For documentation and future references, explain the relevance of this entry with your policies.
That is, by reading the policies, a future user can understand the purpose of that entry.
Trace Entry
Enable or Disable Tracing of this entry
Select "Yes" to debug the application of entry using SafeSquid logs.
Enable entry tracing, is useful if you wish to validate, its application.
TRUE: Select this if you want to enable profile tracing.
FALSE: Select this to disable profile tracing.
LDAP Profiles
To apply this rule, specify the LDAP users/groups/OUs.
This can be done only when your LDAP Server is integrated with Safesquid.
To integrate your LDAP Server with safesquid, use the Integrate LDAP section.
Example: Refer below link to configure the LDAP section.
Read more about Enable authentication for LDAP users.
Profiles
Specify the Profiles applicable for this entry.
This entry will be applicable only if the connection has any one of the specified profiles.
Leave it Blank, to apply for all connections irrespective of any applied profile.
To avoid application to a connection that has a profile, use a negated profile (!profile).
Interface
When SafeSquid is listening on multiple interfaces, specify here the interface (IP: PORT) that you want this entry to apply to.
Leaving it blank implies to all interfaces (leave it blank if SafeSquid is listening on only one interface).
This can be used to: Allow access to the Web interface (http://safesquid.cfg), only on a specific interface (IP: PORT), to enhance security.
Allow authenticated access on one interface, and unauthenticated access to specific websites on another.
Make proxy.pac file at http://safesquid.cfg/template/proxy.pac is available for auto proxy script and auto proxy detection on another interface when only authenticated access is allowed on the primary interface.
IP Address
Specify the IP Address(es) you want this rule to match.
If you wish the rule to match a specific IP address, simply specify that IP address.
Alternatively, you can specify a comma-separated list of IP addresses, if you want the rule to be matched for more than one IP address.
You can also specify the range of IPs.
Example: 192.168.0.10-192.168.0.44
This will ensure all clients with IP addresses from 192.168.0.10 to 192.168.0.44 will be matched.
If left blank, this rule will be applied to all the clients irrespective of their IP Address(es).
When used in combination with the User name field, matching users are allowed access only from IPs defined in this field.
PAM authentication
Enables authentication for users.
Users will be prompted for a username/password by their browser and required to enter a proper username/password.
TRUE: Enable PAM authentication.
FALSE: Disable PAM authentication.
Example:
Refer below link for how to configure PAM.
Read more about Enable SSO authentication for LDAP users.
User name
This field needs to be filled, only if you would want the user(s) to be authenticated, depending on the following conditions:
- With No Authentication selected, fill in the user name with which you would like the user to authenticate. You also have to fill in the Password field for this user. The user is allowed to access, with the specified User name and Password.
- With Pam Authentication selected, fill in the existing user name(s) on the server configured for PAM, and leave the Password field blank.
Only users specified in this field are allowed authenticated access.
You can specify multiple user names, separated with pipe, e.g. ^(john|abraham|mary|laurent)$.
Leaving this field blank allows authenticated access to all the users on the authenticating server.
Password
This field needs to be filled in, you have filled in the User name field.
This is the password for the user defined in the User name field.
A user is allowed access, if he/she meets the authentication challenge, by responding with the entry in the User name field, and this password.
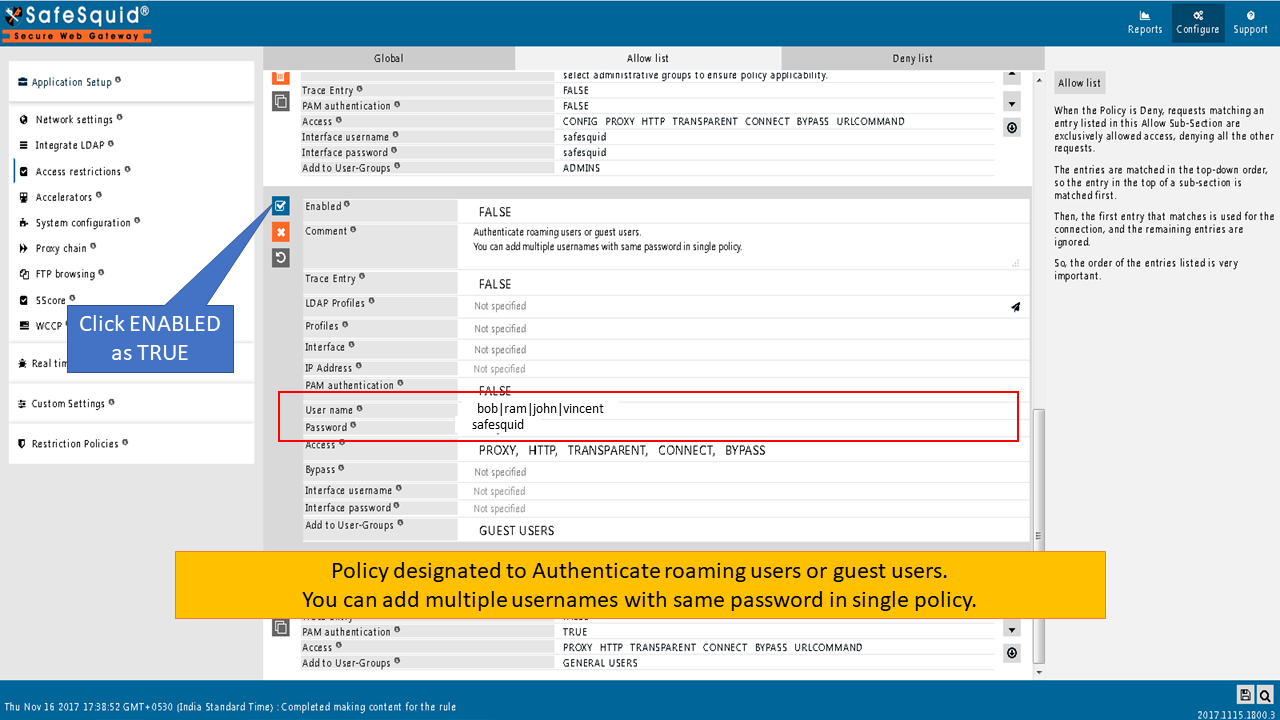
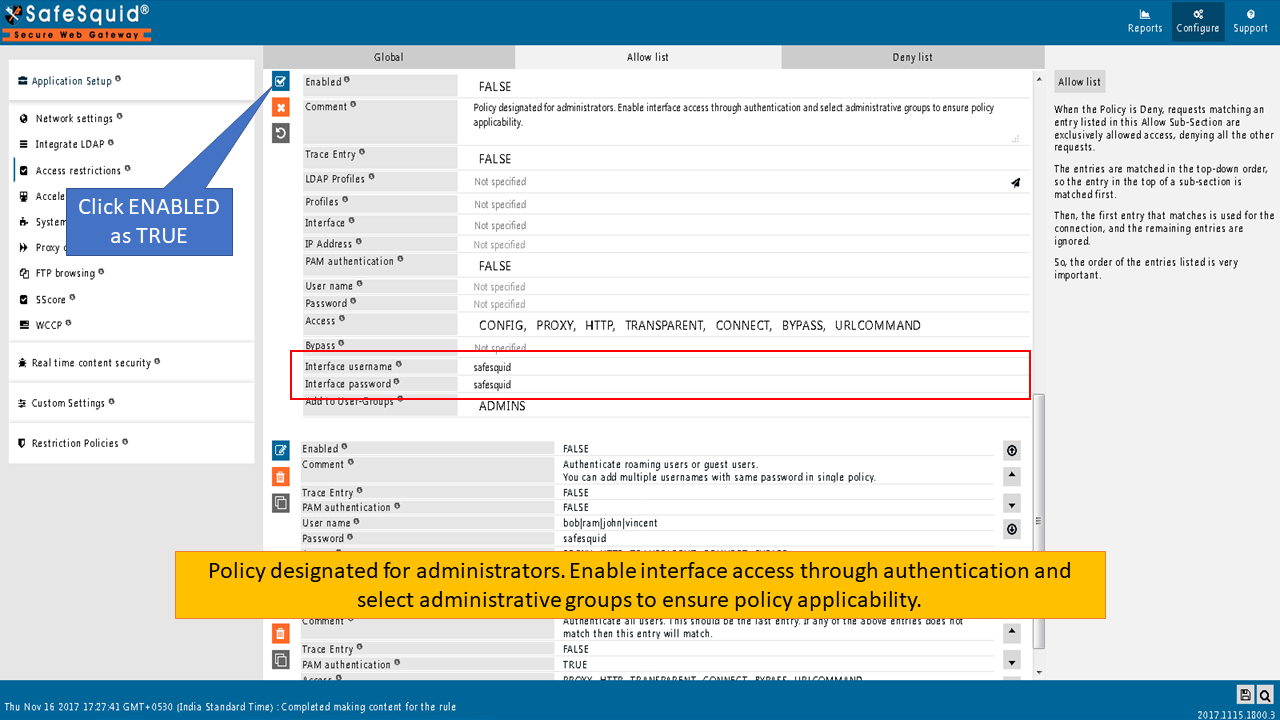
If you want authentication for roaming users or guest users, we have a default policy under the Access Restriction Section on the SafeSauid Interface.
You have to just ENABLE the policy as TRUE as shown below.
Access
Specify the features that connections matching this entry are allowed to access.
Web interface: Selecting this option will allow the user to access the SafeSquid Web GUI (http://safesquid.cfg).
If this option is deselected, the user will be sent an access denied template, when he/she tries to access the web GUI.
Access to http://safesquid.cfg/template/(templatename) is always allowed regardless of selecting/deselecting this option.
Proxy requests: Selecting this option will allow the user to make regular proxy requests.
HTTP requests: Selecting this option will allow the user to make regular HTTP requests to proxy (for Web interface and redirected requests)
Transparent proxying: Selecting this option will allow the user to make transparent proxy requests (must be allowed to make HTTP requests as well).
CONNECT requests: Selecting this option will allow the user to make CONNECT requests for secure connections like HTTPS requests, or use of Internet Applications like FTP or SSH Clients.
Allow bypassing: Selecting this option will allow the user to use the URL Command xx--bypass to bypass filtering rules.
This feature can be used to diagnose filtering reasons and hence should be selected only for proxy administrators, and not for other users.
The URL Commands option below should also be selected, to allow this option.
URL commands: Selecting this option will allow the user to use URL Commands (except bypass, which needs to be allowed separately).
URL Commands allow you to test the functionalities and verify your configurations remotely, from the browser.
URL commands can be used to show information about a webpage and to bypass certain features.
Bypass
Specify the features which you can bypass for connections matching this entry. To match this entry, specify the features that you can bypass for connections.
Header filtering: Selecting this option will bypass the Header filtering section for the users to whom this policy will be applied.
URL redirecting: Selecting this option will bypass the URL redirecting section for the users to whom this policy will be applied.
Cookie filtering: Selecting this option will bypass the Cookie filtering section for the users to whom this policy will be applied.
Document rewriting: Selecting this option will bypass the Document rewriting section for the users to whom this policy will be applied.
External Applications: Selecting this option will bypass the External parsers section for the users to whom this policy will be applied.
Forwarding: Selecting this option will bypass the Request forwarding section for the users to whom this policy will be applied.
Keyword filtering: Selecting this option will bypass the Keyword filtering section for the users to whom this policy will be applied.
DNS blacklist: Selecting this option will bypass the DNS blacklist section for the users to whom this policy will be applied.
Limits: Selecting this option will bypass the Limits section for the users to whom this policy will be applied.
Antivirus: Selecting this option will bypass the virus scanning for the users to whom this policy will be applied.
ICAP: Selecting this option will bypass the ICAP section for the users to whom this policy will be applied.
DLP: Selecting this option will bypass the DLP module for the users to whom this policy will be applied.
Interface username
You can use this field, along with the Interface password, to allow authenticated access to the Web Interface (http://safesquid.cfg).
When you don't define users, this single entry allows access to everyone, globally.
A user is allowed access to the web interface of SafeSquid, only if he/she meets the authentication challenge, by responding with this User name field, and the corresponding Password.
Recommended: Create a second layer of security, for accessing the Web Interface by creating multiple proxy admin accounts, each possessing individual username and password for accessing the Web Interface.
Interface password
This field needs to be filled in, only if you have filled in the Interface username field above. This is the password for the user defined in the Interface username field.
A user is allowed access to the web interface of SafeSquid, if he/she meets the authentication challenge, by responding with this User name, and corresponding Password.
If you want interface access through authentication, we have a default policy under the Access Restriction Section on SafeSauid Interface. You have to just ENABLE the policy as TRUE as shown below.
Add to User-Groups
Group the users based on the similarities of their profiling going to be in the other sections.
If you wish the users defined in this entry can be grouped with any existing groups, simply add those user groups here.
If you wish to create a new user group for these users, give a new name to the new user group.
When defining a new User Group, use terms that uniquely describe the user group.
Example
Rule#1
I want to access the SafeSquid web interface using IP 127.0.0.1 as a backup in case of our AD failure. Access to the SafeSquid web interface via 127.0.0.1 should not have any user authentication.

Rule#2
I want a user from the local server used for user identification in SafeSquid. The username and password of the local user will authenticate users in SafeSquid. This can be used for user identification and management in situations where Active Directory is not used. Access to the SafeSquid web interface is provided for local users.

Rule#3
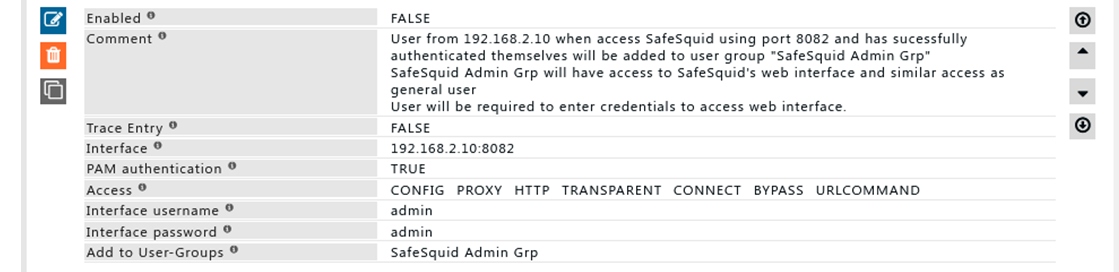
I want users who access SafeSquid using IP: PORT 192.168.2.10:8082 to have access to the SafeSquid web interface. Users from 192.168.2.160:8082 are required to authenticate themselves. Users who are successfully authenticated are added to the user group "SafeSquid Admin Grp" As an extra layer of security, the SafeSquid interface will prompt for authentication. By successfully providing username and password users can access SafeSquid's web interface.
Rule#4
I want all users in OU= Diamonds to be considered as part of the Manager team. All the users in OU=" Diamonds" when successfully authenticated will be added to the user group "MANGER TEAM". The User group MANAGER TEAM has a similar set of permissions compared to general users. OU is ideally used when the grouping of users and already managed in AD itself.

Rule#5
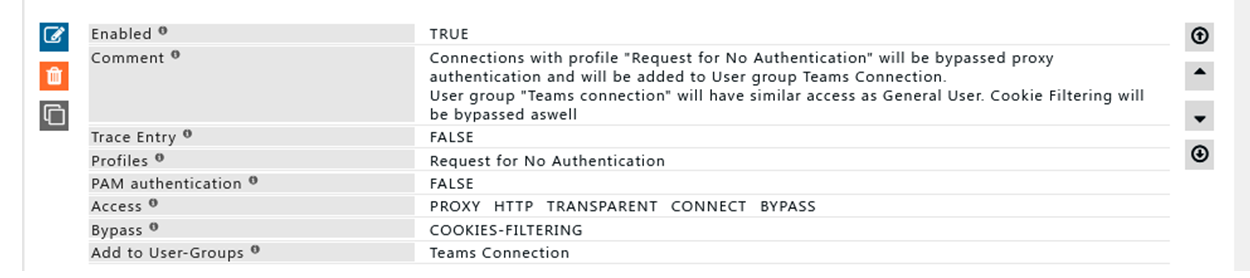
Connection with profile "Request for No Authentication" will bypass authentication and will be added to user group "Teams Connection" Connection with user group "Team Connection" will have similar access as General User. Cookie filtering will be bypassed using the bypass profile: Bypass Cookie Filtering feature.
Using a profile to bypass proxy authentication can be useful where the application is unable to perform authentications a great example would be Microsoft Teams Desktop Application.
Rule#6
We want all users who have successfully authenticated themselves to be added to a user group "General Users". User group: "General User" will not have access to SafeSquid's web interface User Group: General Users is usually created at last of the all entries because users who are not considered into different user groups are part of the user group "General Users"

Rule#7
Users who are not in any of the user's groups and have failed to authenticate themselves are added to the user group "NO Auth Users" Users from the user group "No Auth Users" will neither they will have access to SafeSquid's web interface nor they can surf the internet.

Deny list
When the Default Access Policy is set to Allow, only requests matching an entry listed in this Deny SubSection are exclusively denied access, allowing all the other requests.
The entries are matched in the top-down order, so the entry at the top of a sub-section is matched first, and the first entry that matches is used for the connection, and the remaining entries are ignored.
So, the order of the entries listed is very important.
All options in the deny list will work the same as the Allow list.