Difference between revisions of "Testing your Kerberos SSO authentication setup"
en>Santosh.thorat |
m (1 revision imported: Importing all pages) |
(No difference)
| |
Latest revision as of 15:36, 24 July 2021
Configure Authentication in SafeSquid’s Access Restrictions
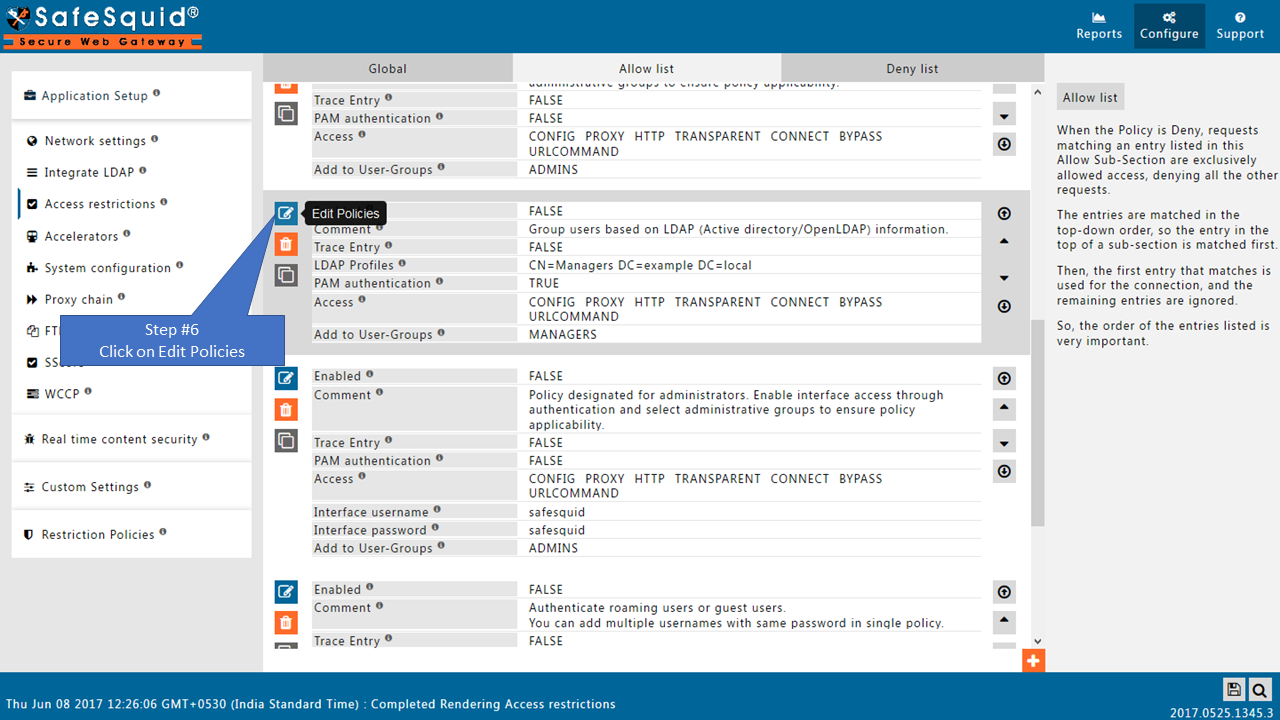
SafeSquid’s WebGUI is used to create/modify policy configuration. We can access the WebGUI from any authorized system, depending on Access Restrictions configuration section (by default ALL are allowed). To ensure that we do not get locked up, we will in the following steps configure the Access Restrictions section of SafeSquid to enable the SSO authentication, and then to enable authentication for only our Test Client windows7.safesquid.test (My client machine). You may choose AD browser for testing purpose.
My Test Client machine : windows7.safesquid.test (Connect in your domain and should able to resolve. Verify time synchronization)
We already done Preparatory Steps (Verify it once before setting proxy)
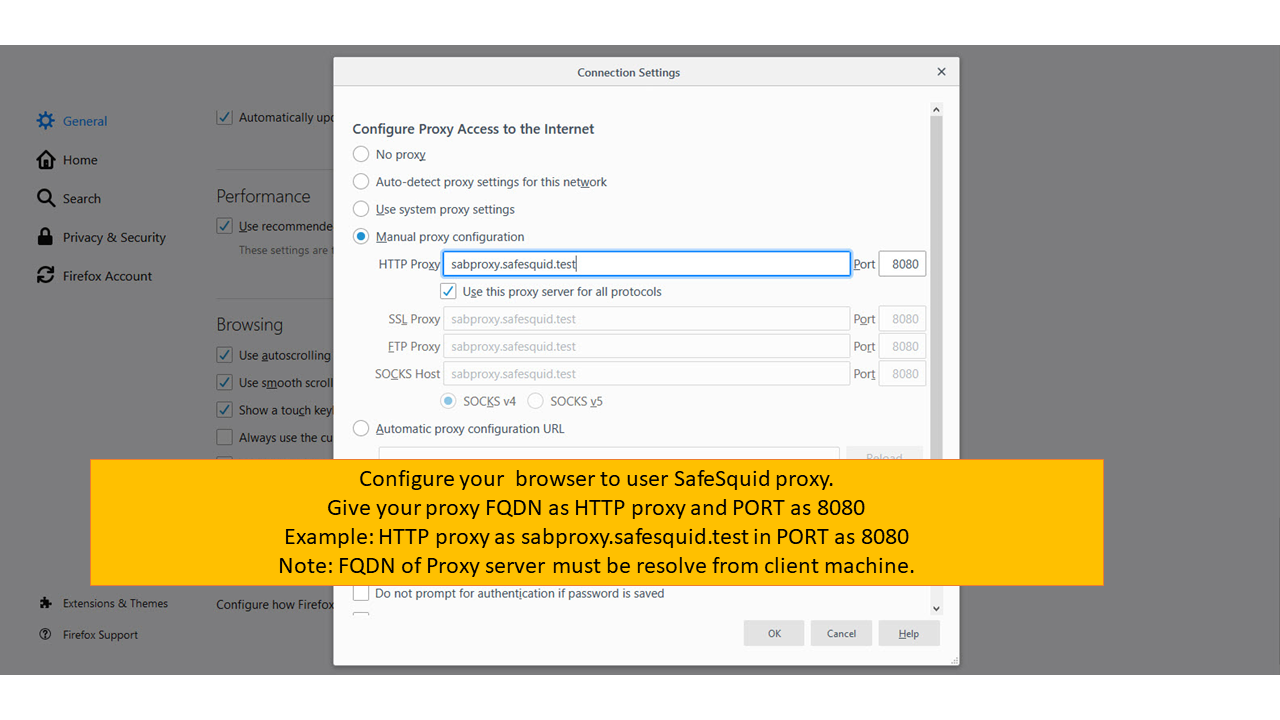
- Configure your Internet browser to use sabproxy.safesquid.test : <port_usually_8080> as your proxy server.
Note: You should NOT be using the <IP address> : <port> format now. Always use FQDN of Proxy Server
 |
Access the SafeSquid User Interface
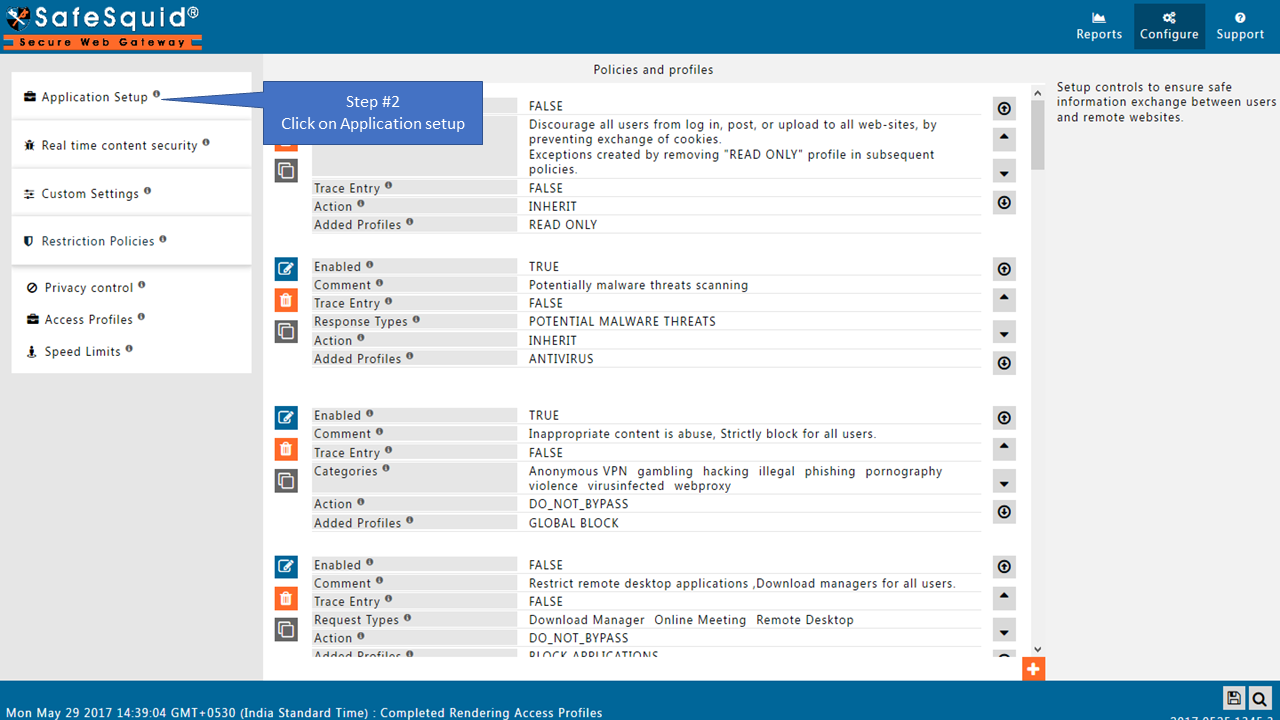
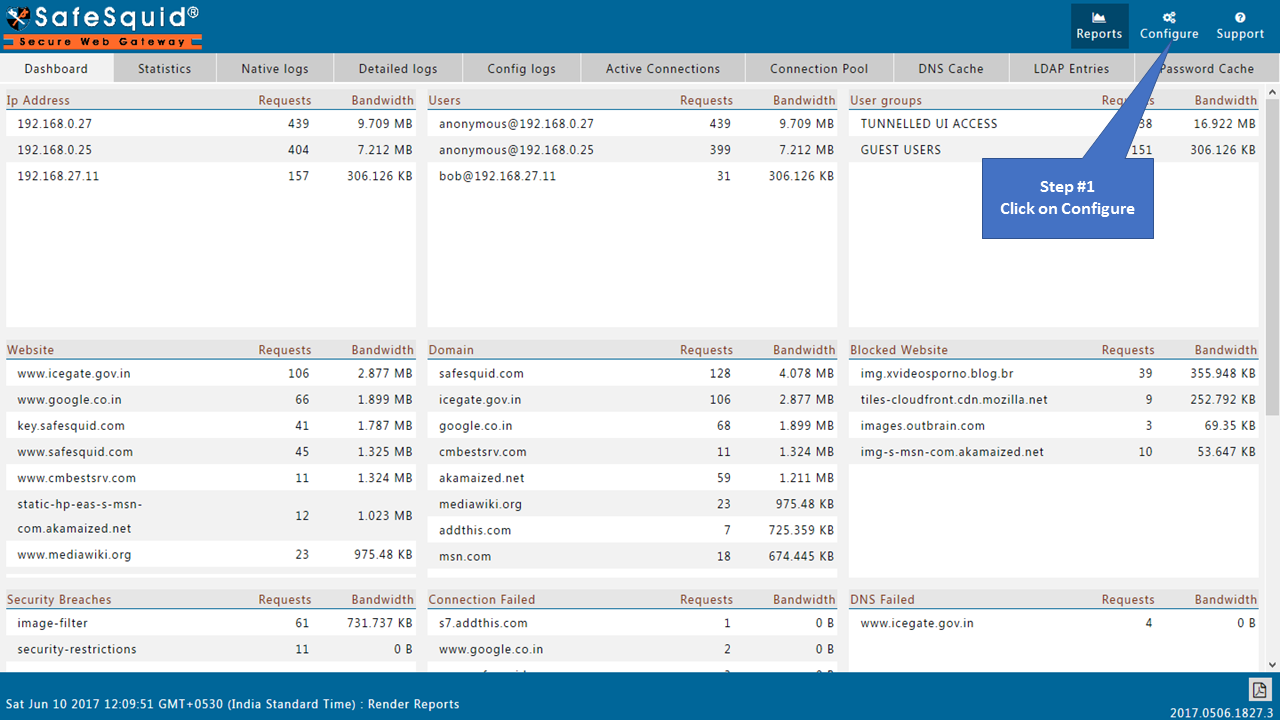
Go to Configure Page
|
|
Go to Application Setup
|
|
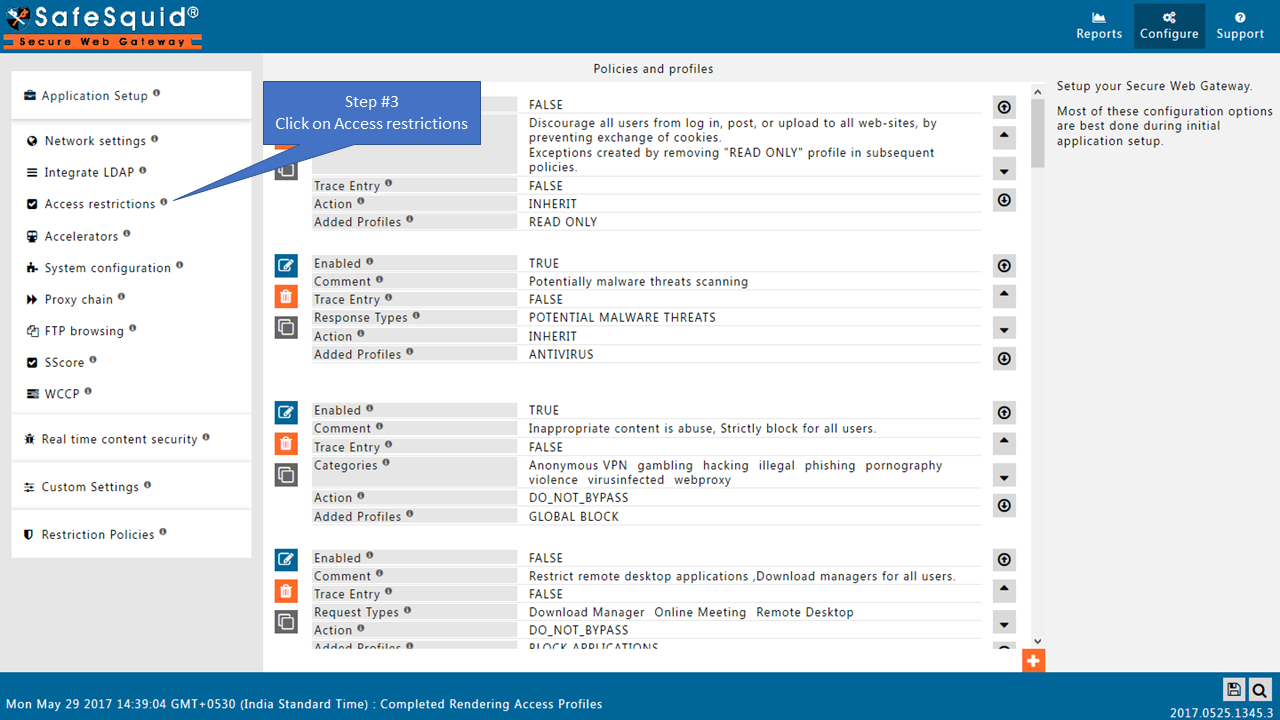
Go to Access Restrictions
|
|
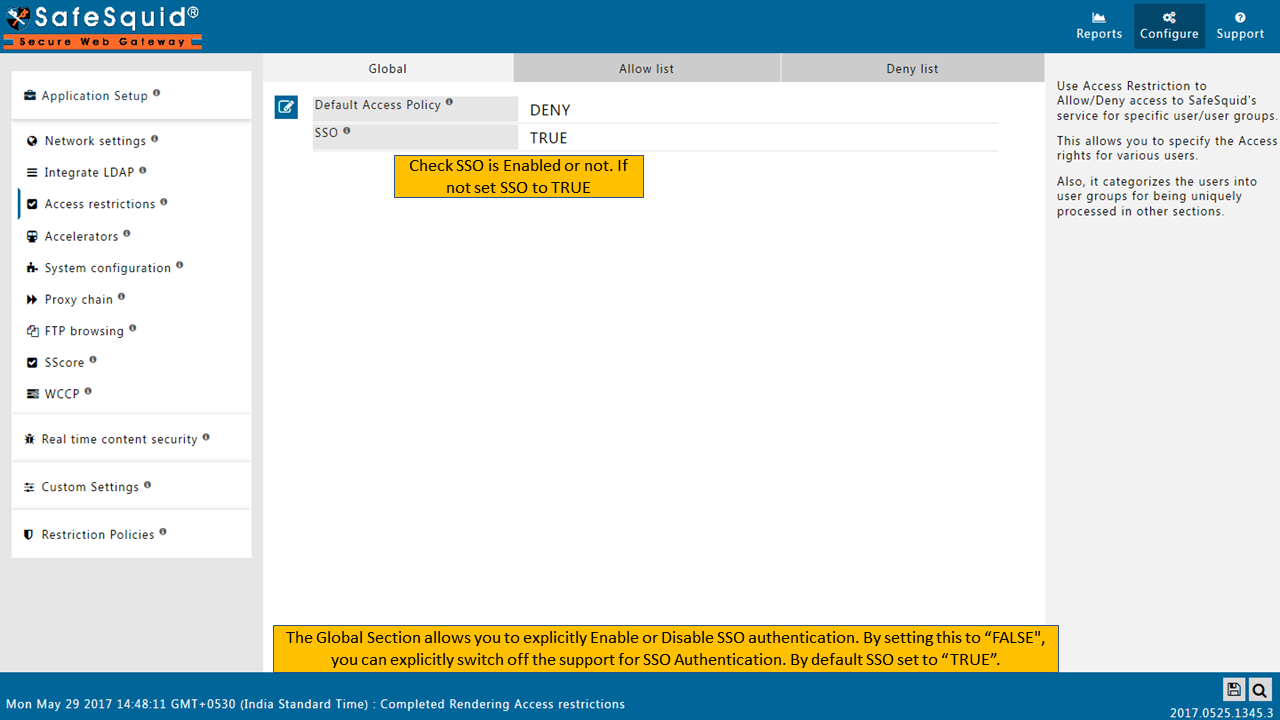
Enable SSO Authentication
|
|
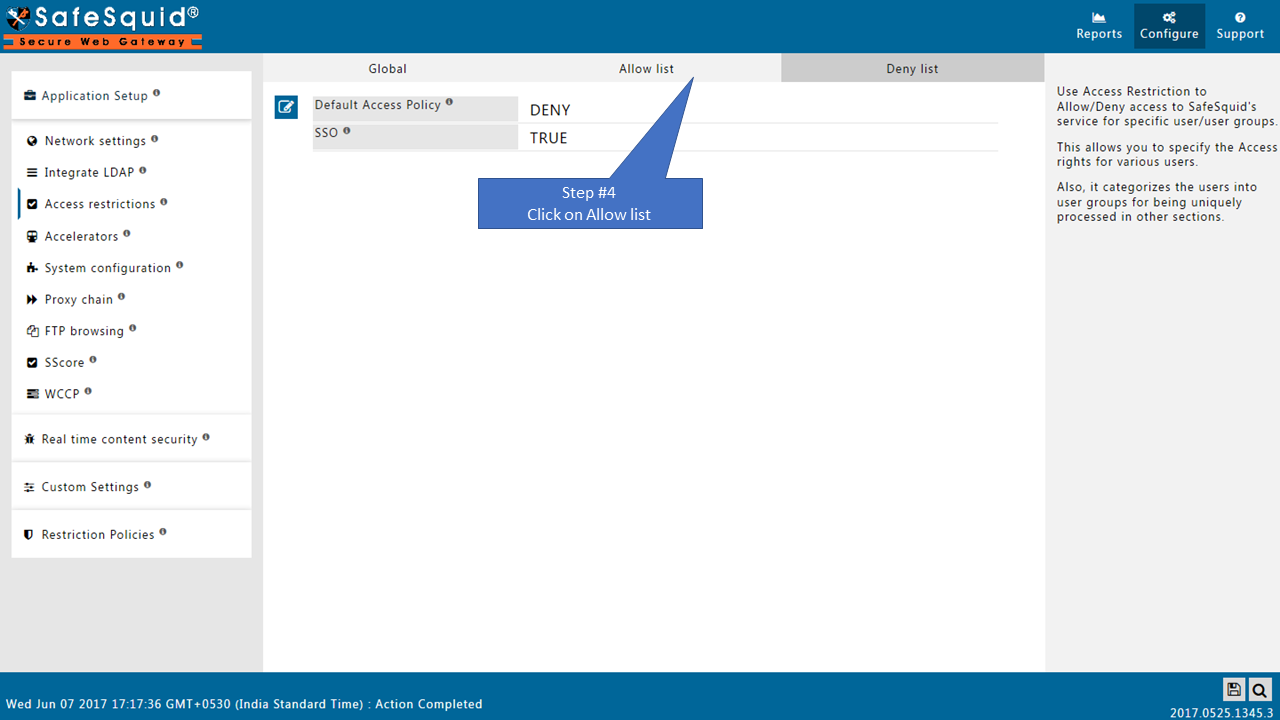
Go to Allow list
|
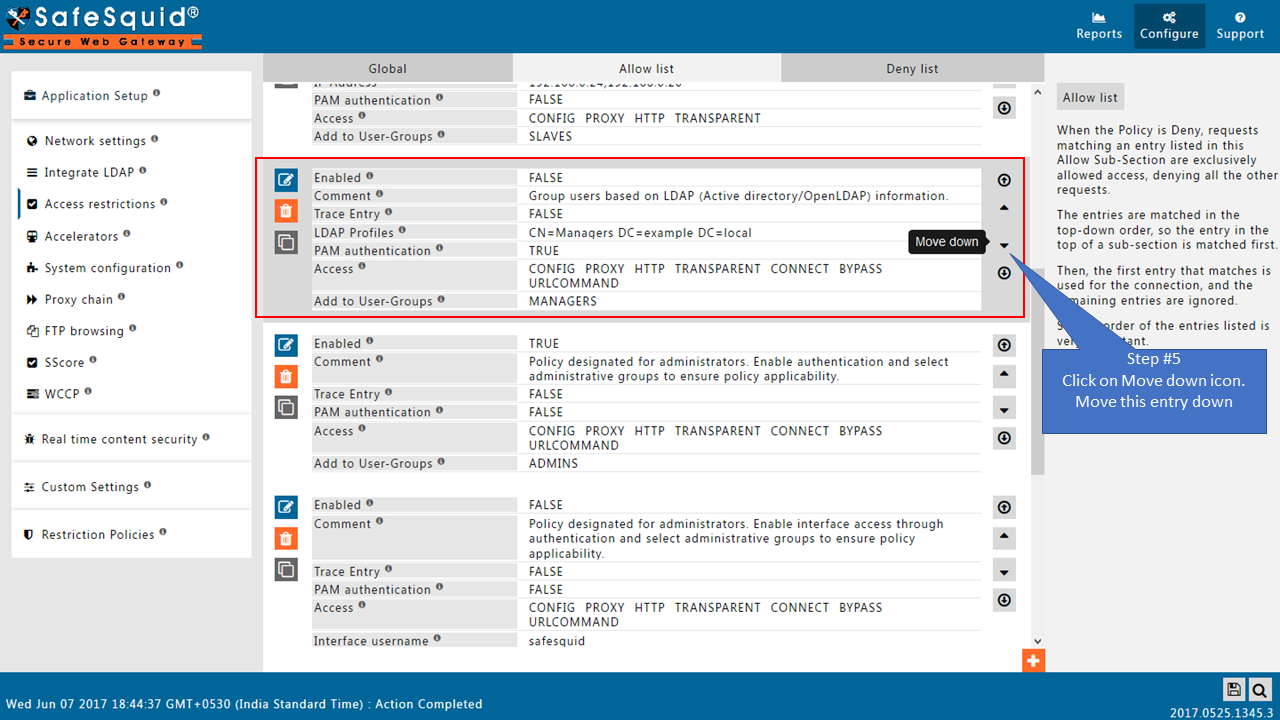
Change the order of Default entriesTo avoid locking yourself to the SafeSquid User Interface. See the working of each default Entry here |
|
|
|
|
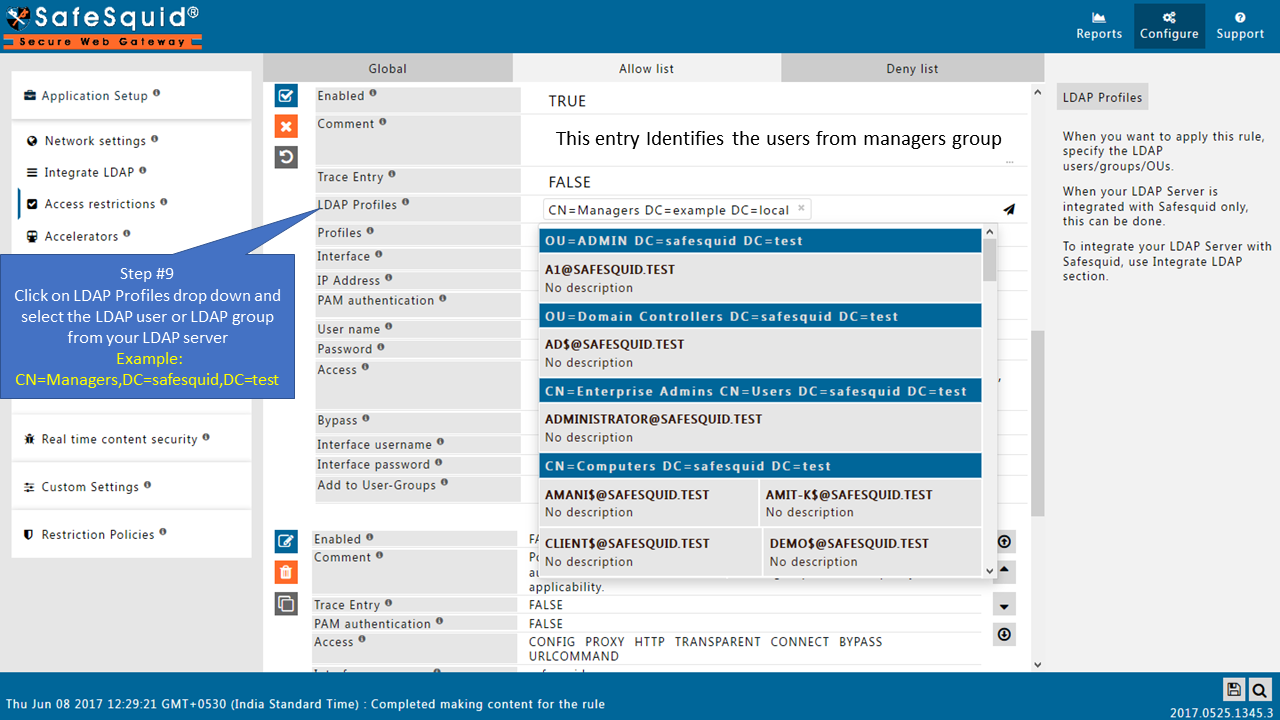
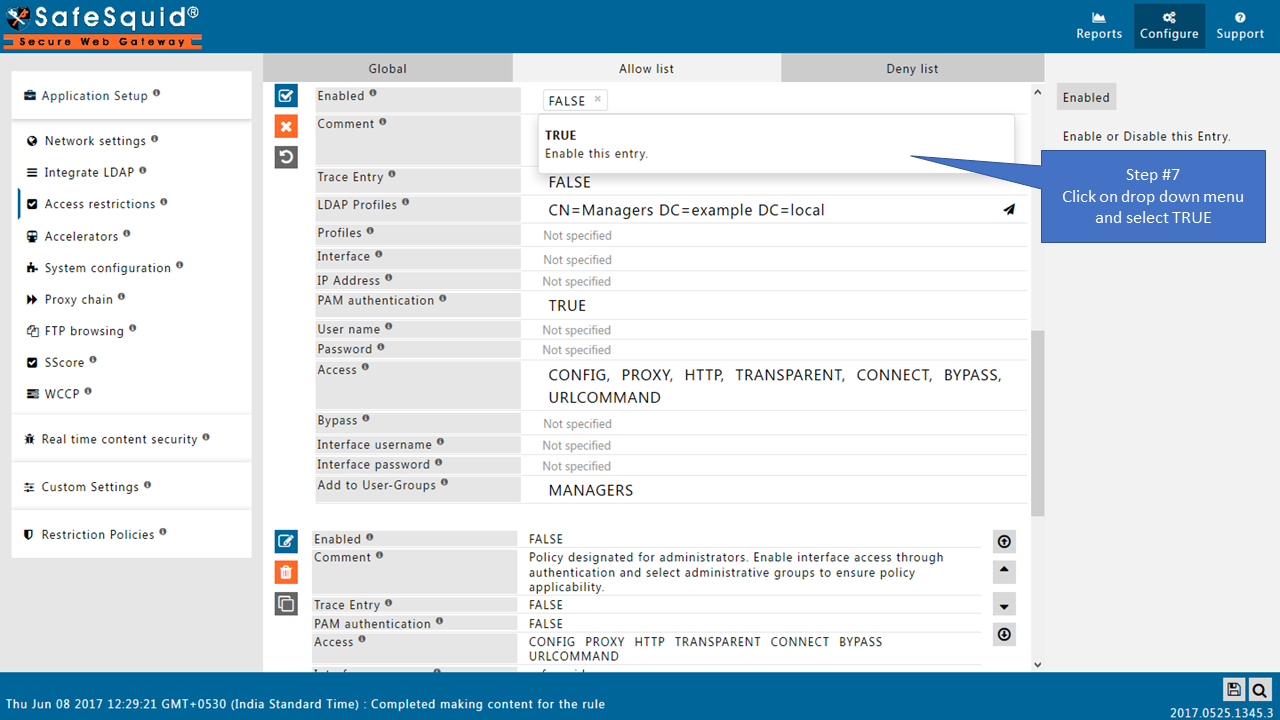
Add LDAP users
|
|
|
|
|
|
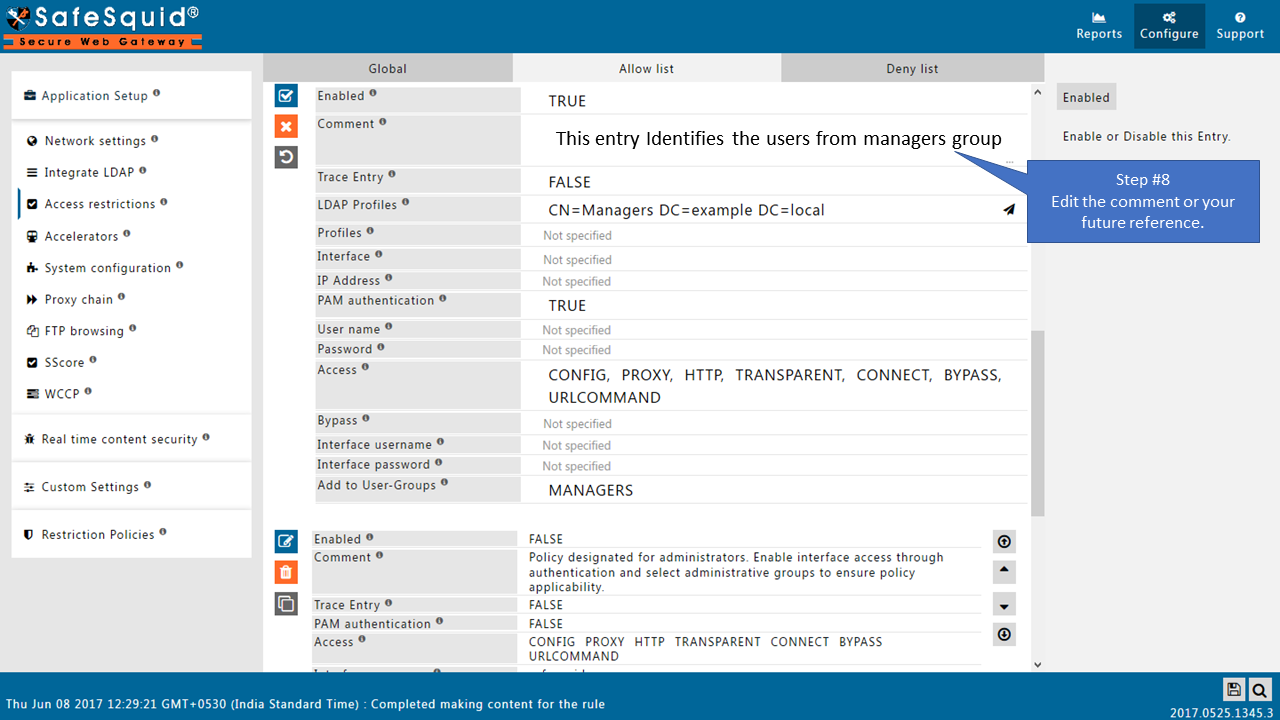
Note: If your LDAP server is not integrated then you will not see any users list in the drop down menu.
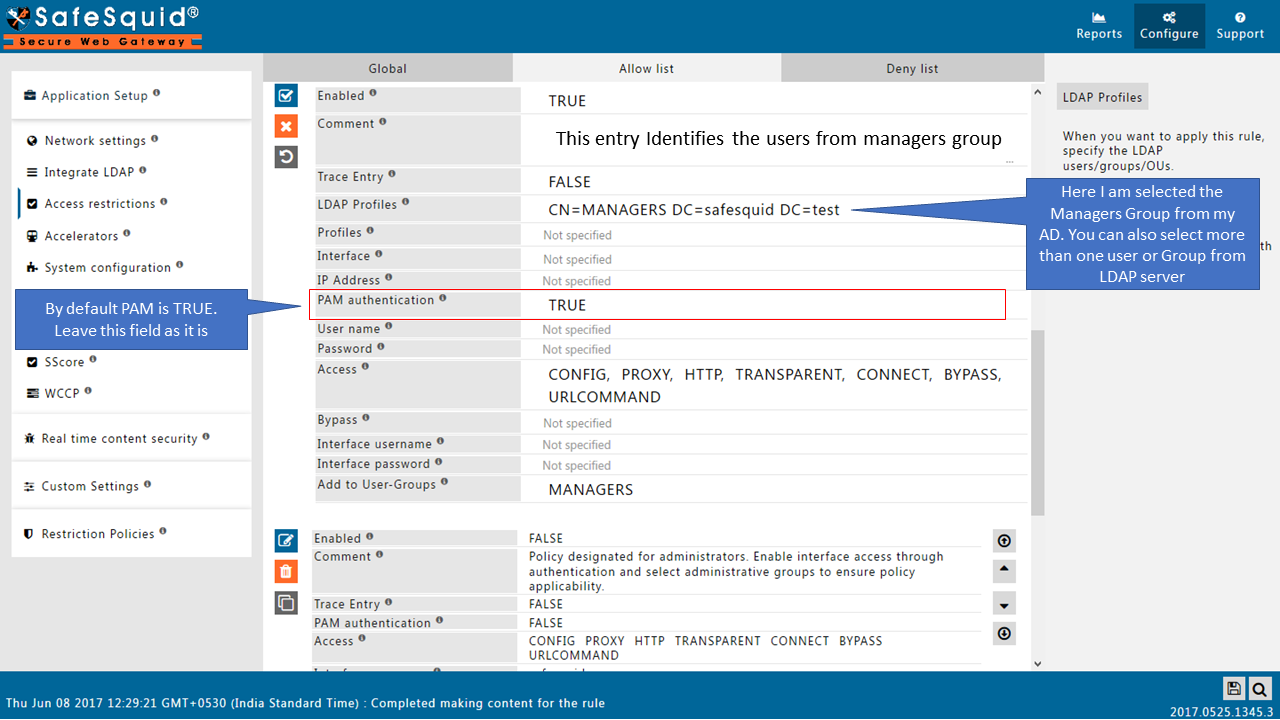
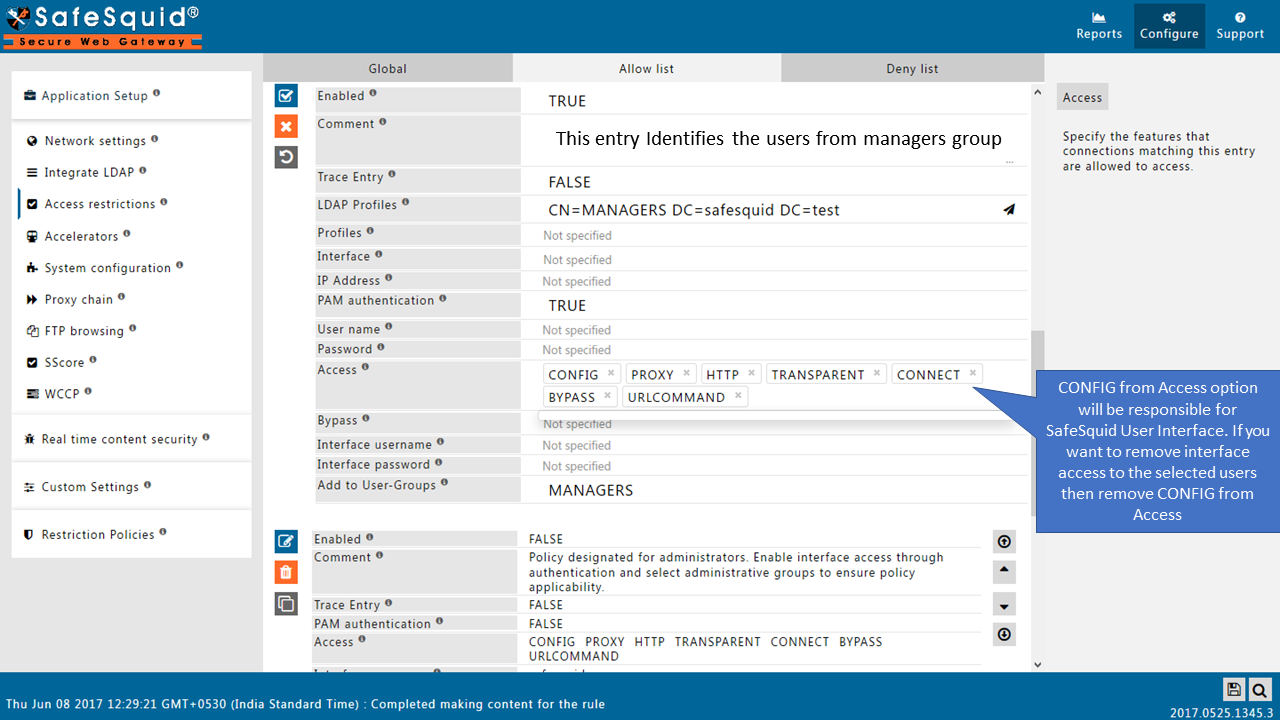
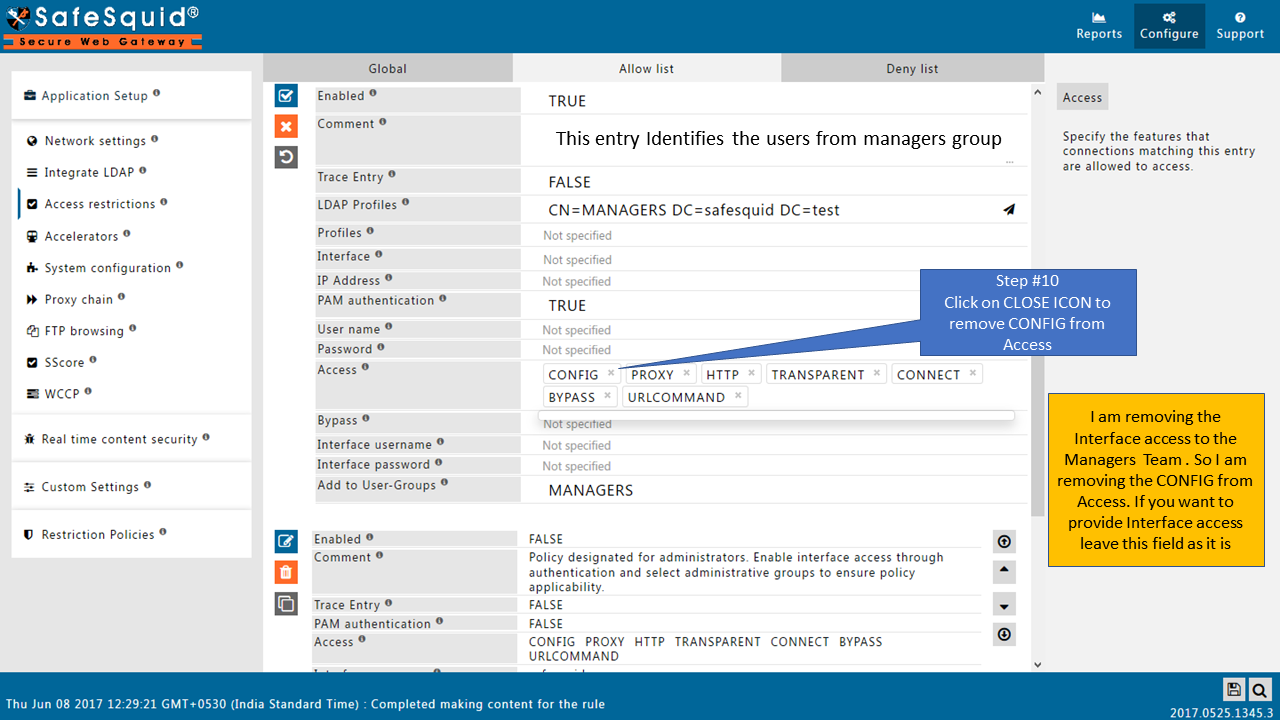
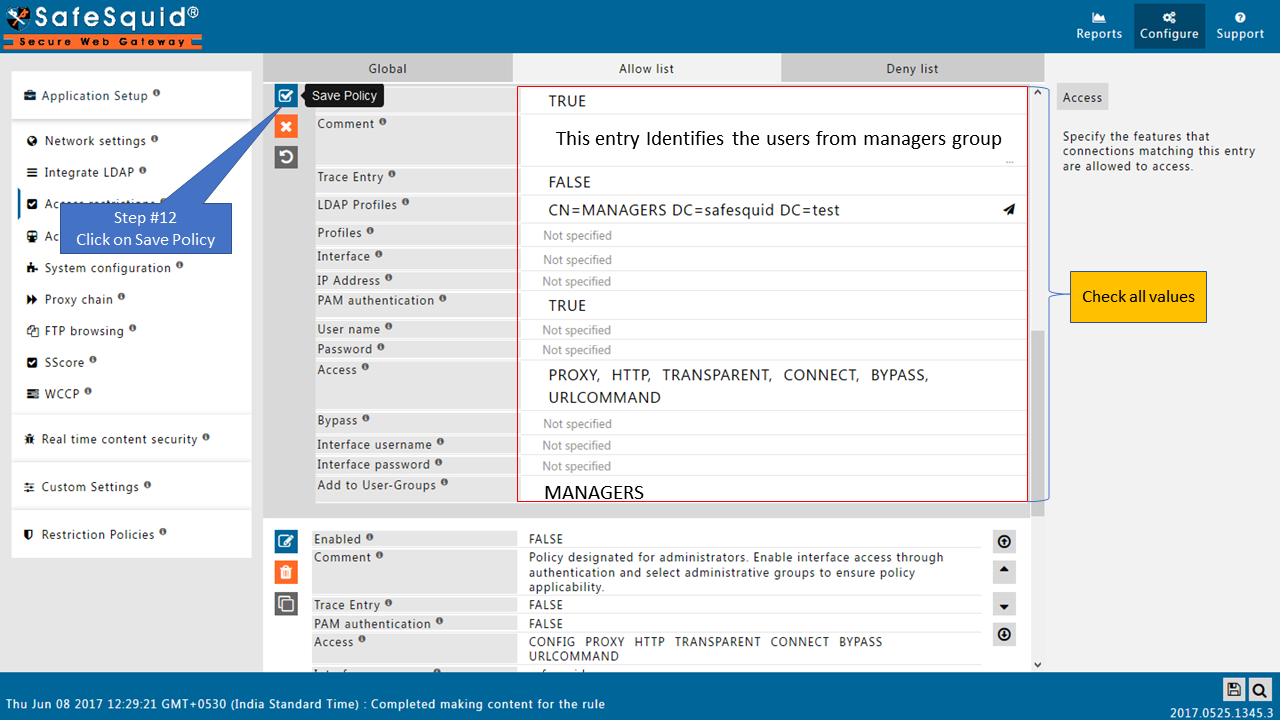
Here I am selecting the manager group from my AD so this policy will only applicable for the users from this group (manager group). If you want to apply rule for all the users, then keep this entry blank. |
|
|
|
|
|
|
|
|
- Access the internet, confirm that you can access the web the way should be. '('It should not ask you for authentication prompt)
- Take a look at the output of the tail command that you had earlier left running on the Linux console.
You will see request from the user that had logged into the windows7.safesquid.test system and the user should be getting identified as <username>@<SAFESQUID.TEST>@ 192.168.221.212
On the console leave this tail command running.
tail -f /opt/safesquid/safesquid/logs/extended/extended.log
Here we will be validating the SSO authentication, and the log lines here will reveal the success of our undertaken steps.
If you can confirm that, Hurrah you are done!
To enable Windows Integrated authentication for the rest of your enterprise, modify the entry you created in the Access Restrictions for IP 192.168.221.212 and simply leave the IP address field blank.
