Difference between revisions of "Enabling HTTPS inspection on SafeSquid User Interface"
From Secure Web Gateway
en>Santosh.thorat |
m (1 revision imported) |
Latest revision as of 00:31, 25 July 2021
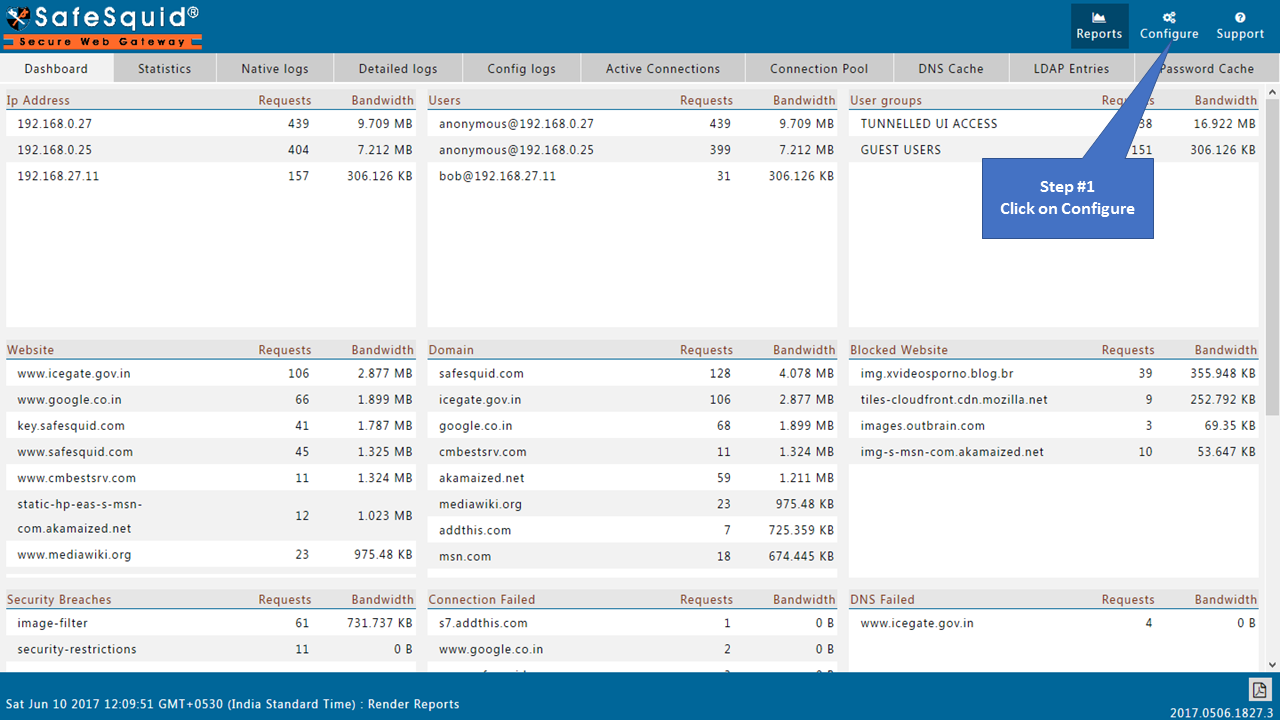
Access the SafeSquid interface
Go to Configure Page
|
|
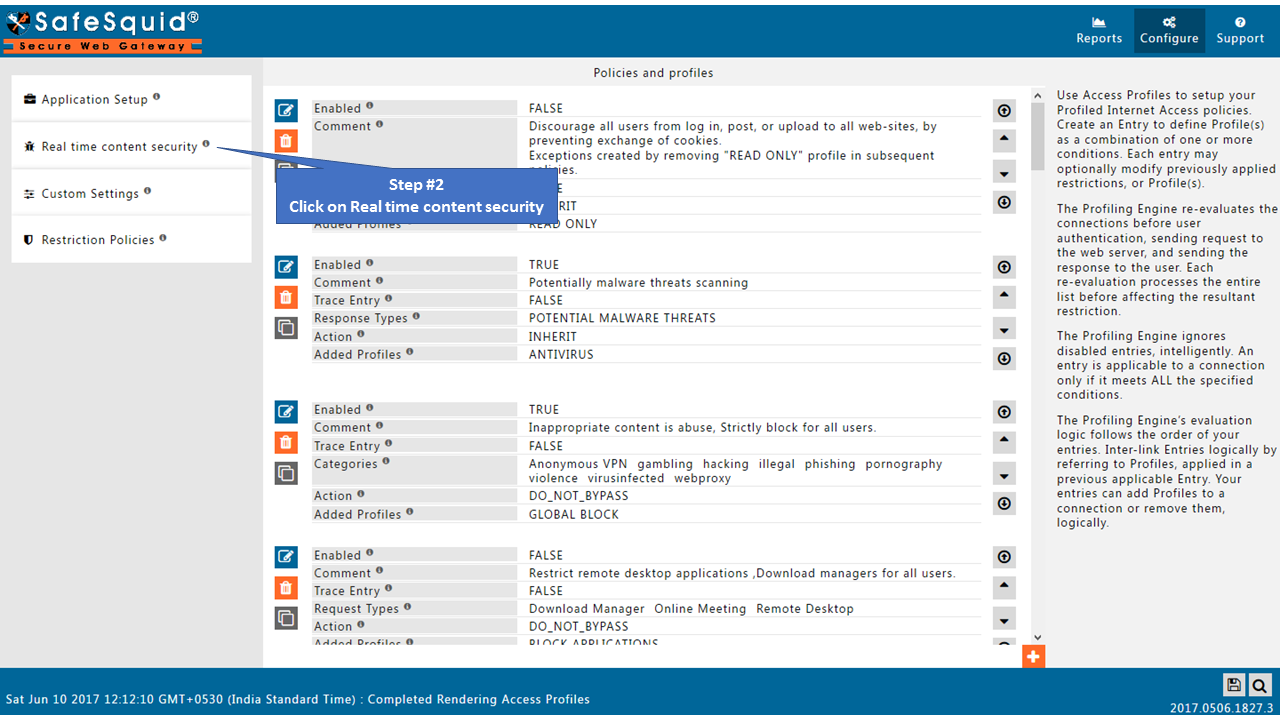
Open HTTPS Inspection section
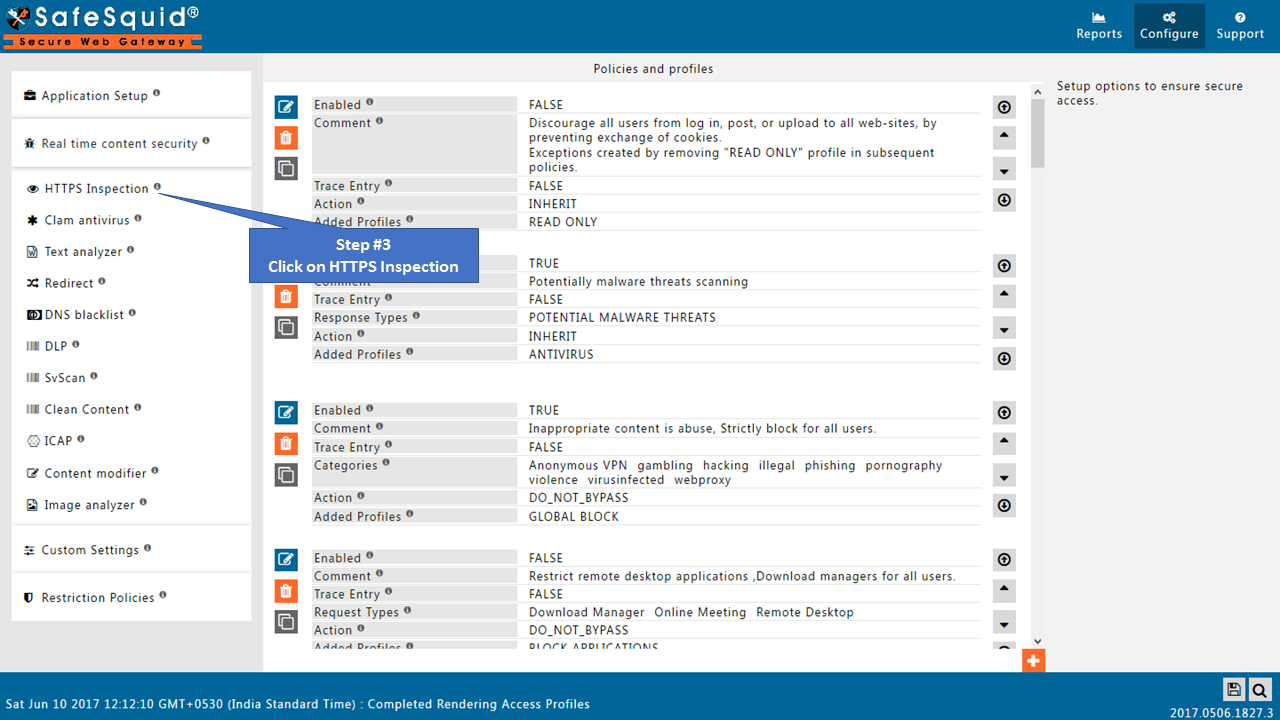
Enable HTTPS Inspection
Note: In newer versions of SafeSquid which are released after June-2017, setup tab is removed. You will see only three subsections in HTTPS inspection section.
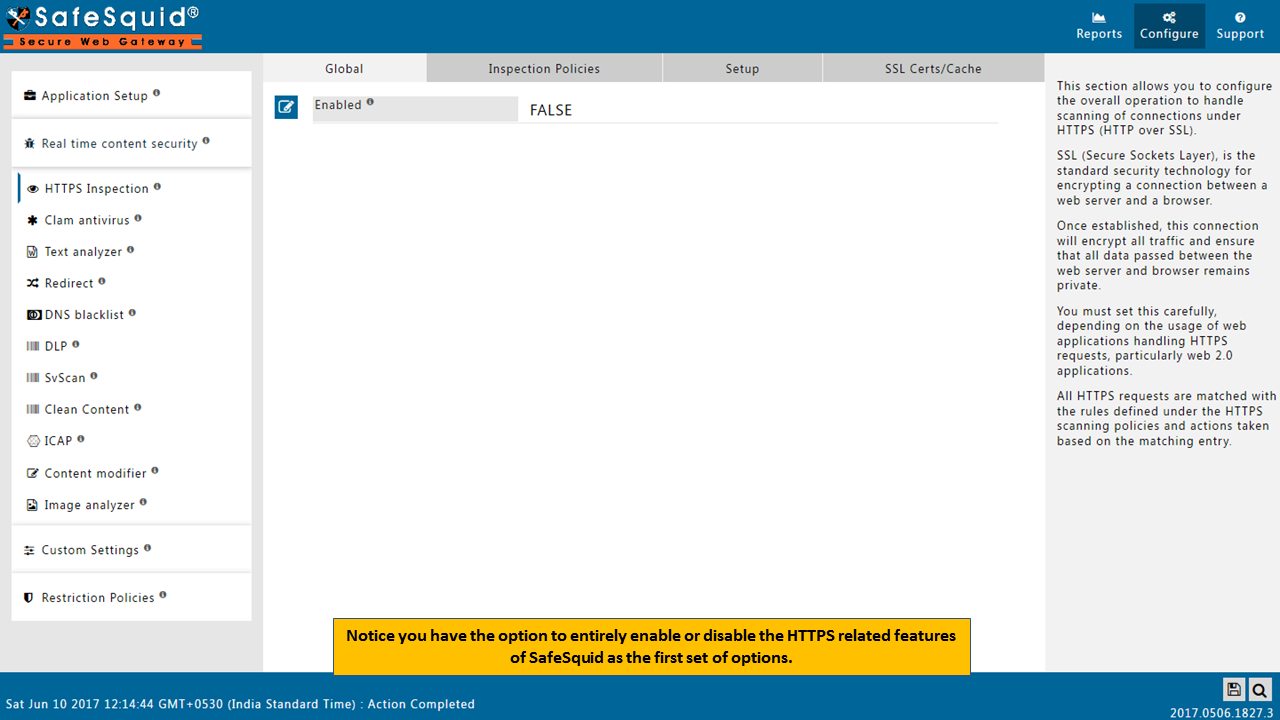
Open Global part of HTTPS Inspection section and make the Enabled as True.
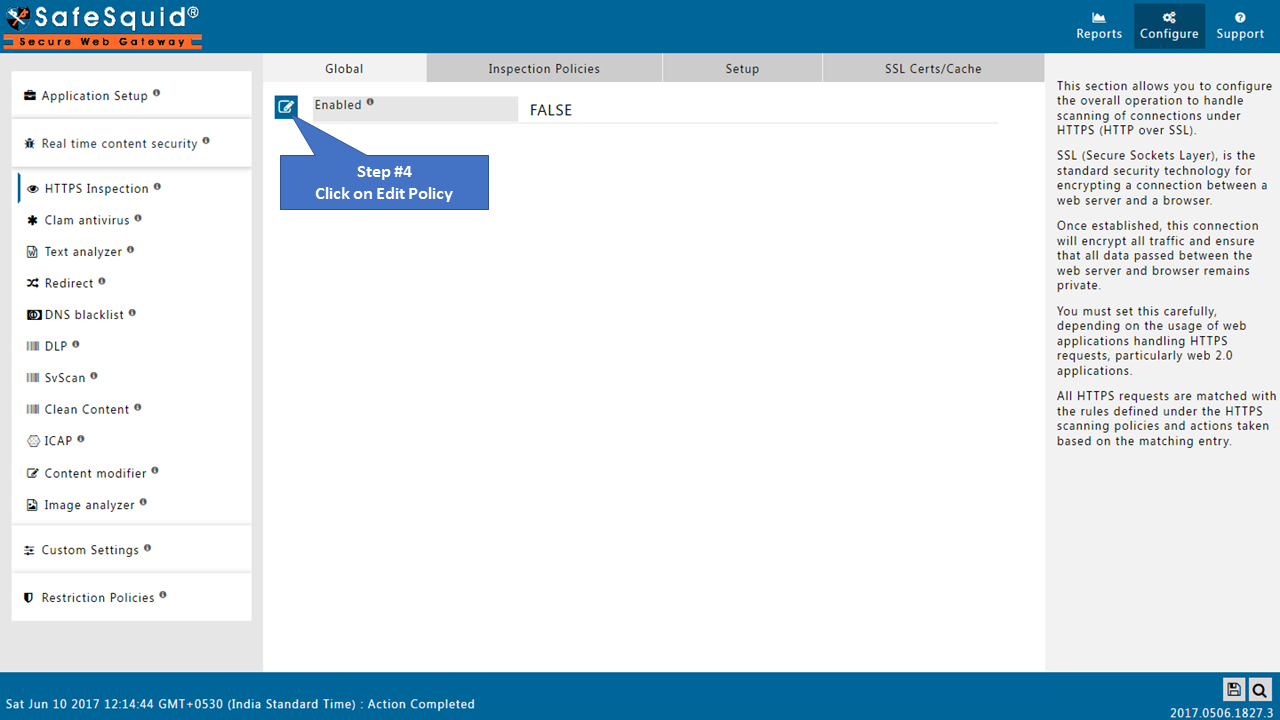
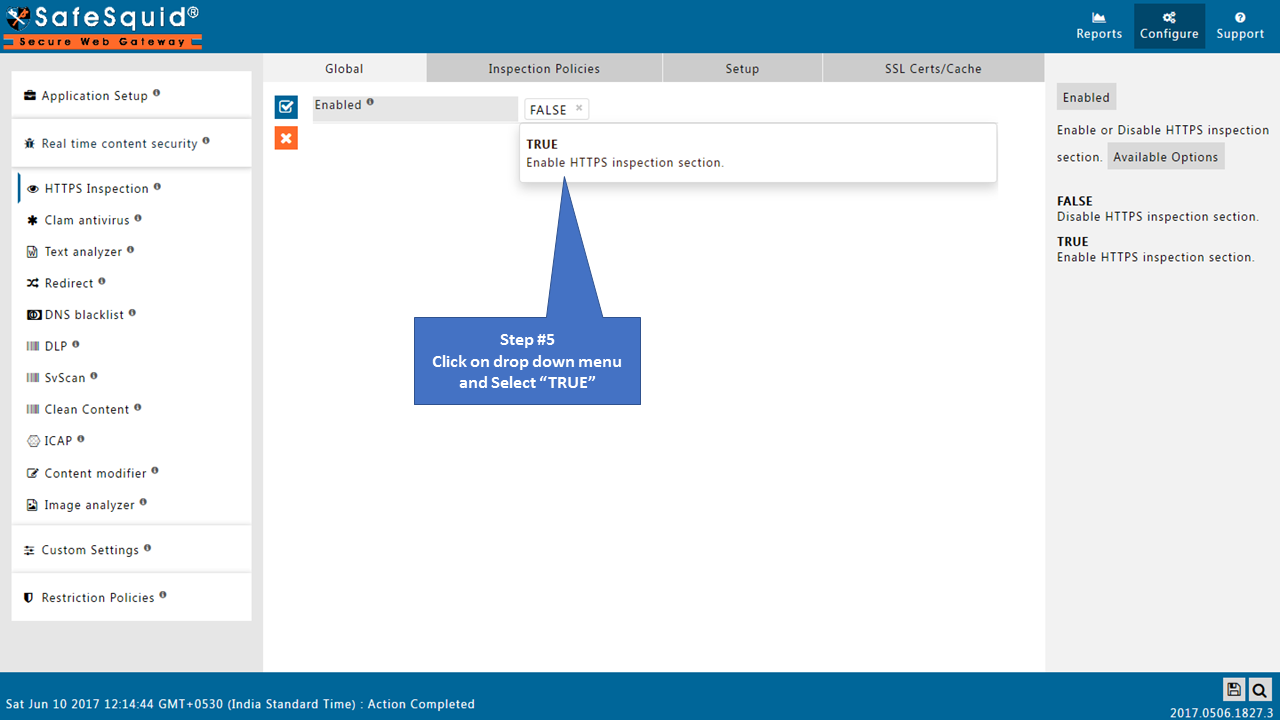
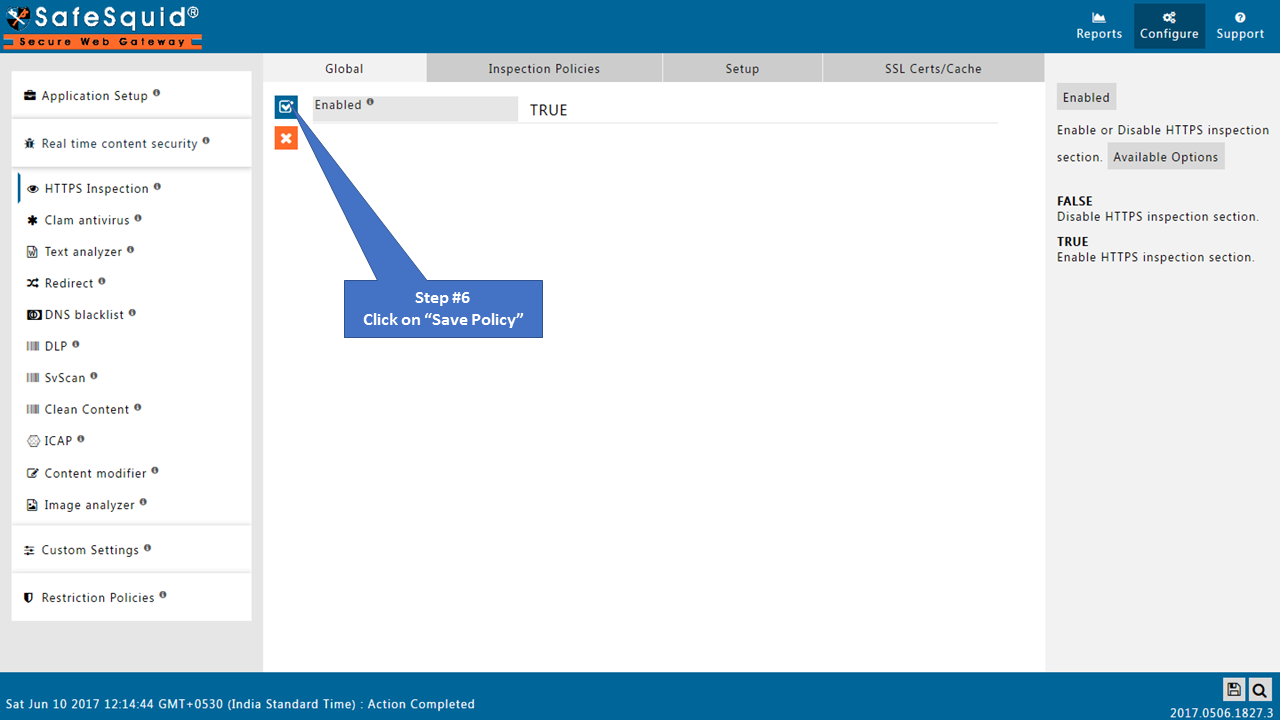
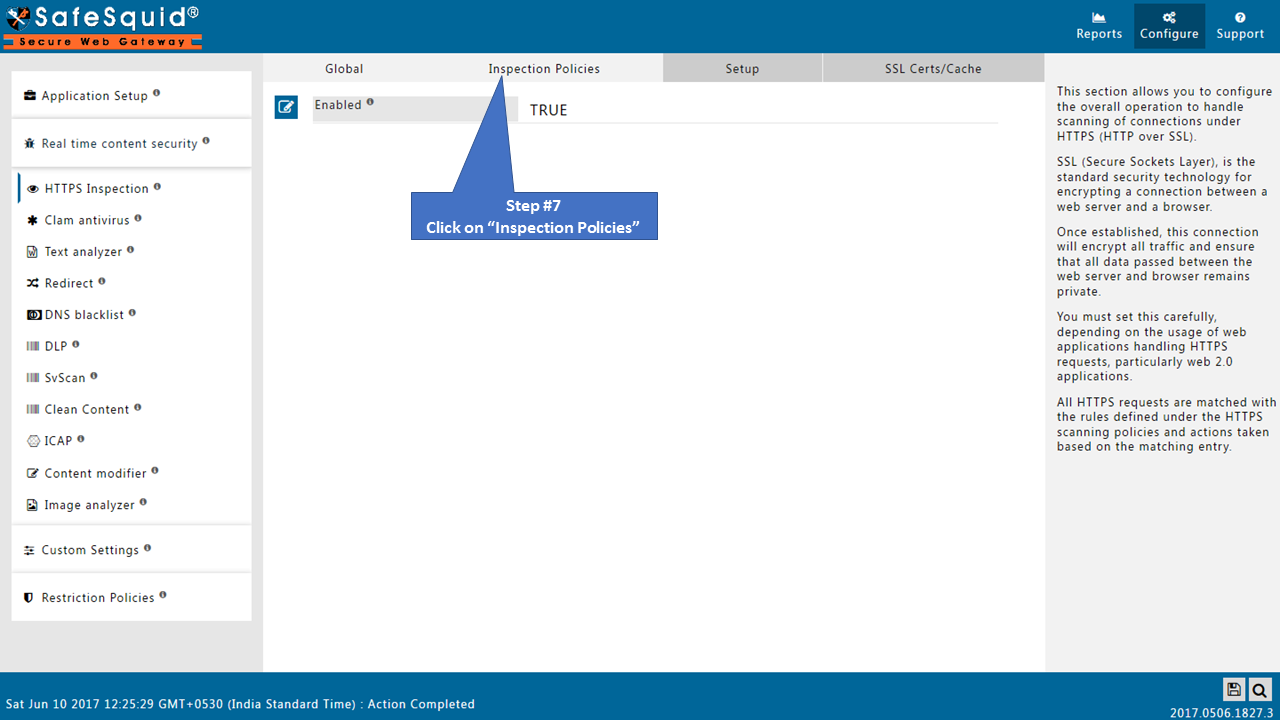
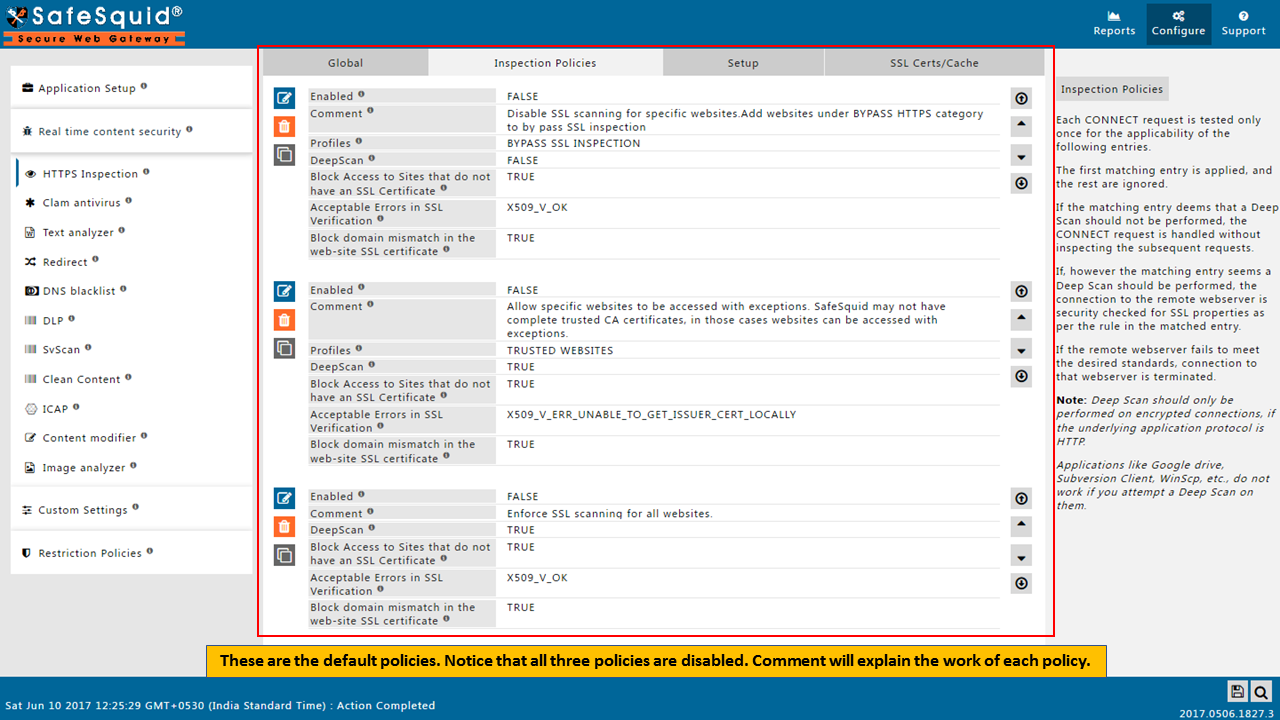
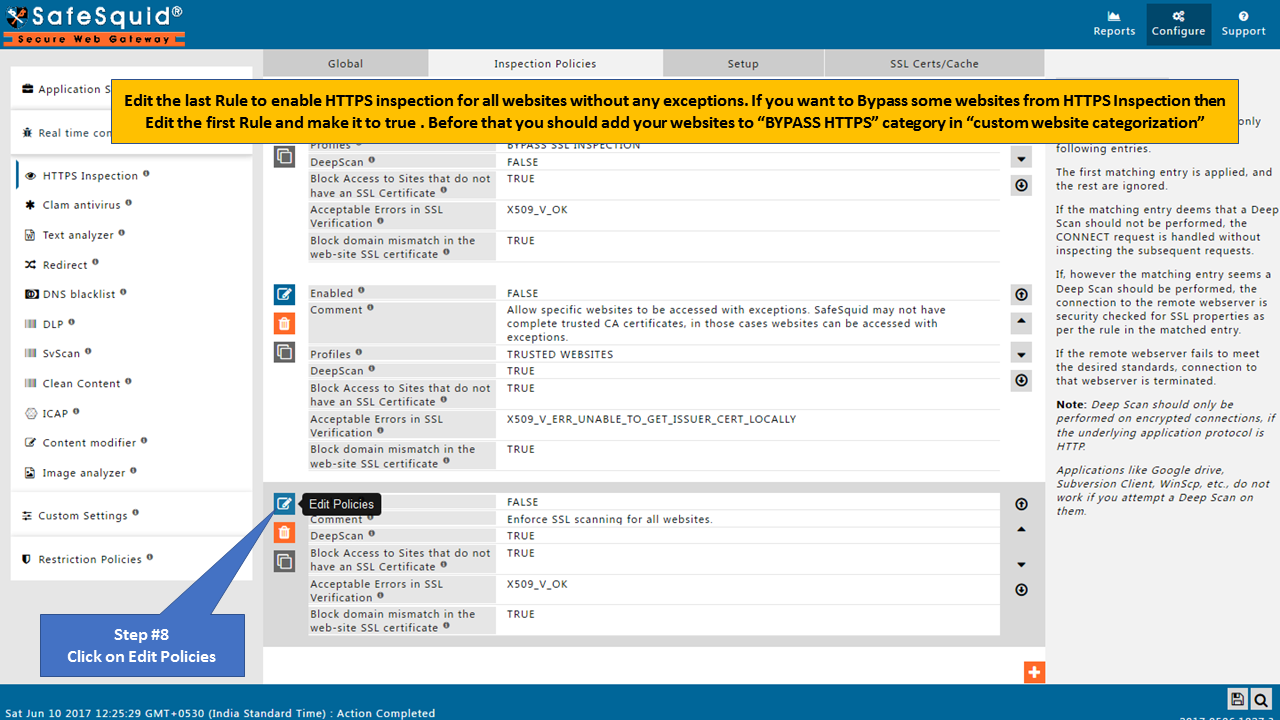
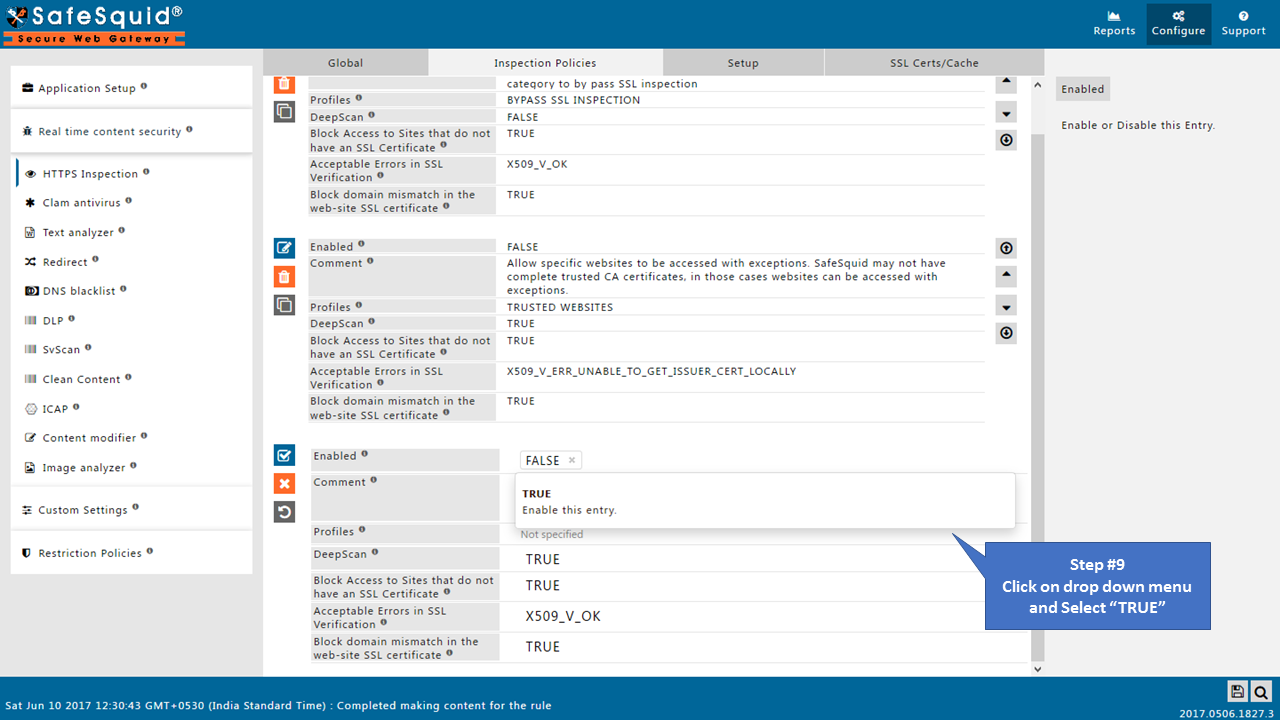
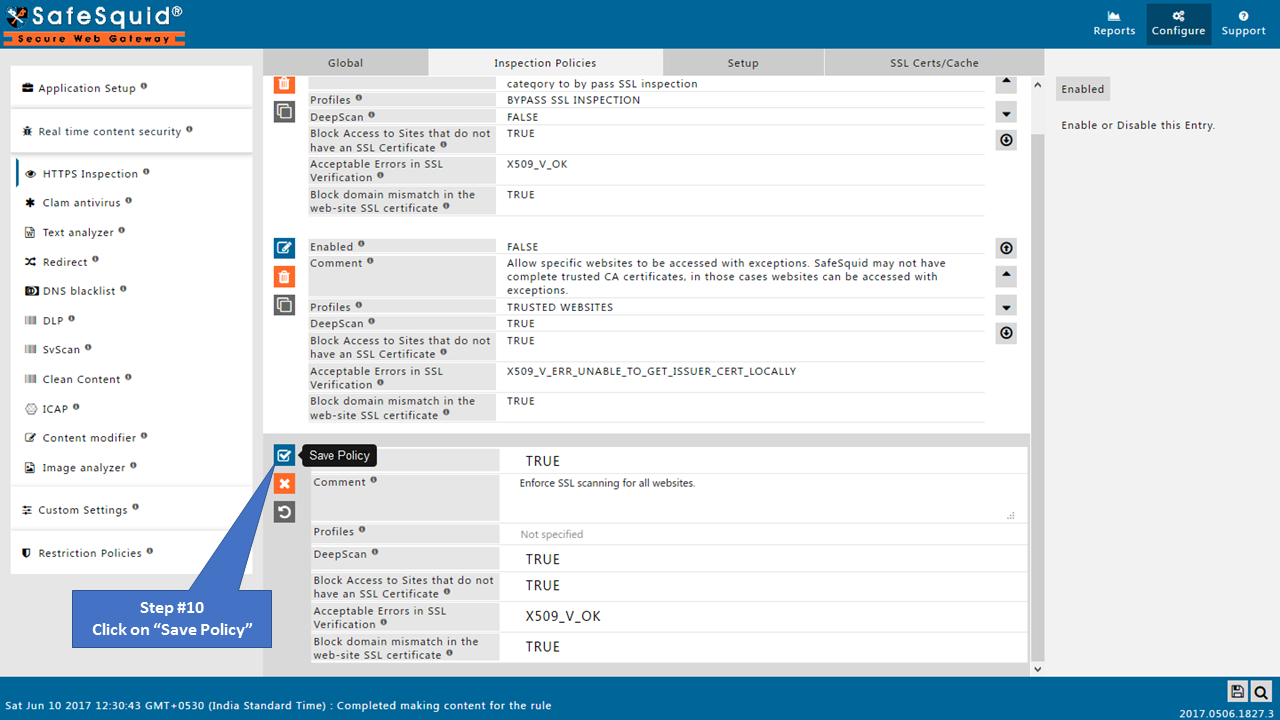
Open Inspection Policies Tab
Make sure all the policies should be Enabled as True.
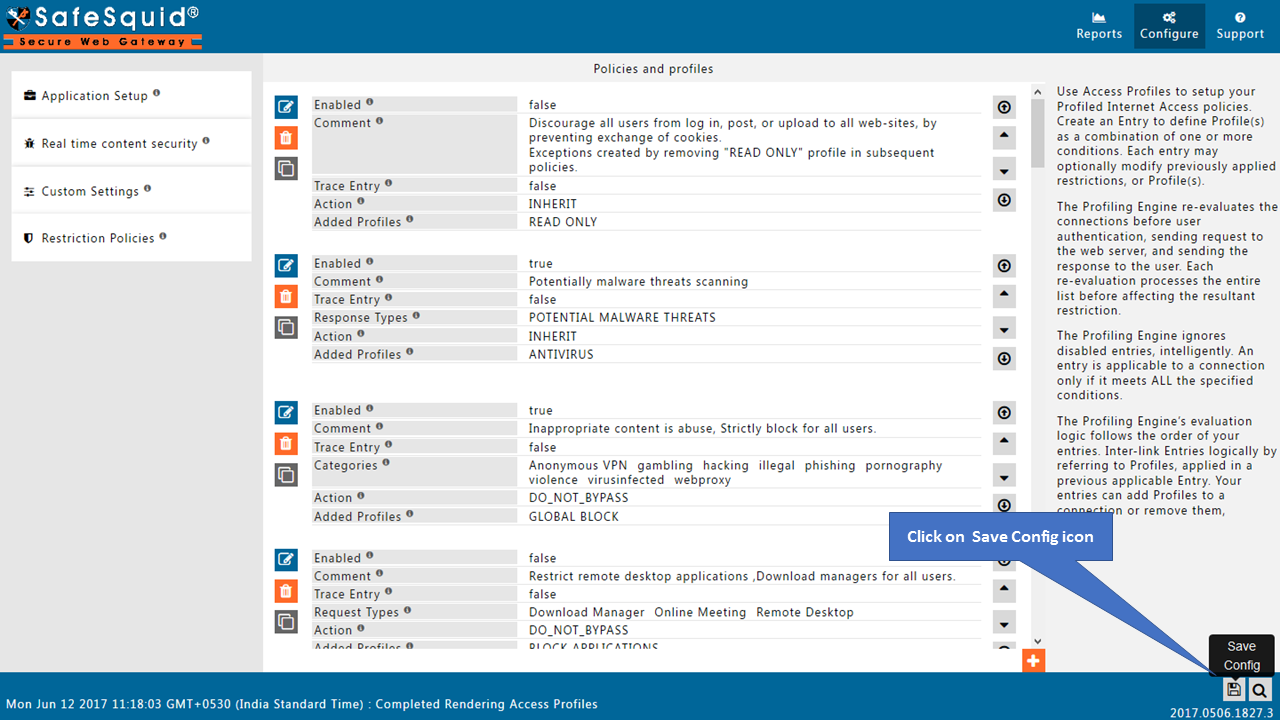
Save Configuration
Click on Save Configuration icon situated at bottom left corner.
|
When you click on Save config, it will give a prompt for asking the confirmation to store your configuration into the cloud.
Otherwise select No and click on submit |
