Enable IP based authentication
OverviewAlmost all the proxy applications restrict access based on the IP address. Most of the organizations network administrator would always prefer to block access to a specific address or range of addresses that he/she suspect belong to malicious individuals. You can block access to a specific IP address or range of IP addresses to secured web access. SafeSquid SWG allows you to control single IP address or range of IP address using Access Restrictions section which is under Application Setup side menu. SafeSquid SWG won't let your current IP address get locked out, hence SafeSquid warns you and refuses your policy insert. If you're inside of a corporate intranet, be very careful about setting up your IP policies. The IP address you see on your own computer (like 192.168.0.10) generally bears no relationship to the IP address you'll actually appear as out on the internet. Your company likely proxies and/or NATs your address into a predictable set of outbound addresses which you'll likely need to ask your network team about. A user whose access is restricted based on an access policies should get block template on browser. PrerequisitesTo check the scenario make sure that your IP address is not already added inside the Access restrictions section. Access the SafeSquid User interface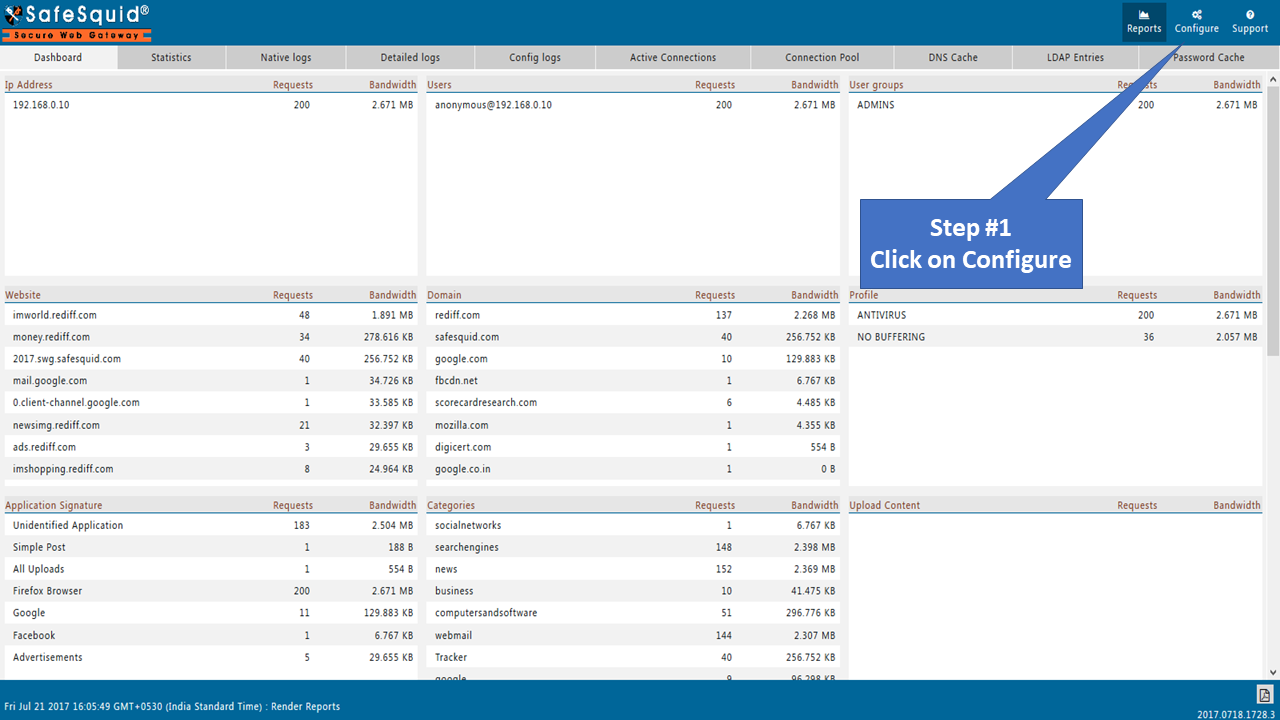 |
|
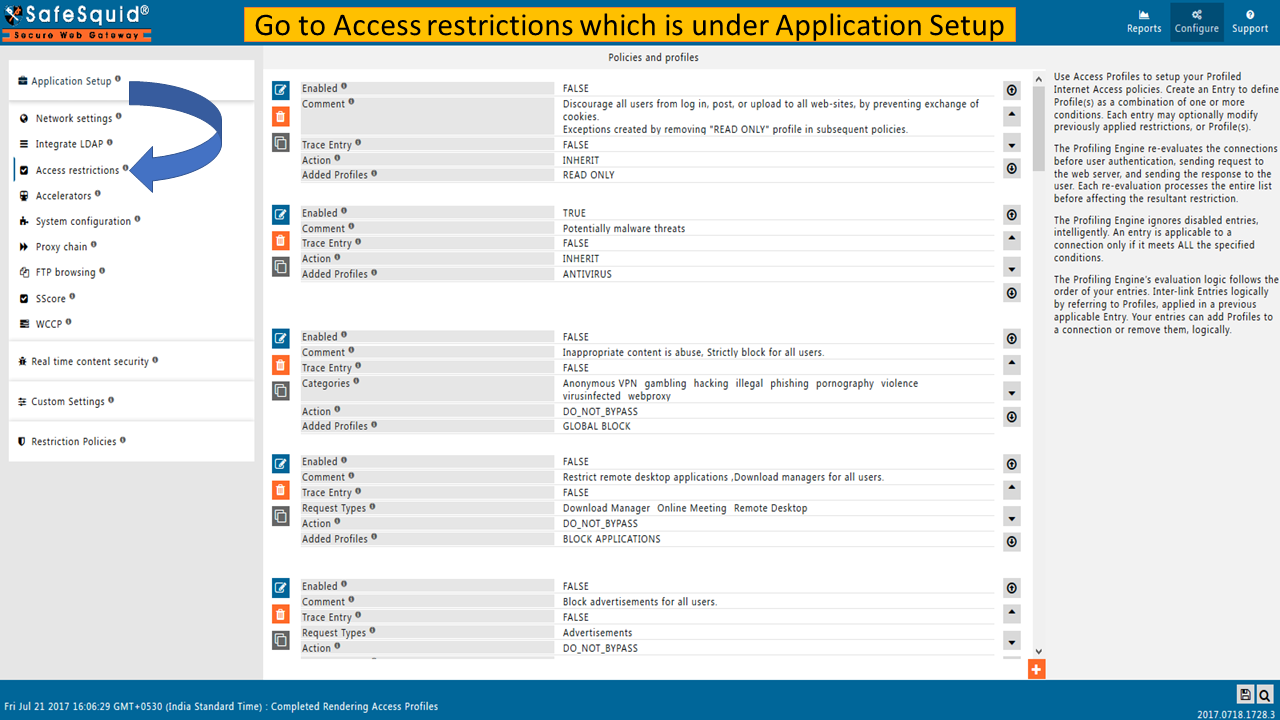
Goto configure page from SafeSquid WebGUI and open Access Restrictions section which is under Application Setup side menu. |
|
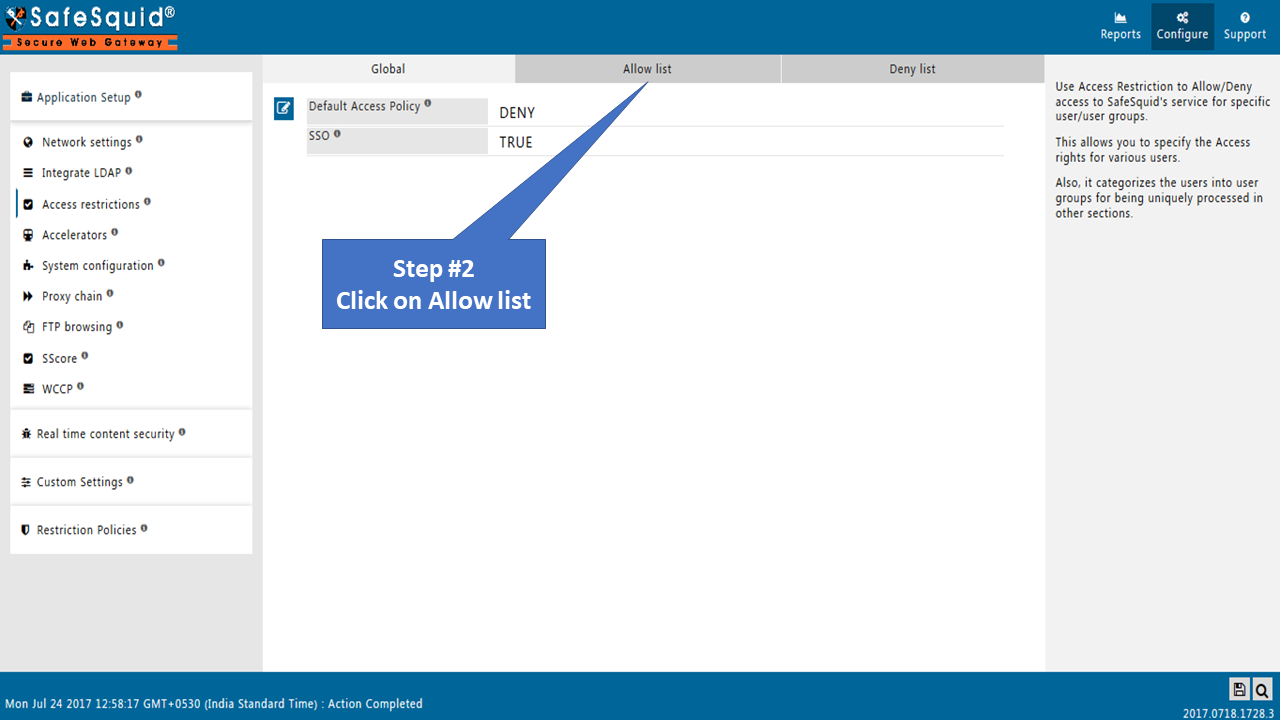
To create new policy go to Allow list subsection. |
|
Create New PolicyClick on Add New icon situated on bottom left corner to create new policy.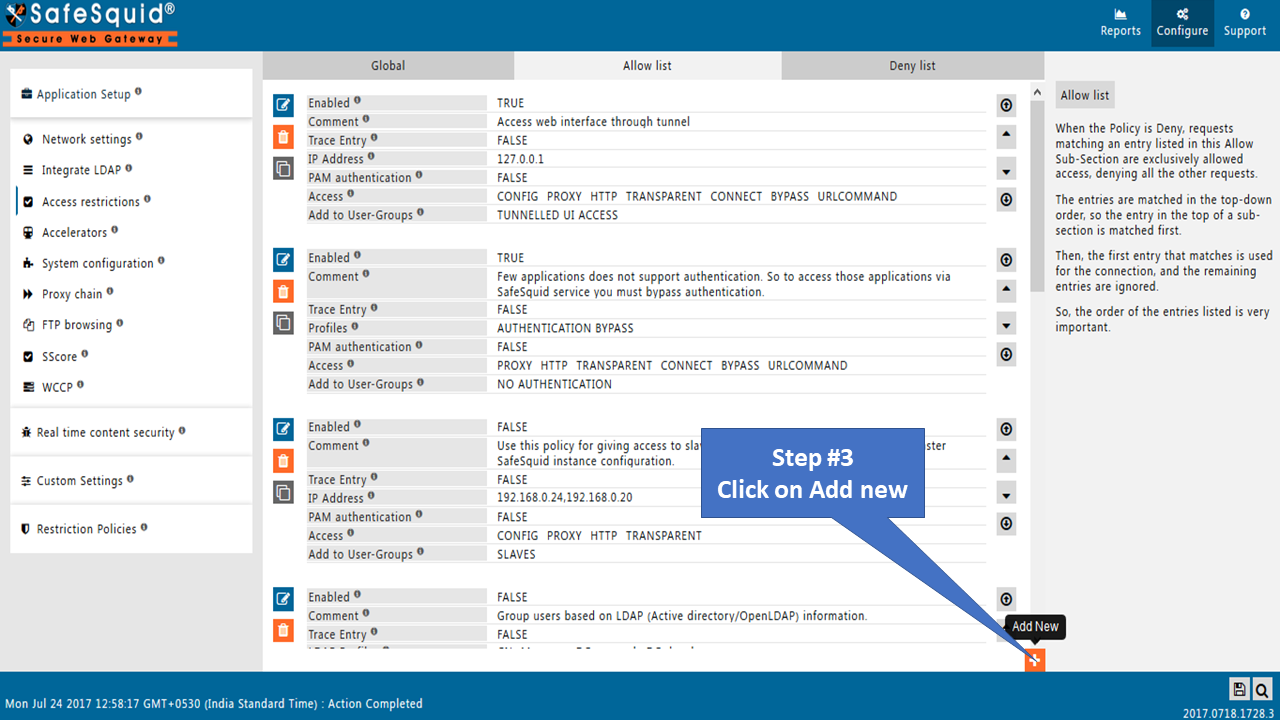 |
|
Enter your IP address inside IP Address field. You can also specify comma separeted lP address or range of IPs. 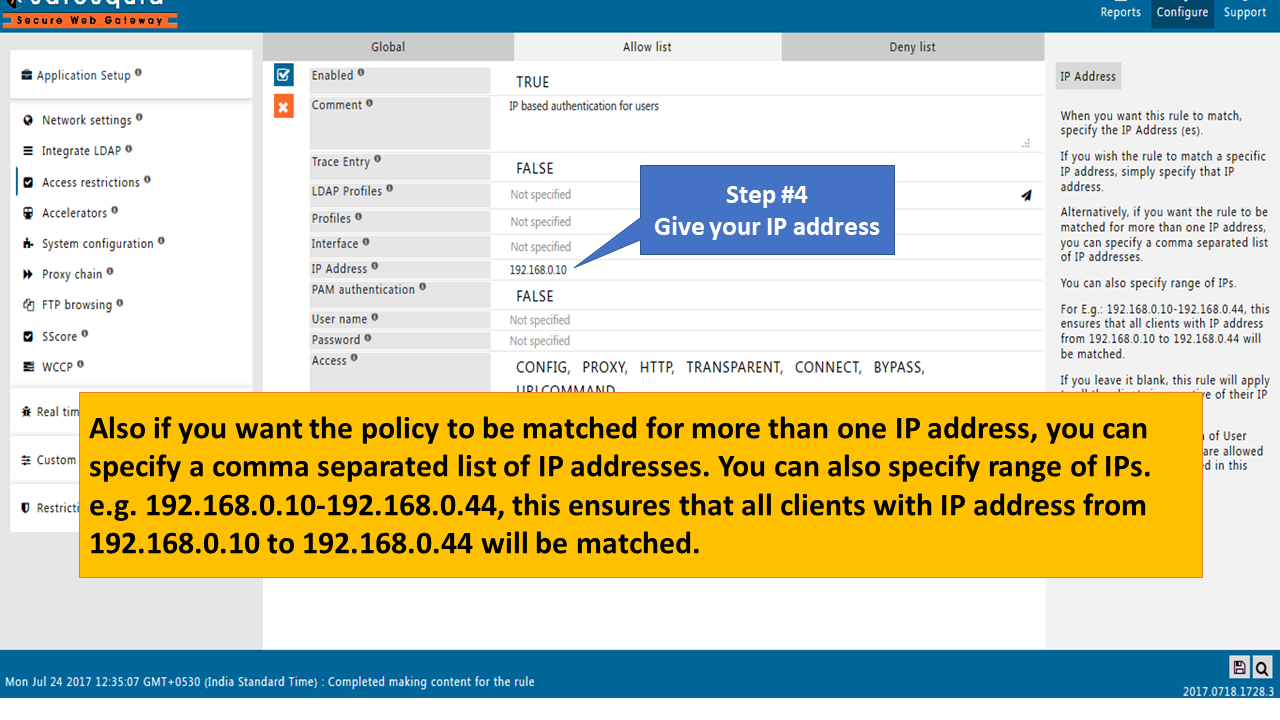 |
|
You need to specify unique User-Group name inside Add to User-Groups field. Here we have specified IP BASED AUTHENTICATION in Add to User-Groups field. 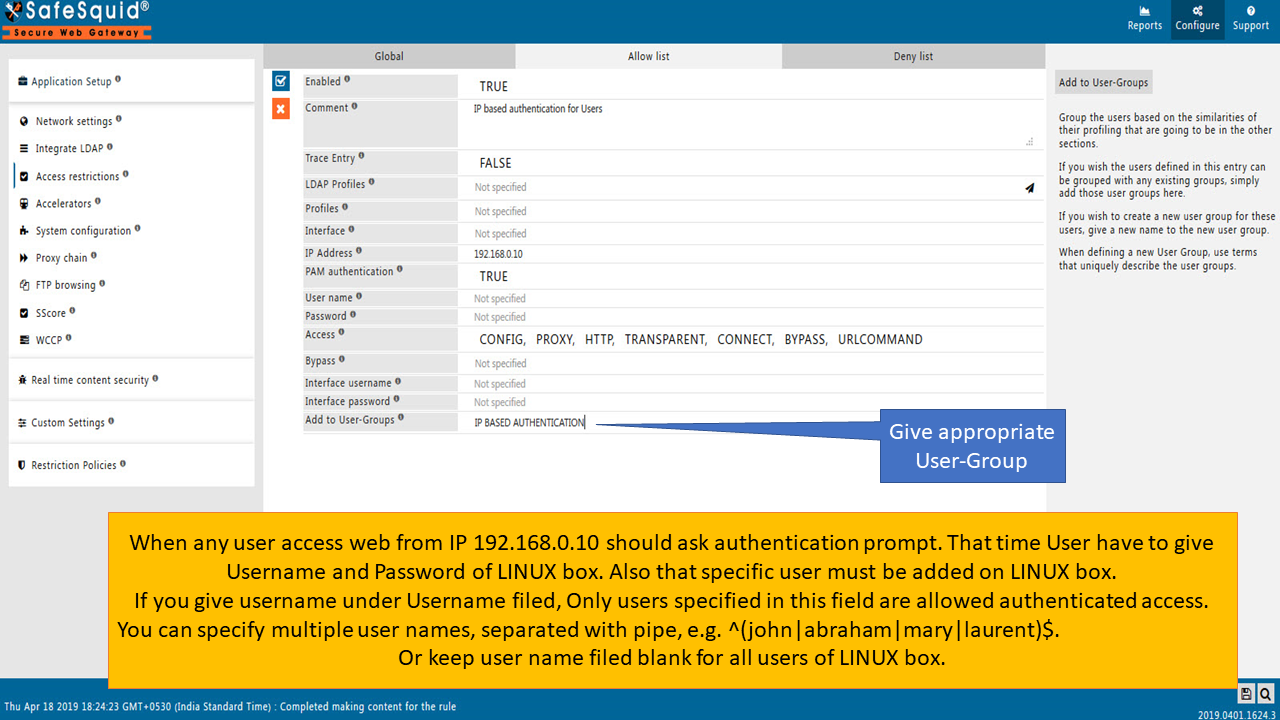 |
|
TestingTo test the scenario try to access any website from your mentioned IP address(here 192.168.0.10). You will get authentication prompt. You have to specify Username and Password of your linux machine. |
