DLP
Overview
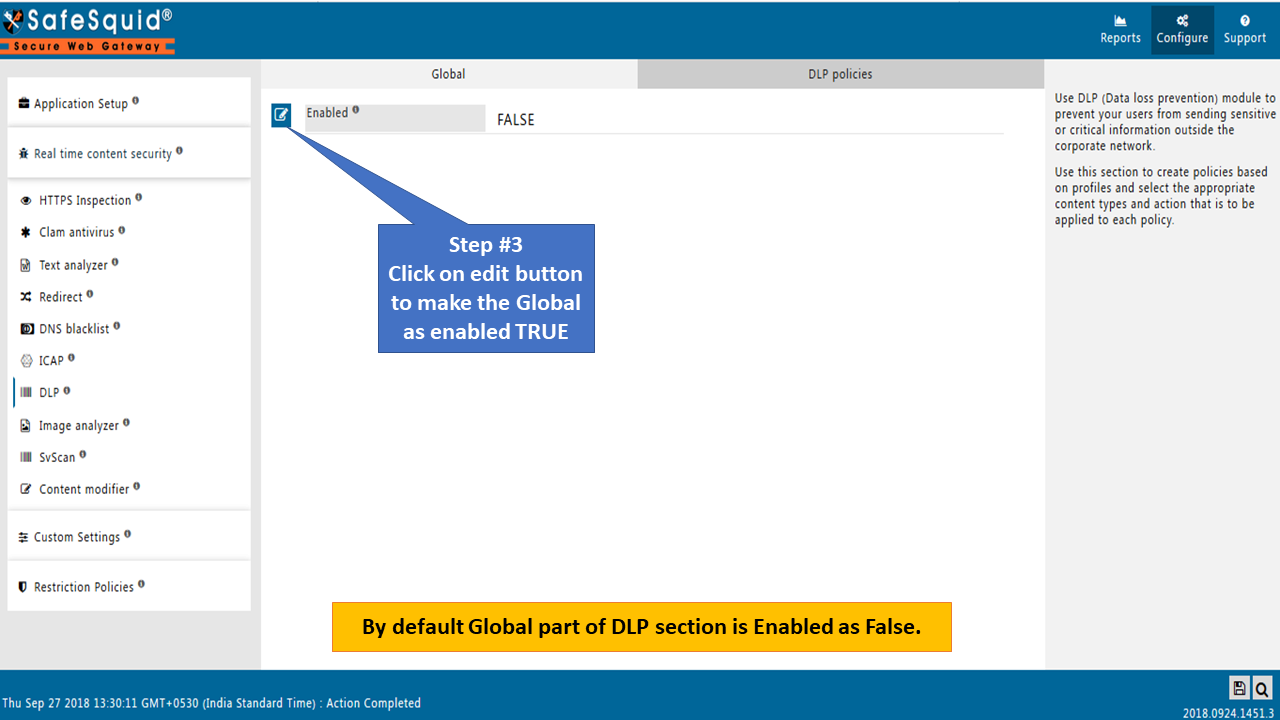
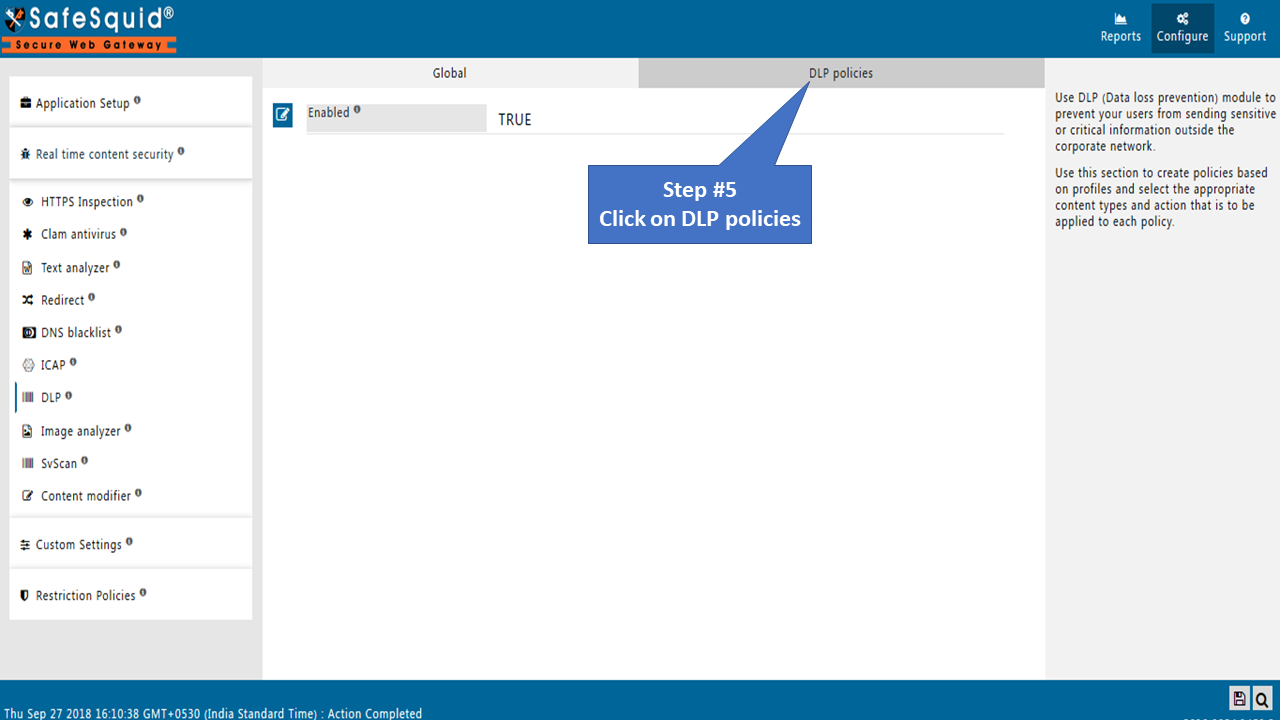
DLP is nothing but Data Loss Prevention module in Safequid. DLP module was introduced in SafeSquid to restrict end users from sending sensitive or critical information outside the corporate network. You can achieve this simply by creating rule(s) in DLP section for blocking the predefined content type.
Prerequisites
HTTPS Inspection should be enabled in SafeSquid. If not enabled, you can check our document - How to enable HTTPS Inspection
Access the SafeSquid interface
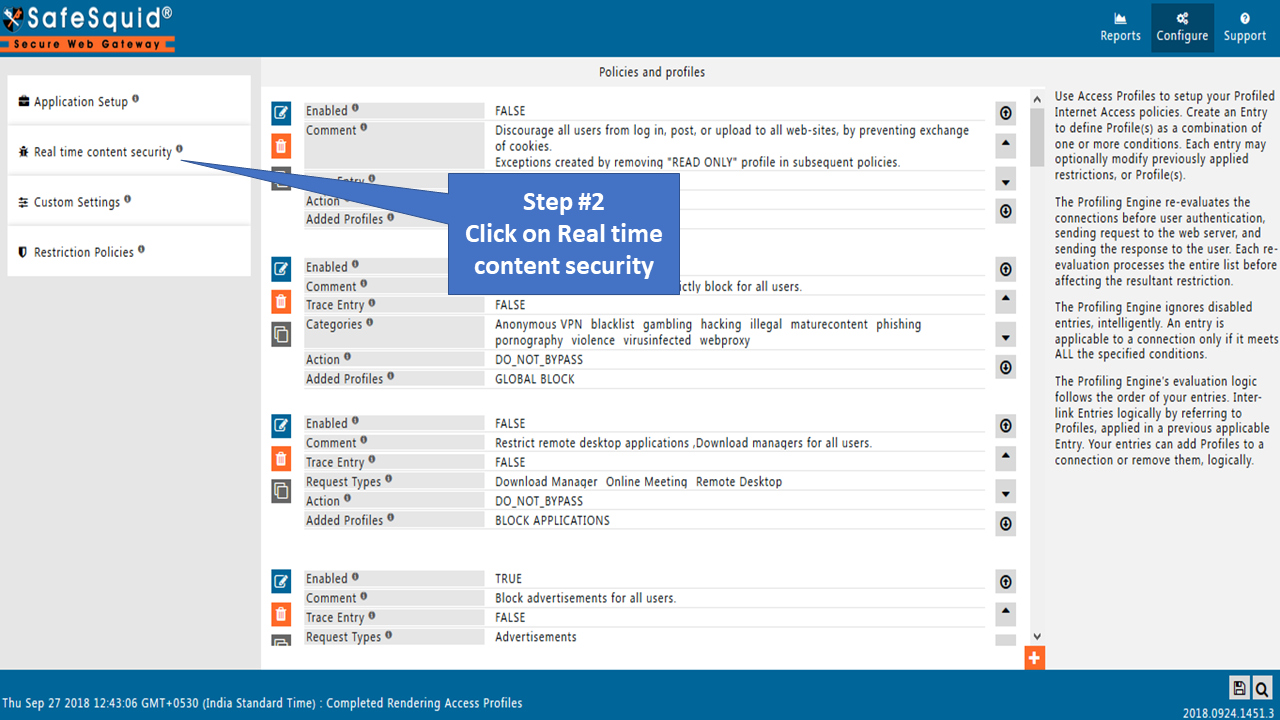
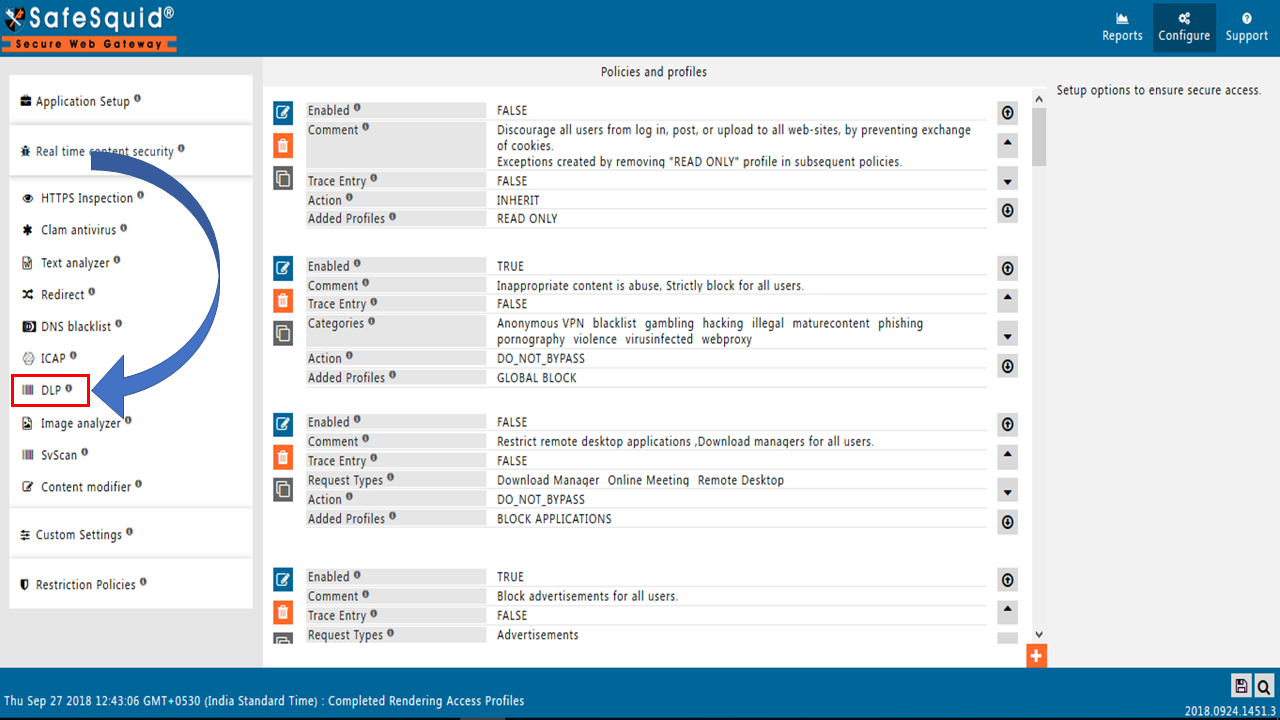
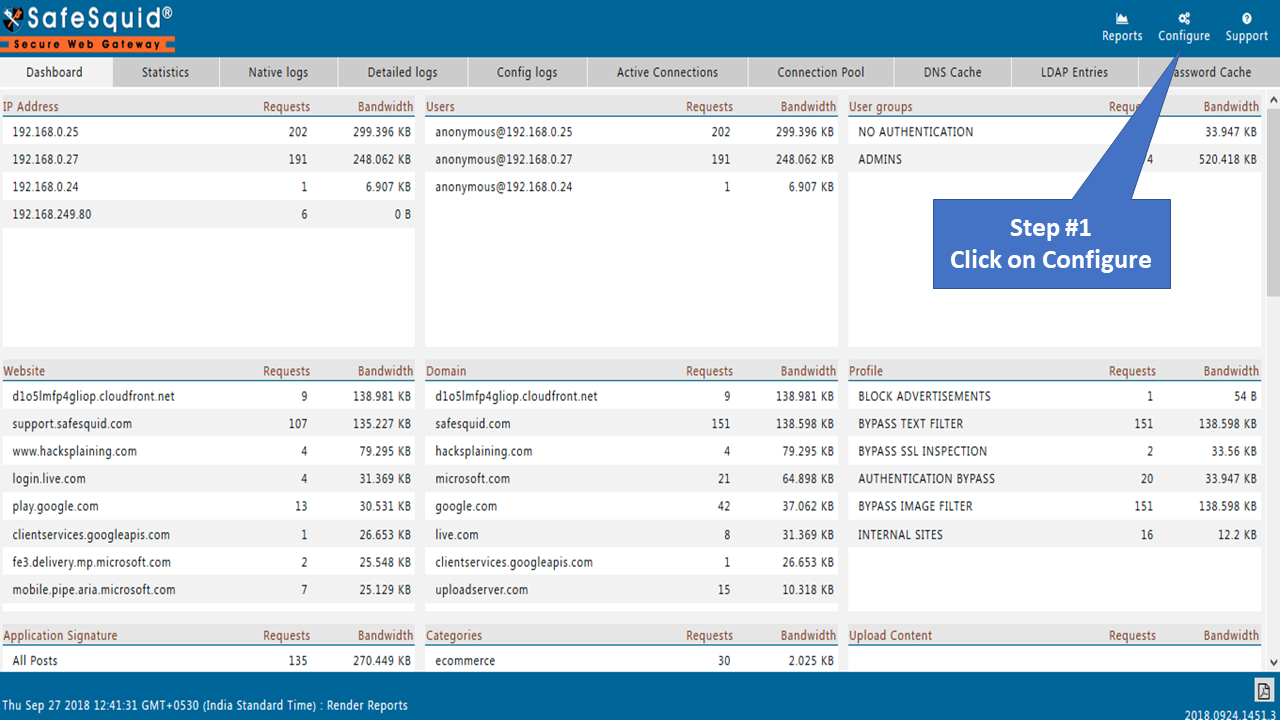
Go to configure page
|
 |
|
|
|
|
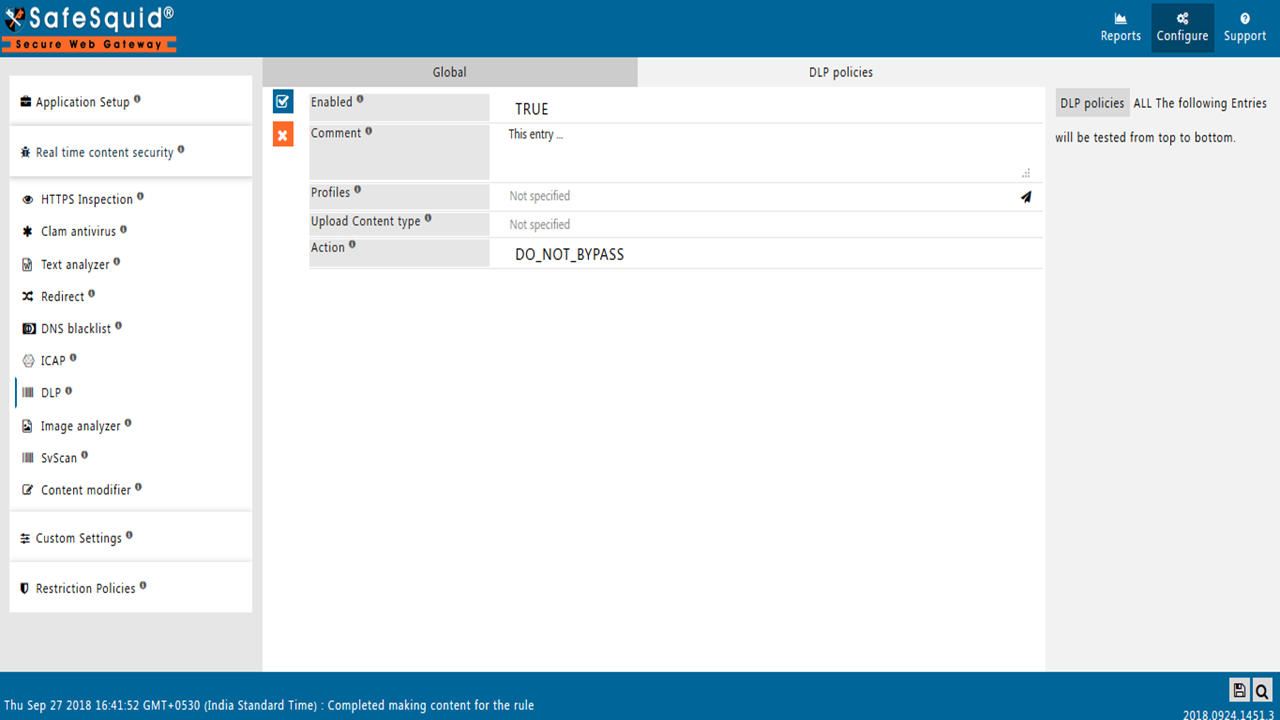
|
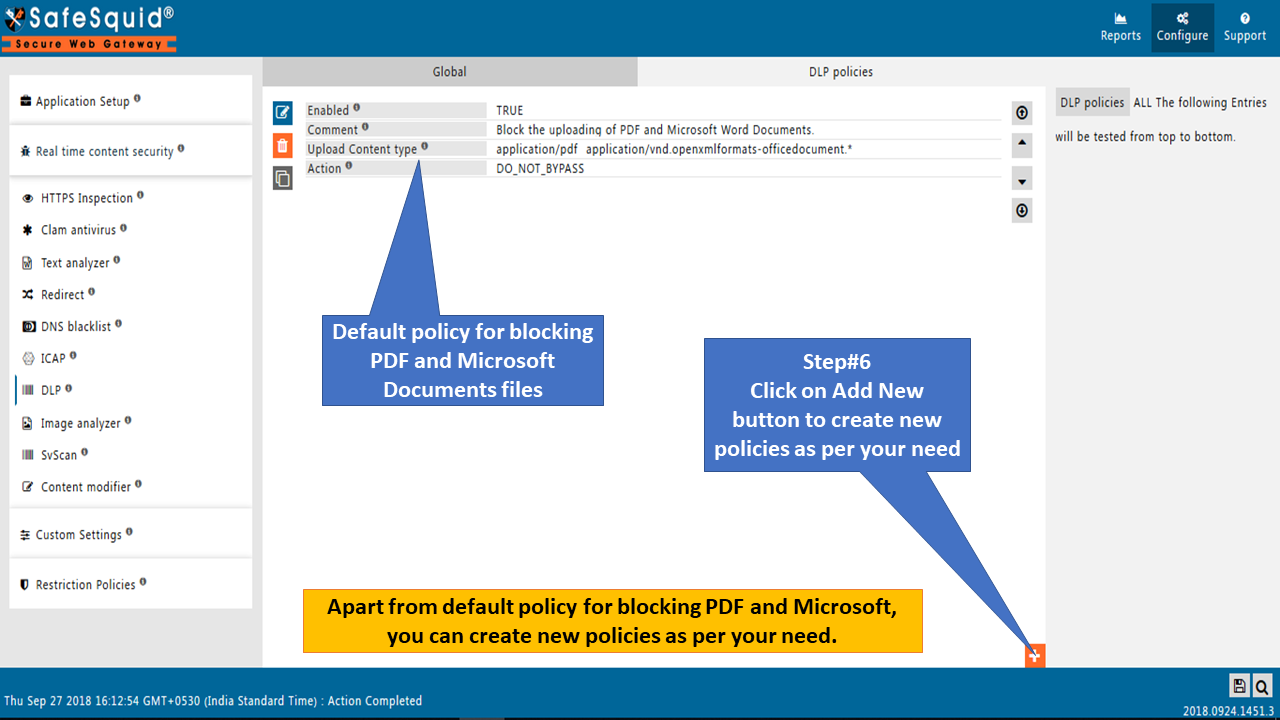
ALL The Following Entries will be tested from top to bottom.
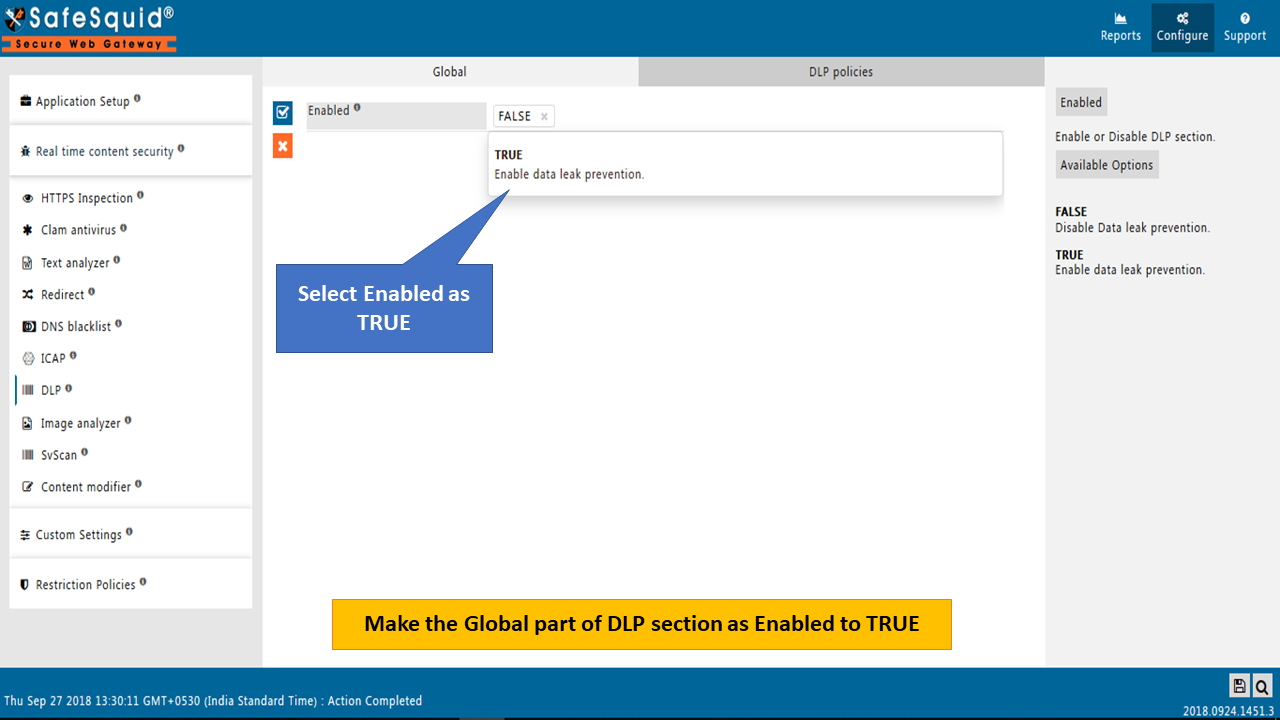
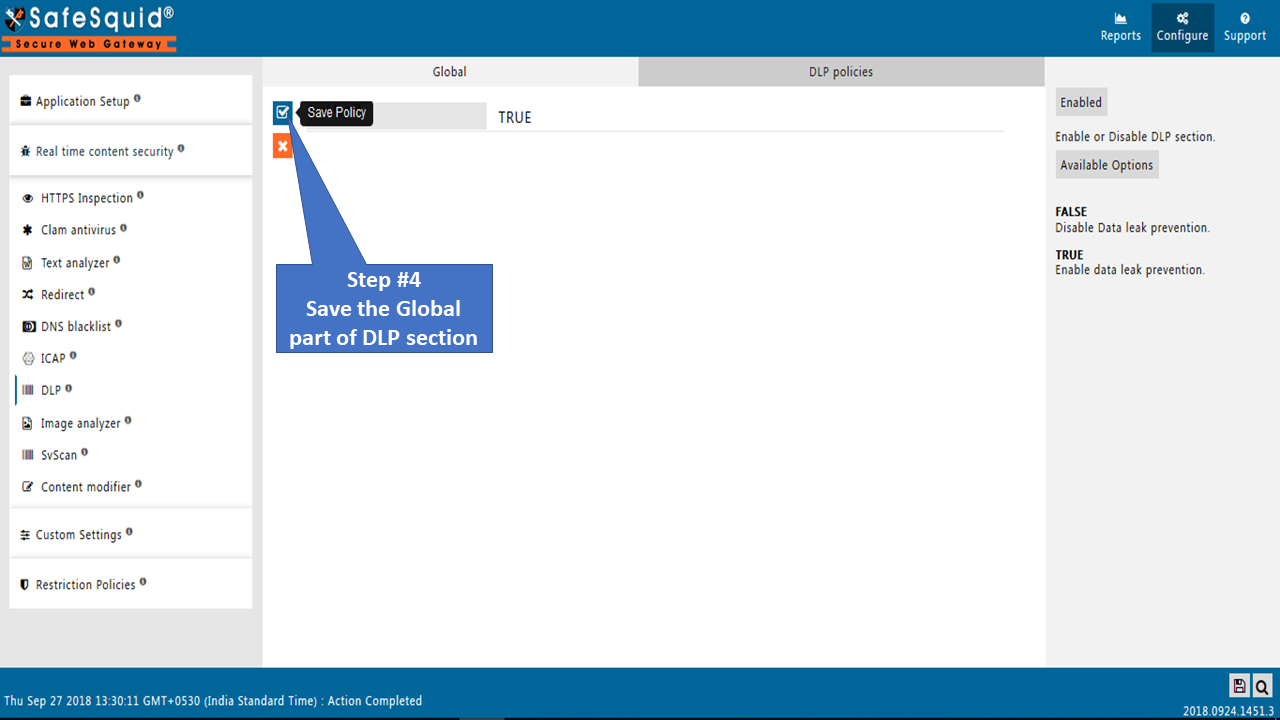
Enabled
Enable or Disable this entry.
- TRUE : Enable this entry.
- FALSE : Disable this entry.
Comment
For documentation and future references, explain the relevance of this entry with your policies.
That is, by reading the policies, a future user can understand the purpose of that entry.
Profiles
Specify the list of Profiles that should be applicable for this entry.
This entry will be applicable only if the connection has any one of the specified profiles.
Leave it Blank, to apply for all connections irrespective of any applied profile.
To avoid application to a connection that has a profile, use negated profile (!profile).
Upload Content type
Select the list of upload content types or content categories, to which this entry will be applicable.
The connection should have been already profiled to have one or more of these content types or content categories to match.
Use Negation "!", to match this entry, only when specified content types or content categories are not applied to the connection.
Leave it blank to match this entry irrespective of applied content types or content categories.
If you set this to "Image, Pdf, Audio, !Text, !Jpeg ", then this entry will be applicable to only those connections that have been profiled as Image, or Pdf, or Audio,
or not profiled as Text or Jpeg.
Action
Specify action to enforce on matched connections.
- DO_NOT_BYPASS : Select this, if you want to strictly block the websites.
- ALLOW : Select this, if you want to allow requests matching this policy.
- DENY : Select this, if you want to block requests matching this policy. Will not block the requests to those users who have allow bypass set from the access section.
Example
Rule#1
We want to block upload of all office files which are Macro Enabled for connections with profile “BLOCKED MACRO ENABLED FILES”
Office file which are macro enabled – ms-word, ms-excel, ms-powerpoint.
When users try Uploading macro enabled documents it will result in a failure.
Rule#2
I want all audio and video files to blocked when tried to upload.
Upload of audio and video file will only be blocked for connections with profile “Block All Audio&Video Files”
Rule#3
I want to allow upload of all office documents for only users who are part of user-group "HR Group".
All office documents will be allowed to upload only for user-group "HR Team".
