Setup VPN with SafeSquid Web Security Client
Overview
SafeSquid web security client enables remote users to connect to private computer networks to gain access to their data in a secure way. The users gets authenticated from your LDAP server with IP assigned by the SafeSquid VPN server. For example, an employee traveling or working from home can use SafeSquid web security client to securely access the office network through the Internet. Instead of remotely logging on to a private network using an unencrypted and unsecure Internet connection, the use of a safesquid web security client ensures that unauthorized parties cannot access the office network and cannot intercept any of the information that is exchanged between the employee and the office network. When client requests a webpage then request comes to the web security client installed in client machine without setting proxy settings in the browser.
Prerequisites
- Go to SafeSquid Subscription server https://key.safesquid.com/
- Generate Activation key, download and save it.
- Manage SSL Trusted Root Certificate Authority
- Deploy SafeSquid - Getting Started
- Once installation get completed access SafeSquid Web Interface using http://safesquid.cfg/
- Activate your Product
Server Side Configuration
- Enable HTTPS inspection on SafeSquid Interface
- Note : No need to download and import your SSL certificate into Chrome or IE, in HTTPS configuration because it will import automatically.
- Integrate your LDAP server with SafeSquid for LDAP authentication.
- Integrate your PAM service for PAM authentication in case you don't have Active Directory for LDAP configuration. Add PAM user and set password.
- Manage VPN settings
- Download VPN binary http://downloads.safesquid.net/VPN/safesquid_vpn_latest.tar.gz and upgrade from the interface
- Start openvpn service using following command
/etc/init.d/openvpn start
|
- Verify openvpn service status using following command
/etc/init.d/openvpn status
|
- Enable captive portal port on SafeSquid
- Restart SafeSquid service
- Verify redirection policies using following command (On Linux Box)
iptables -L -v -n -t nat
|
- If redirection policies are not found then follow SafeSquid Sever
- If redirection policies found follow steps Enable forwarding in /etc/sysctl.conf and Reload settings from SafeSquid Sever
Client side configuration
- Add FQDN of proxy server in your hosts file of the system where you are running the installer at given path
- Path:C:\Windows\System32\drivers\etc
Note: If your OPEN VPN server is setup on public IP address , and your set URL(FQDN of SafeSquid Server) is resolved then no need to do above step.
|
Copyright (c) 1993-2009 Microsoft Corp. localhost name resolution is handled within DNS itself. |
- Remove proxy setting from (IE and Chrome) browser before installing websecurity client.
- Download web security client http://downloads.safesquid.net/VPN/websecurity.exe
- Install web security client
Testing
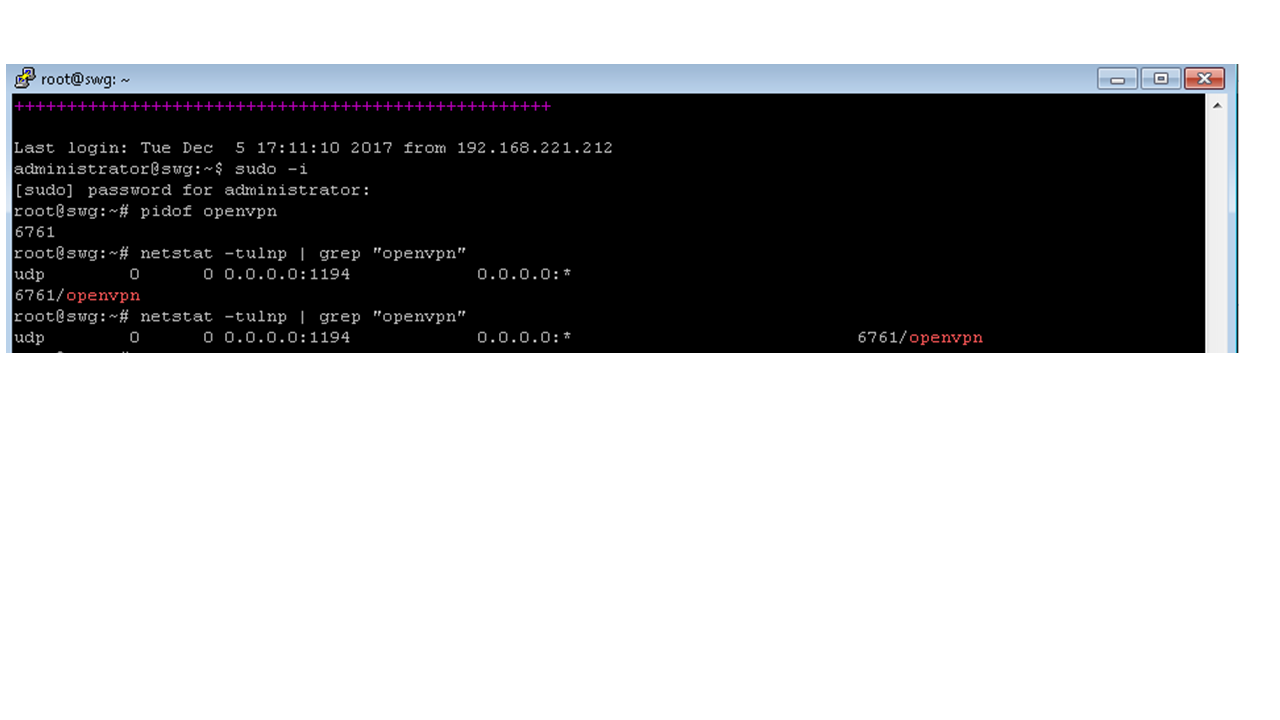
- Go to SafeSquid server and run the below commands:
pidof openvpn (or) netstat -tulnp | grep "openvpn" |
 |
- Check openvpn logs by using below command
tail -F /etc/openvpn/openvpn.log
|
|
root@sabproxy:~# tail -f /etc/openvpn/openvpn.log Mon Dec 26 19:20:10 2016 UID set to nobody |
- Check your WebSecurity Service status from Windows Service Manager.
- If it stopped then check your "C:\ProgramData\websecurity\config\" directory.
- You must see two files client .sovpn and ca
- Check the safesquid certificate in IE and chrome browser. By default websecurity client installs certificates in IE and chrome.
- Import the certificate in Firefox using the steps shown in the installation document WebSecurity installation guide downloaded above.
- Once the installation is successful, open your browser and start surfing.
- Your traffic should flow through SafeSquid.
- Verify SafeSquid logs to ensure traffic flow.