Integrate AD
Overview
After successfully installing AD on the machine we need to set up our AD. In this document we will show you how to set up Active Directory and add new users/ groups/ computers in our AD. After that we will have to link our LDAPAdmin with Active Directory. Now finally we need to integrate our LDAP with SafeSquid and we will be able to see all the created users and user groups in our SafeSquid dashboard.
Prerequisite
- Need to have SafeSquid installed in your system.
- Install LDAP Admin in your machine link to download: http://www.ldapadmin.org/download/ldapadmin.html .
- Need to have the windows Server up and running on a VM or any machine and must be connected to the internet.
- AD needs to be installed, activated and running on the server.
- Follow this link to install AD and activate AD in windows server: http://pc-addicts.com/setup-active-directory-server-2016/ or
this link: https://dinika-15.medium.com/installing-active-directory-on-windows-server-2012-r2-e9e614770588
Client Scenario
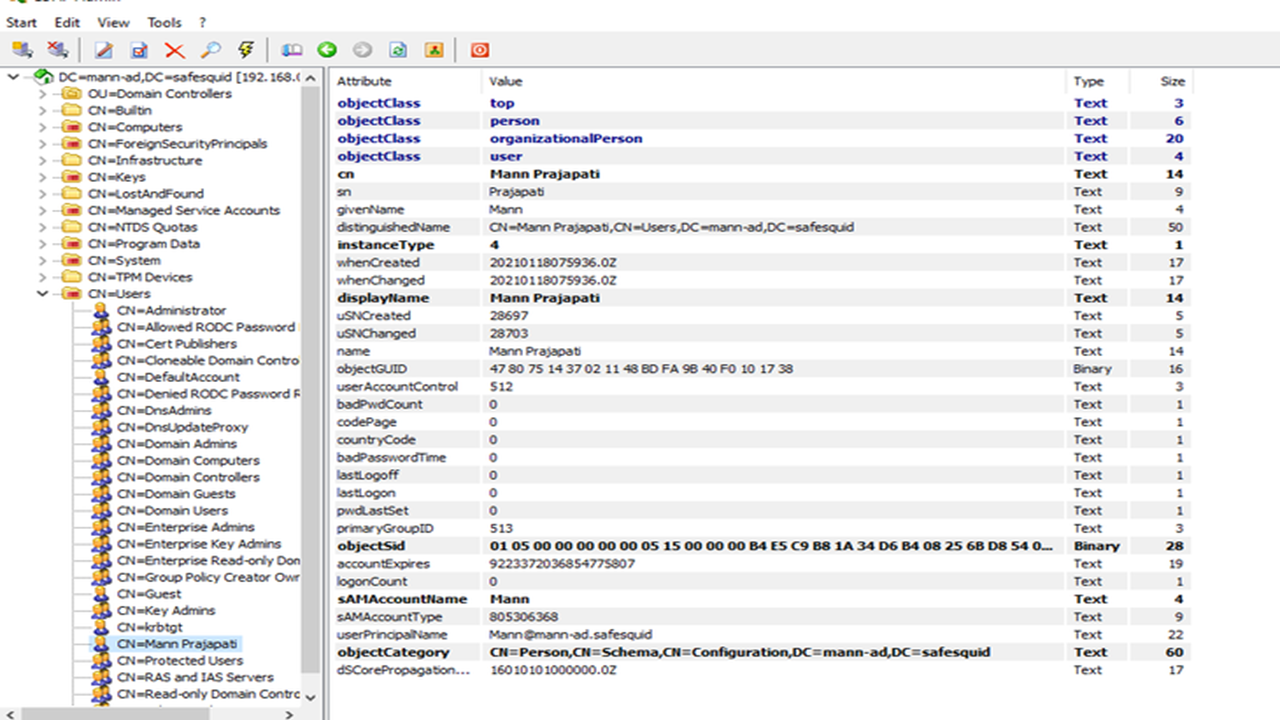
Here we will create a Active Directory named mann-ad.safesquid. Then we will create a new user who's First Name is 'Mann' and Last Name is 'Prajapati'. This user's directory will be mann-ad.safesquid and his Logon name will be 'Mann'. After this while linking LDAPAdmin with AD we will give the Connection Name as 'SafeSquid AD' and the Host IP as 192.168.0.108. In the Base section we'll enter 'DC=mann-ad, DC=safesquid'. Now while creating account at the end set the Username as Administrator@mann-ad.safesquid and put a strong password. Next step is to integrate LDAP with SafeSquid. So in Ldap Basedn enter 'dc=mann, dc=safesquid' and in Ldap Domain enter mann.safesquid.
Procedure
Step 1: To add or view the users
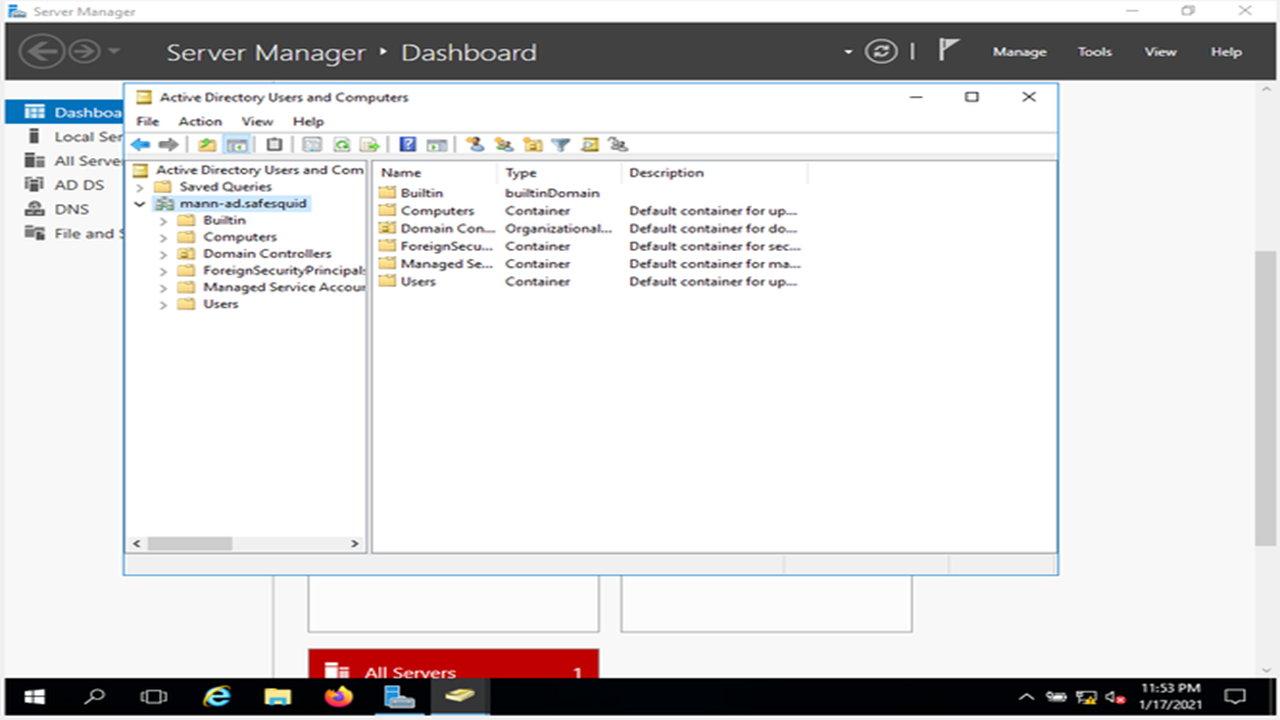
- Click on Active Directory Users and Computers.

- You will see your AD.
- You can add new users, groups, computers etc. by right clicking on the user icon and select the required choice.
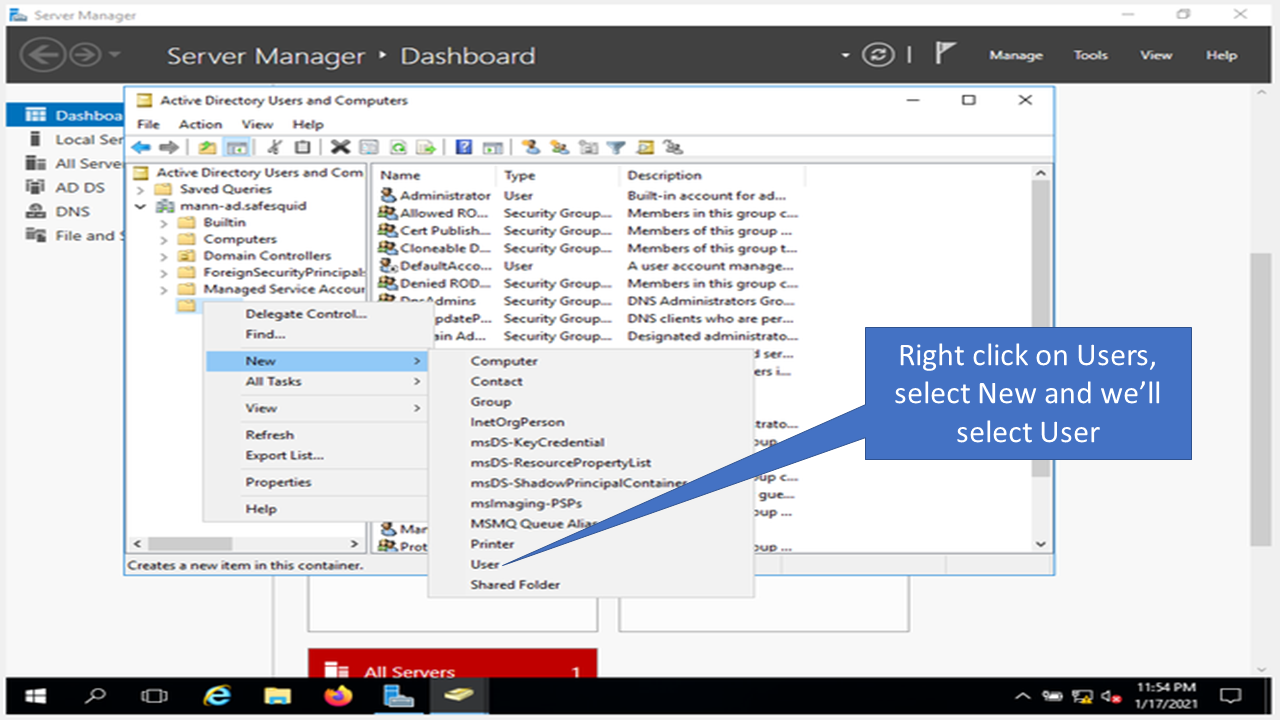
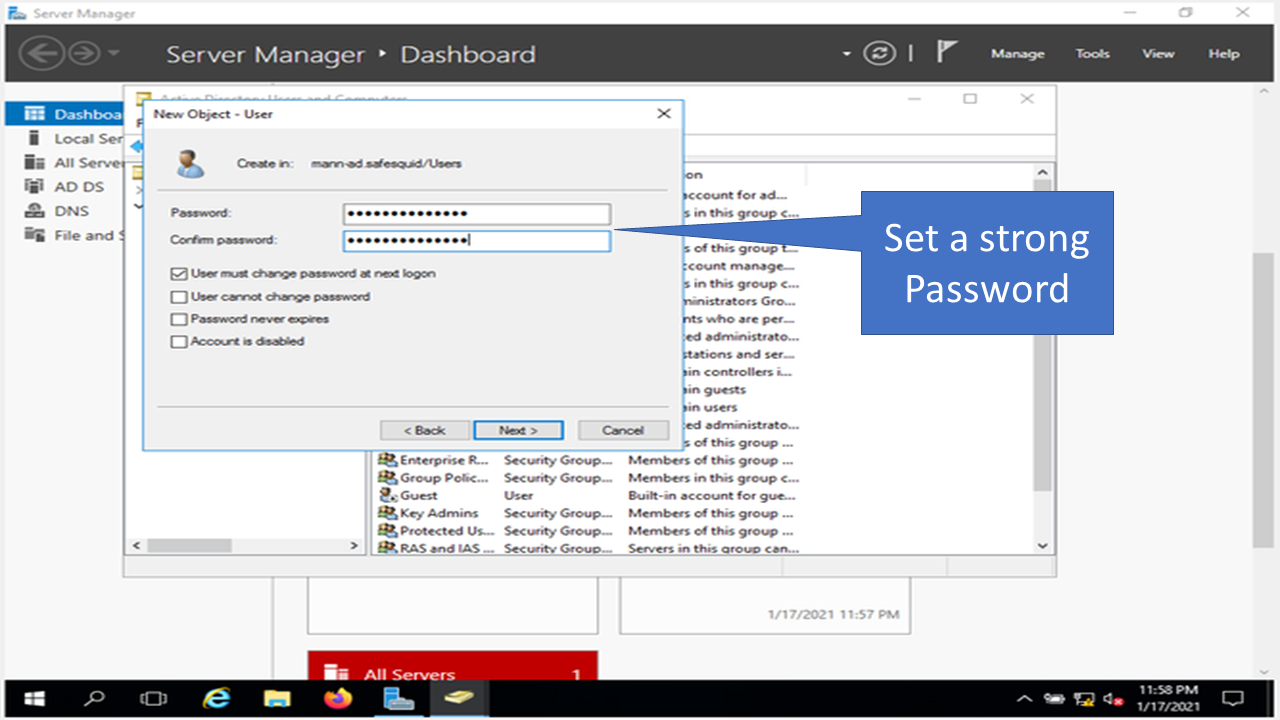
- For example to create user select the user option and enter required information.
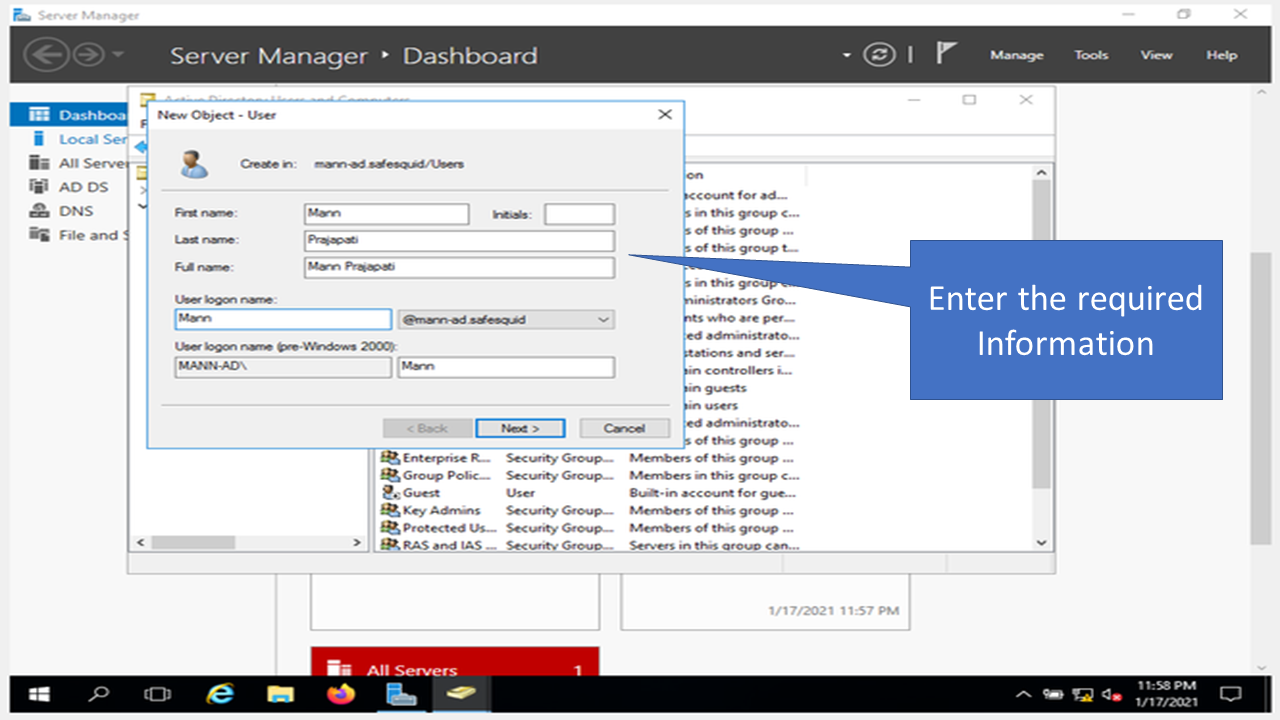
- Enter your password. Then click on finish.


Step 2: Linking LDAPAdmin with AD
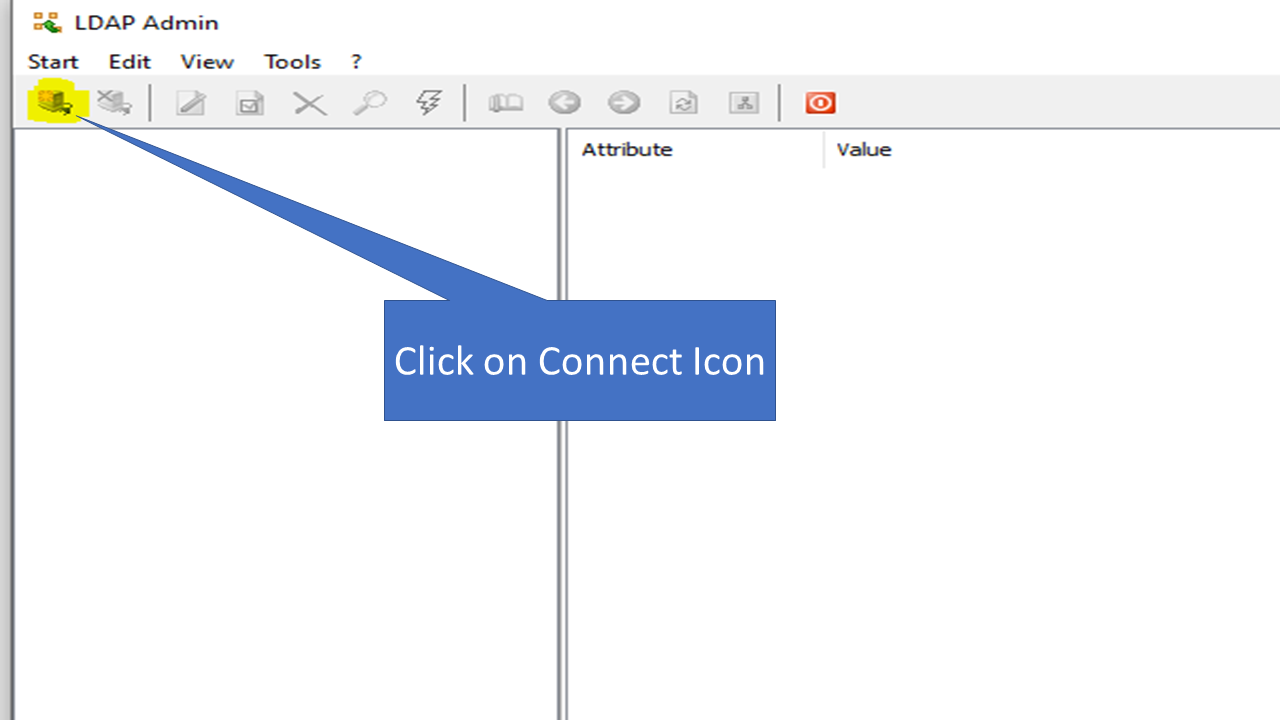
- Click on the connect Icon on the top left corner.
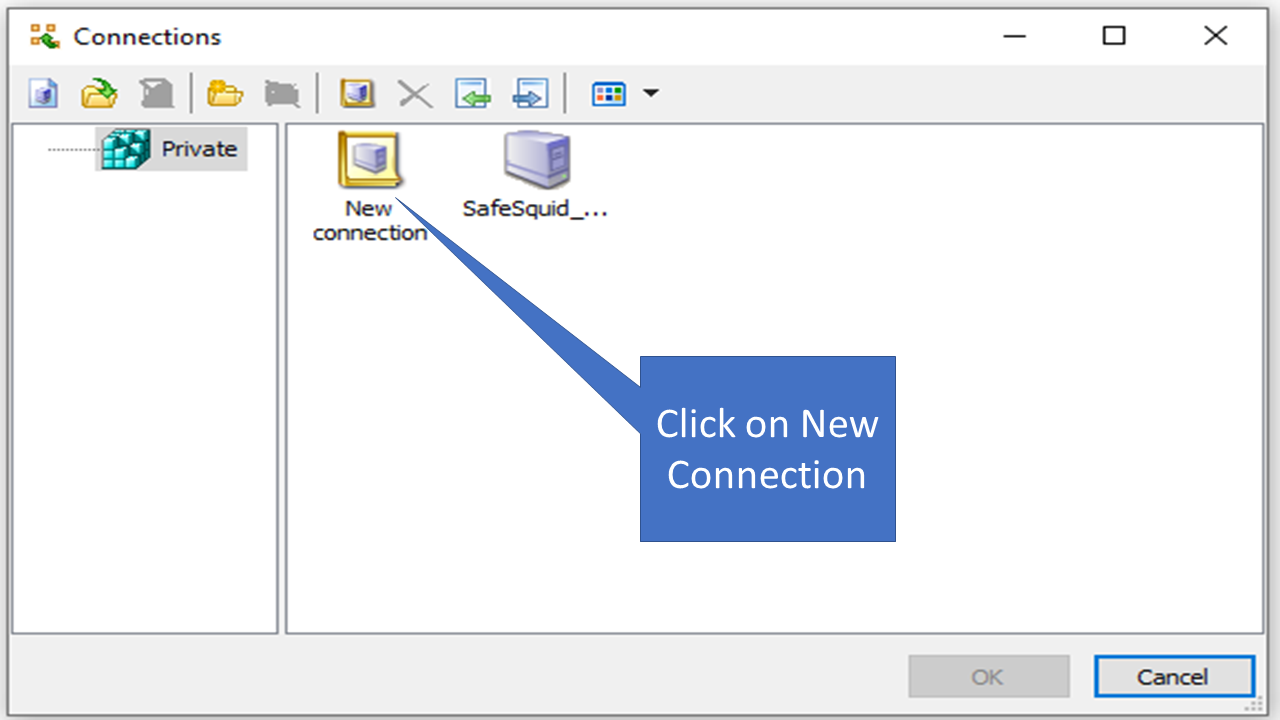
- Click on new connection.
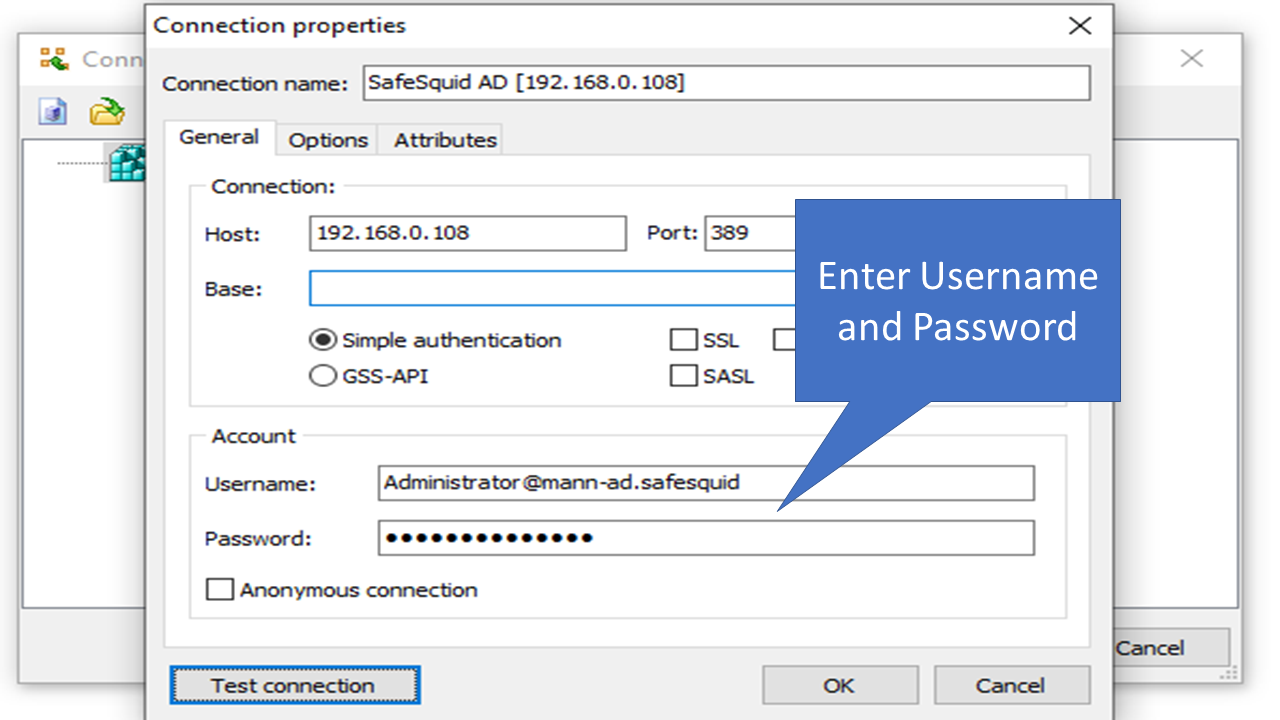
- Enter the required details in the fields.
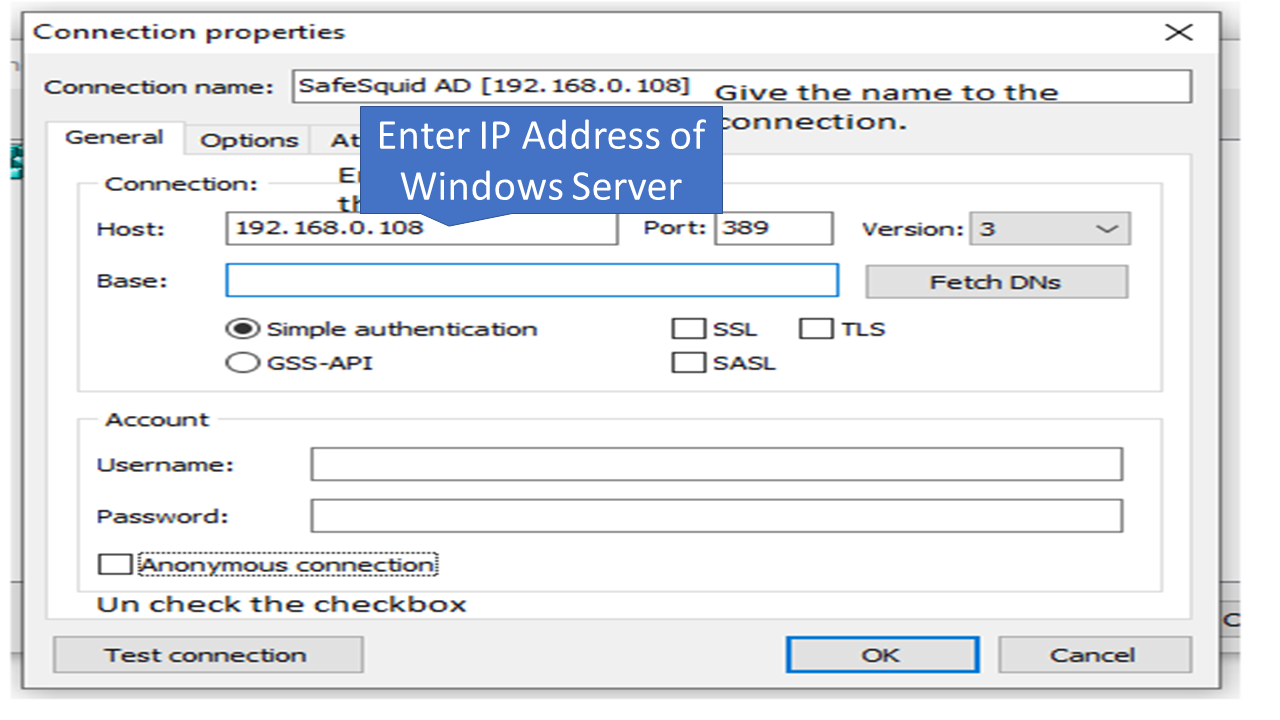
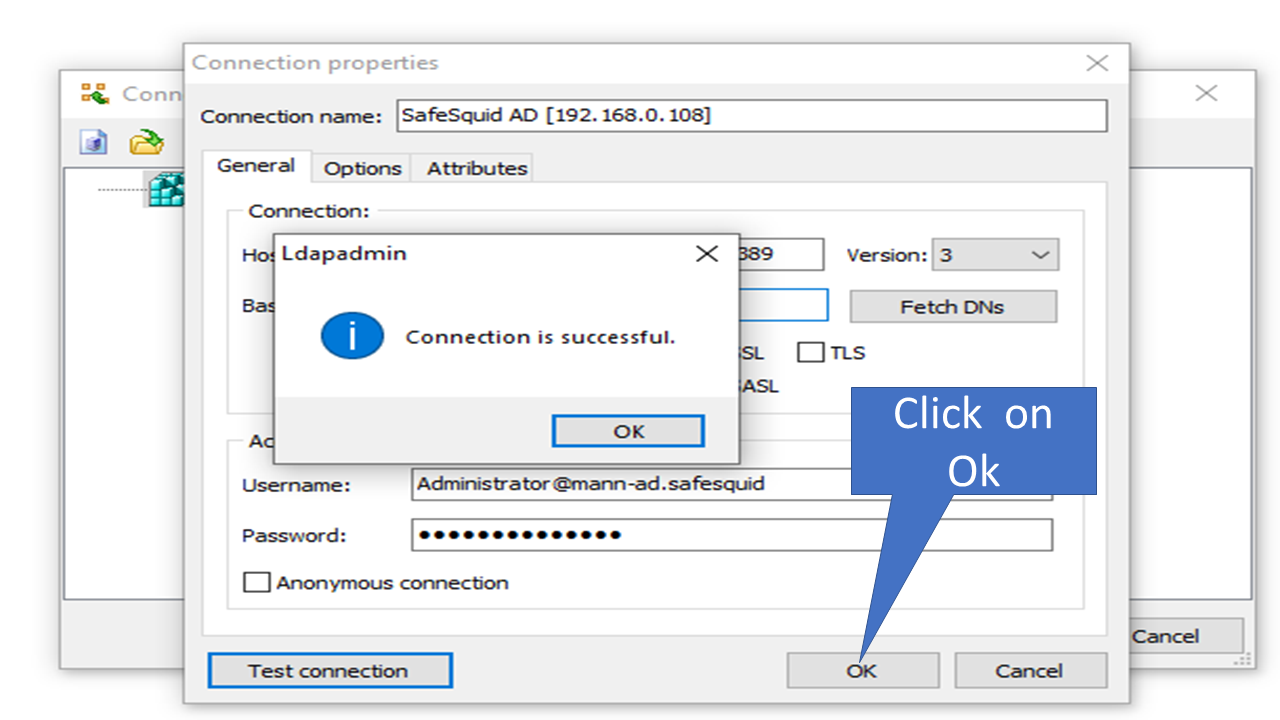
- Enter the Username and the password of the Account of the Windows Server. And click on test connection. If anything goes wrong, then check whether you have provided correct details or not.
- Click on Ok.
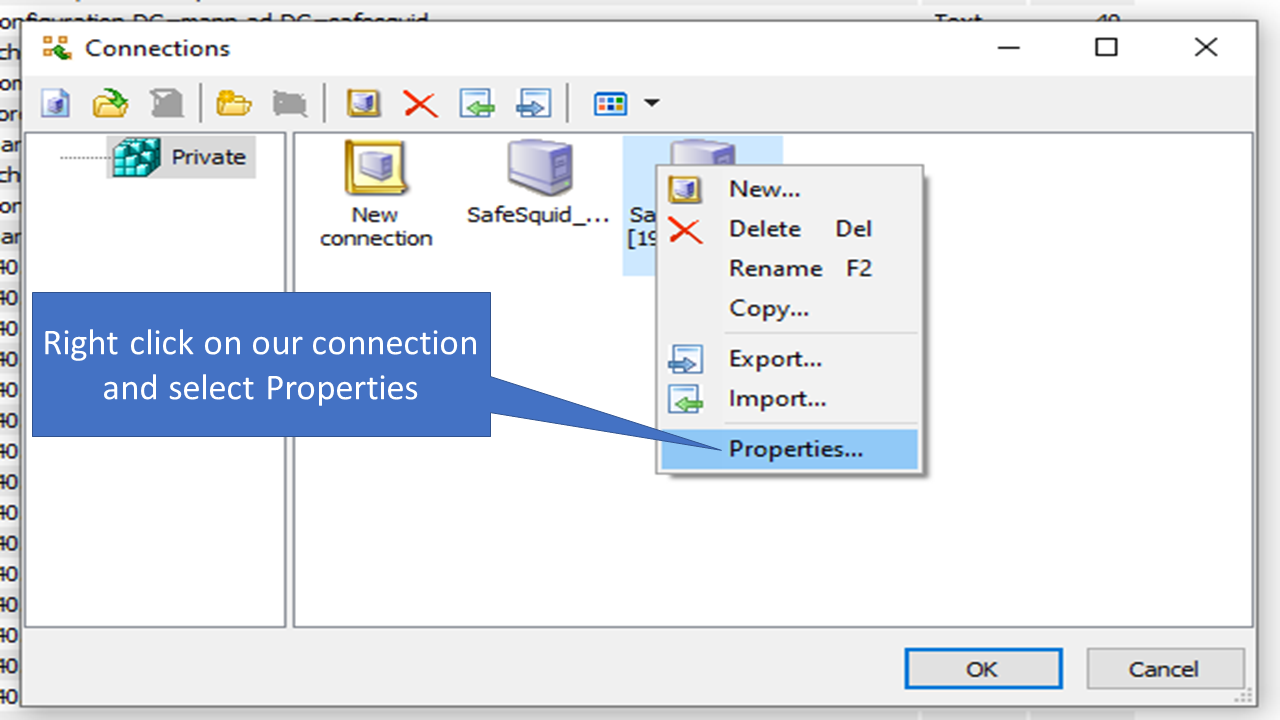
- Double click on the connection you will see something like this.

- But we don’t want this so go back and right click on the connection and click on properties.
- Now click on Fetch DNs and select the first one.
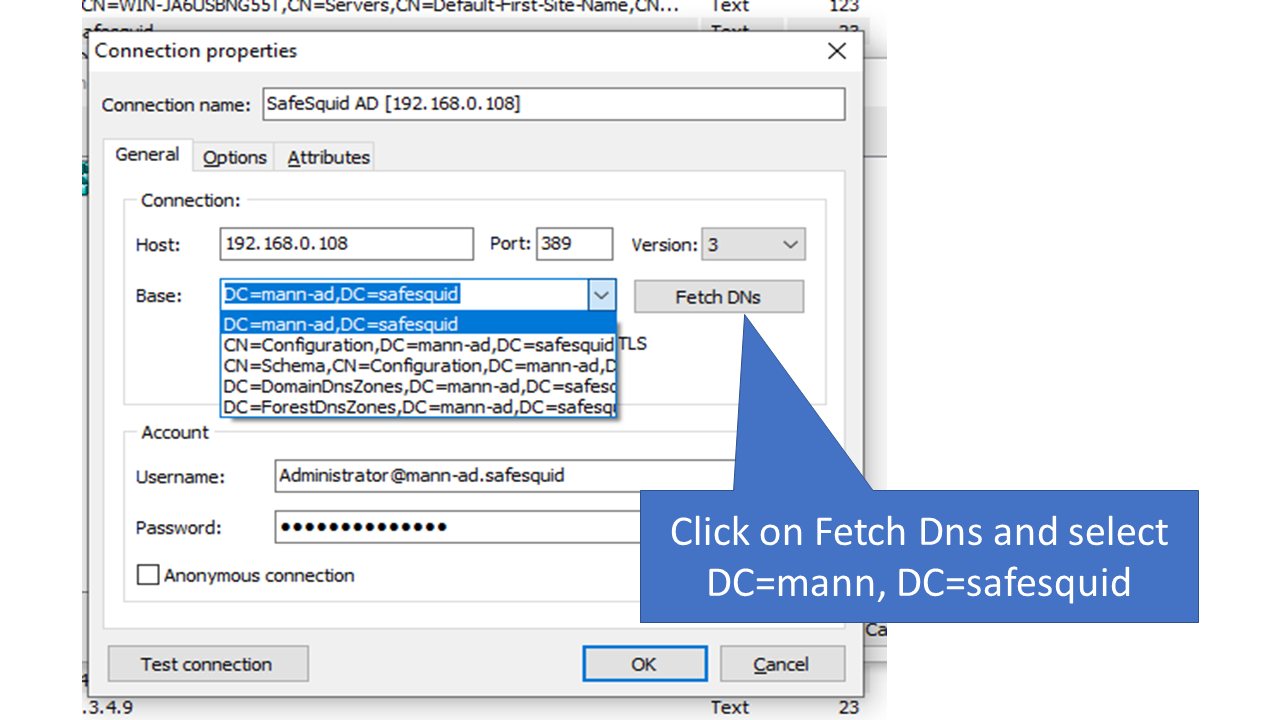
- Now you will see the list of all the users.


Step 3: Integration with SafeSquid
- Now go to http://safesquid.cfg/ and click on configure.
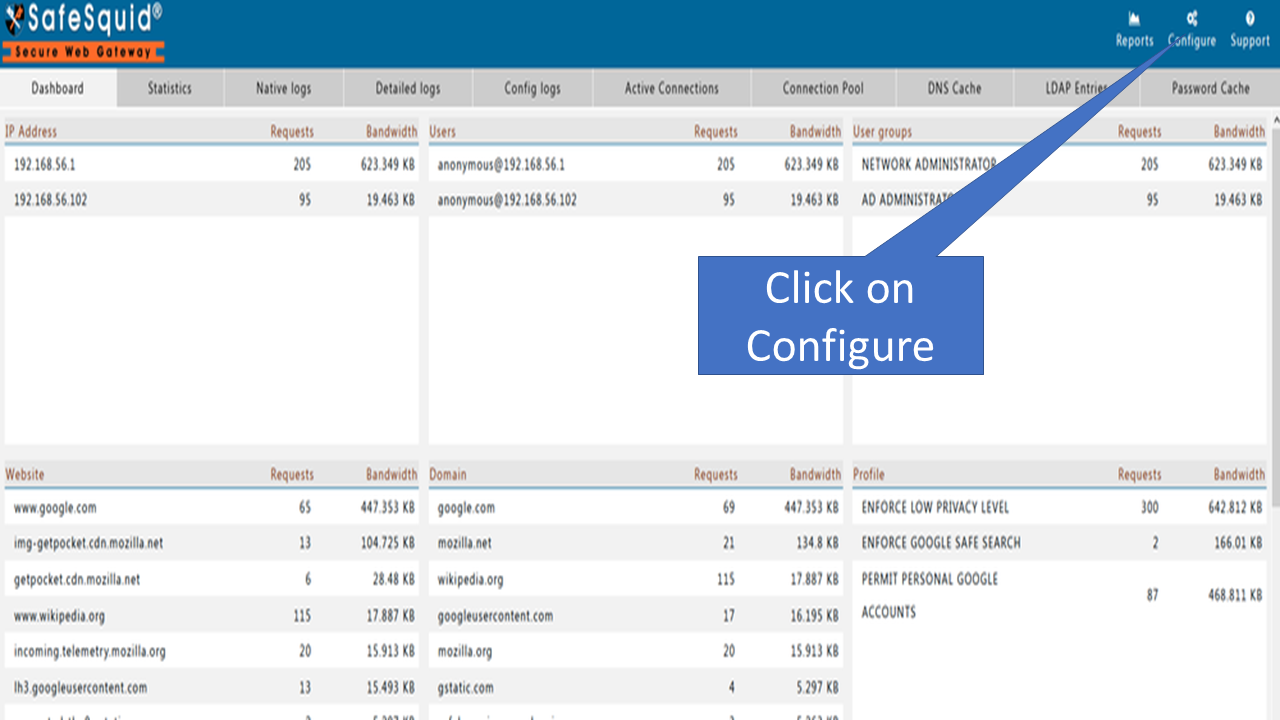
- Click on Application Setup and then click on Integrate LDAP.

- Click on add new ‘+’ icon on the bottom right corner.
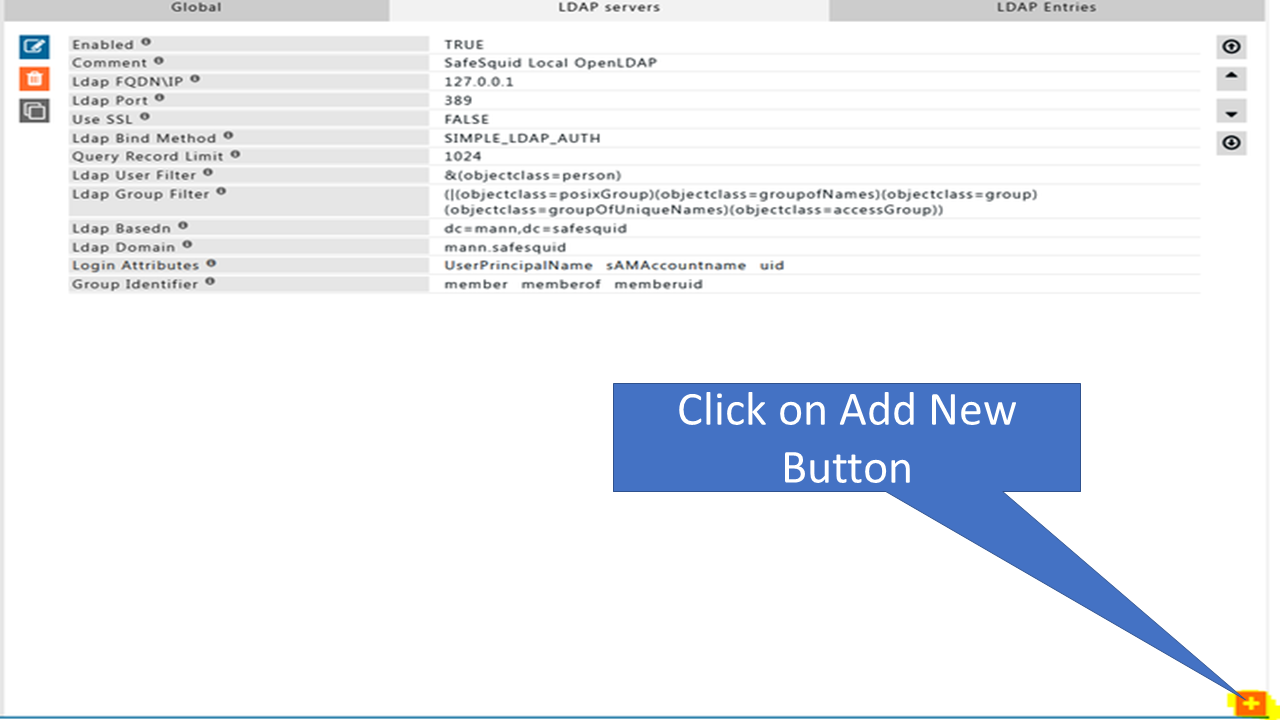
- Enter the following details
For password click on the black arrow.
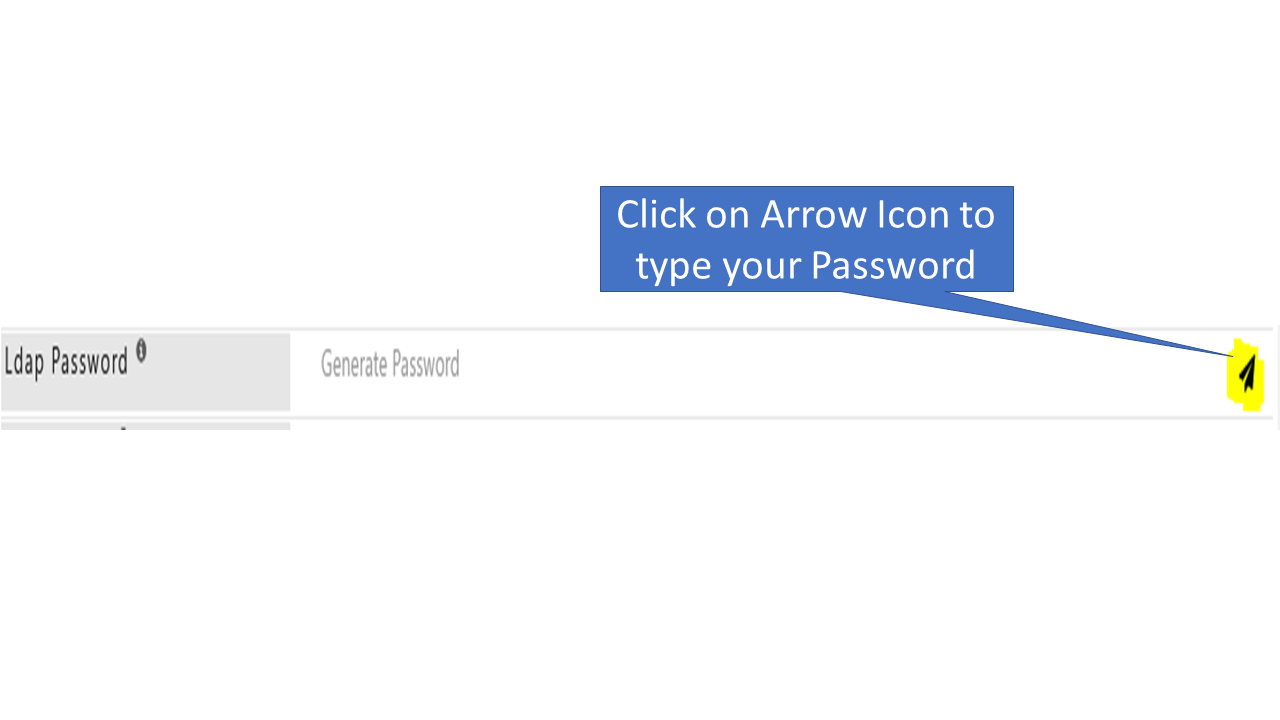
And enter the Windows Server password and confirm it.

Fill the following details according to your Configuration.
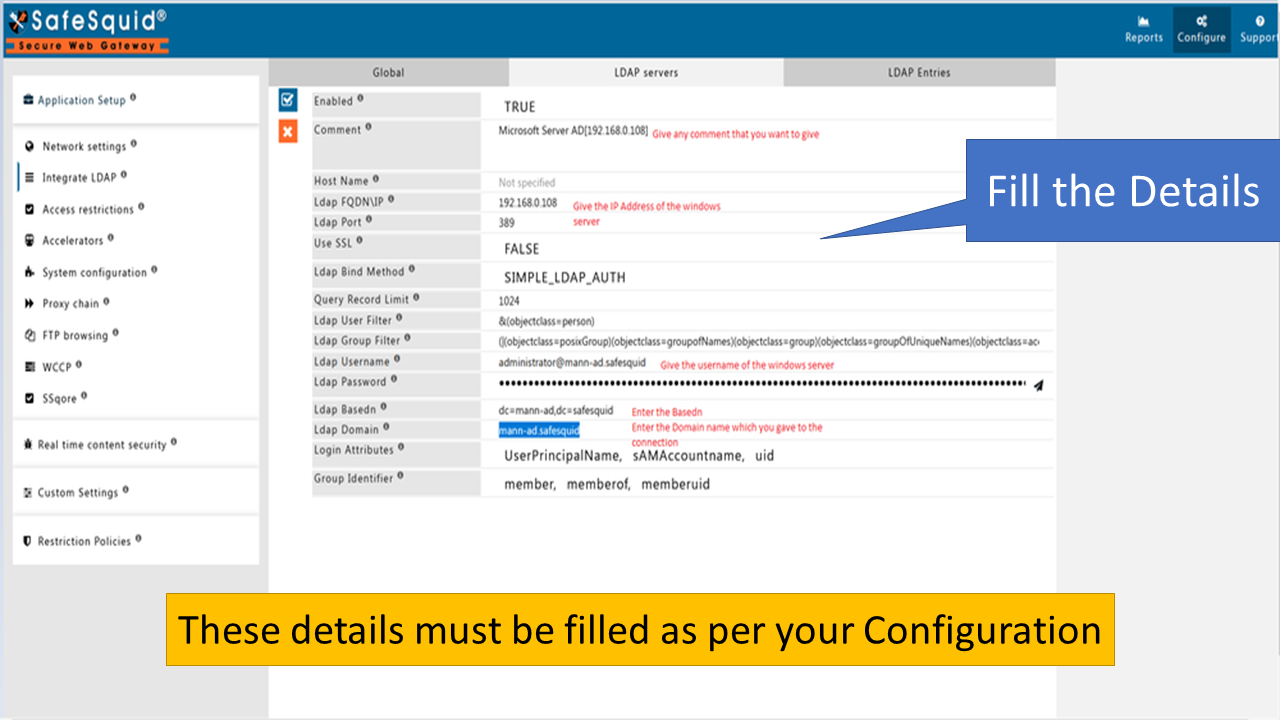
- Click on Blue tick mark and then save it.
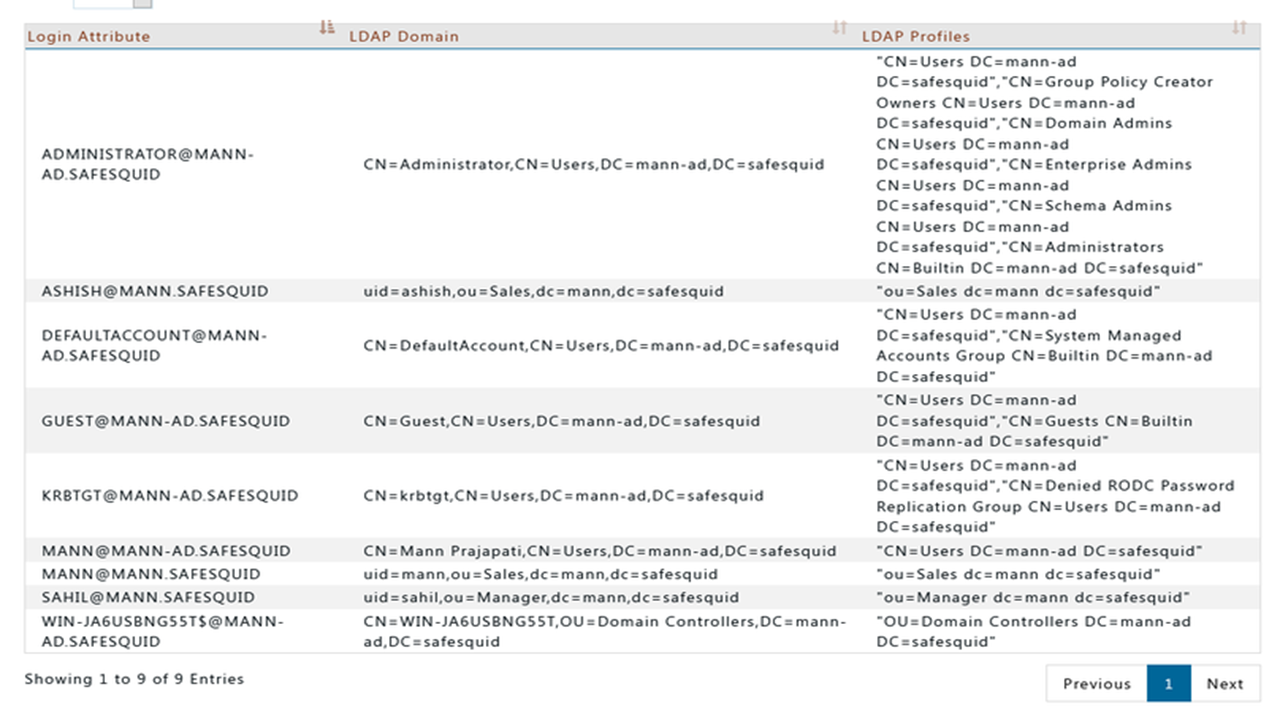
- Now select the LDAP Entities.
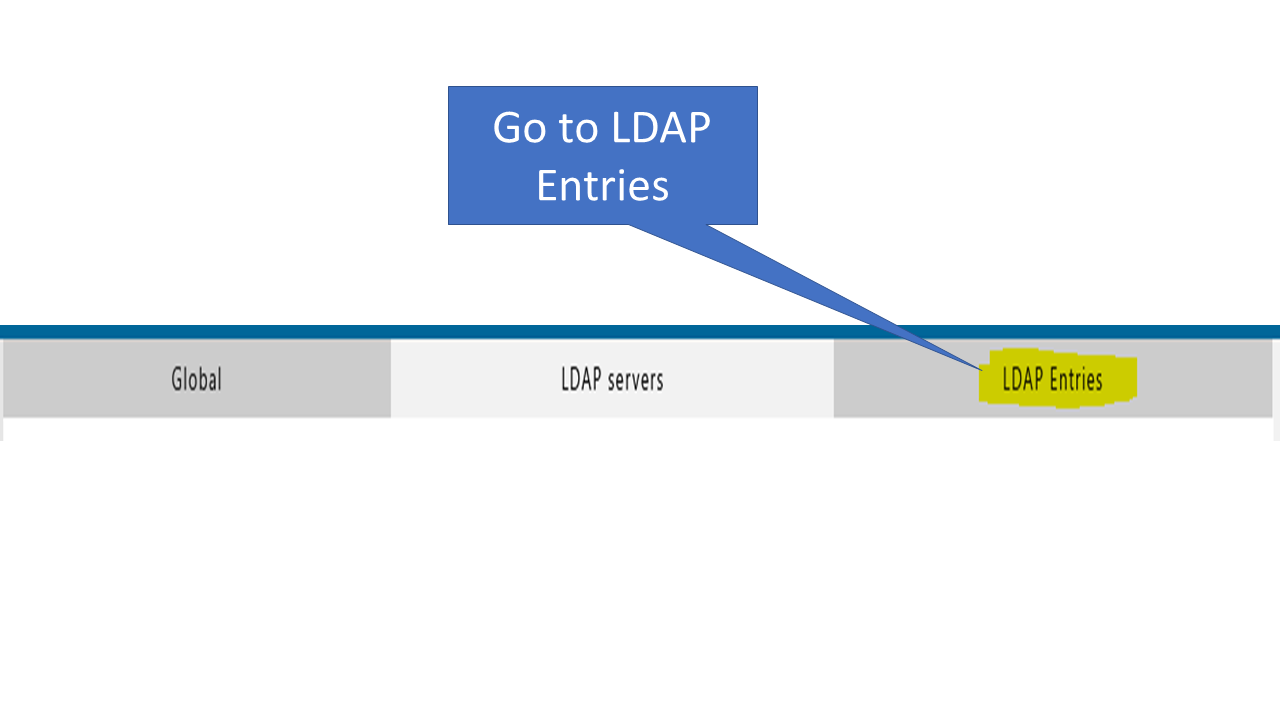
- And You will see the list of all the users.