Difference between revisions of "Integrate Active Directory For SSO Authentication"
en>Santosh.thorat |
m (1 revision imported: Importing all pages) |
(No difference)
| |
Latest revision as of 15:36, 24 July 2021
Overview
In given example we are integrating an Active Directory for SSO authentication.
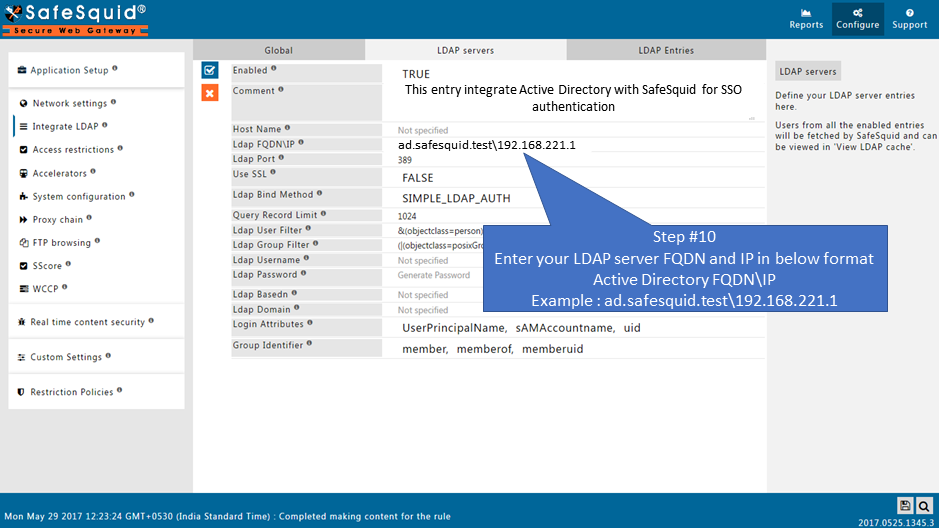
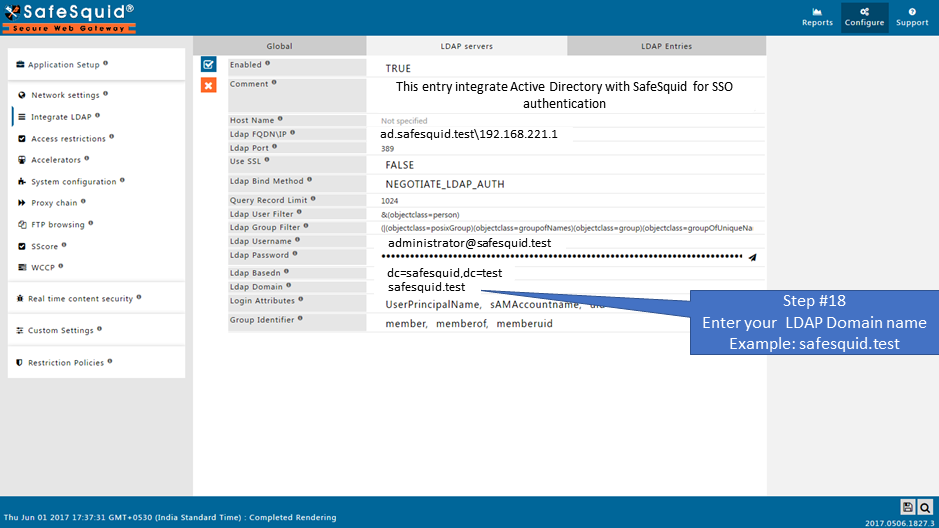
Your Active directory (AD) FQDN: ad.safesquid.test (You should get your AD FQDN from this location : AD ( Start > Control Panel > System > Full Computer name))
Your Active directory (AD) IP Address : 192.168.221.1
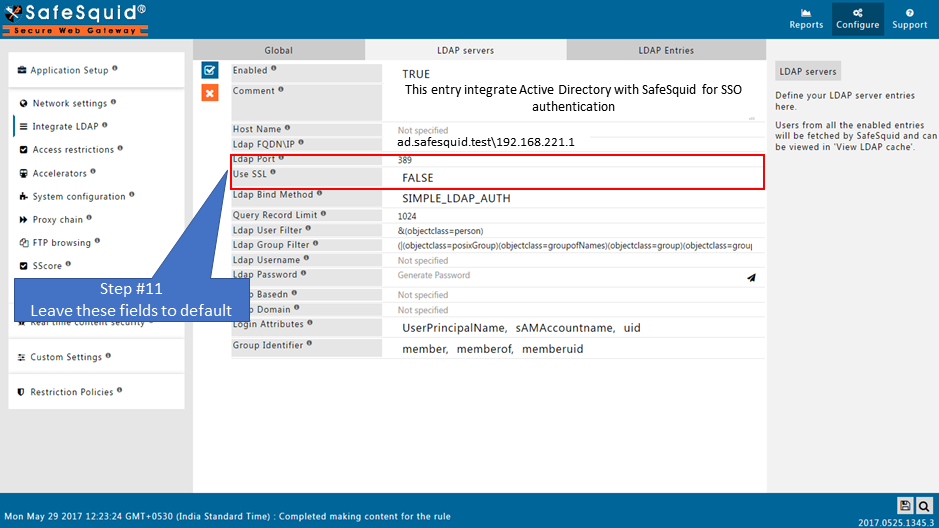
Domain of Active Directory (AD) : safesquid.test
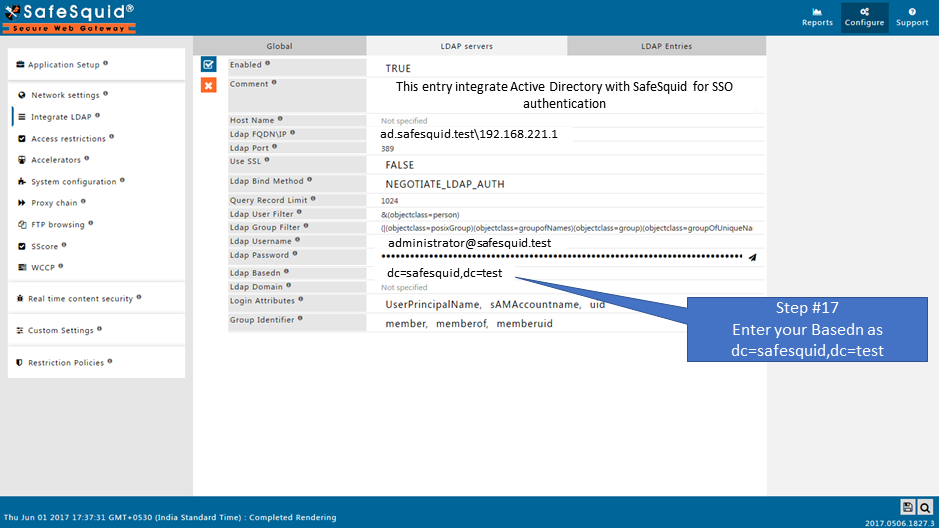
Base Dn of AD : dc=safesquid,dc=test
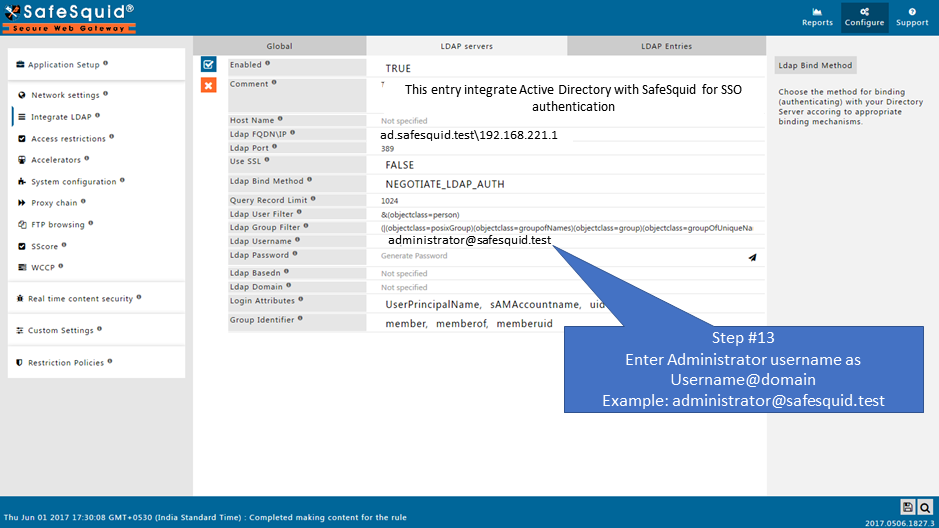
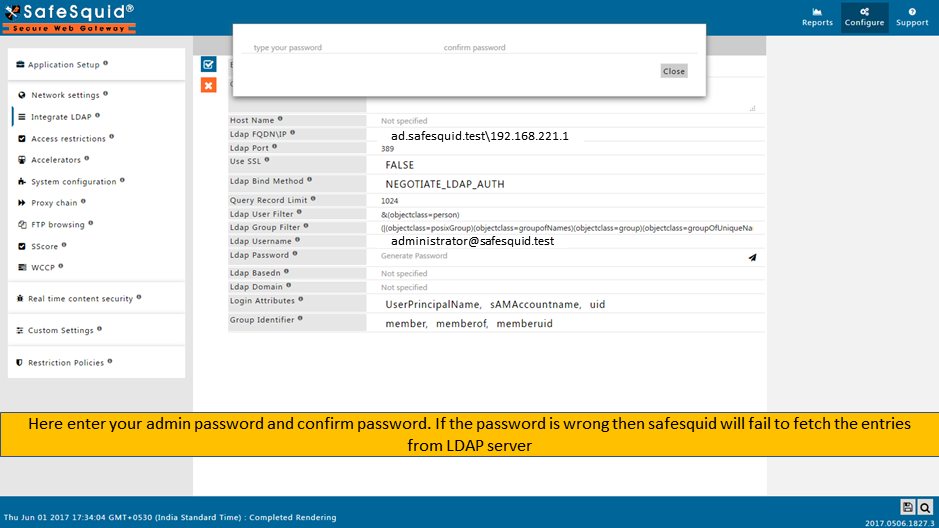
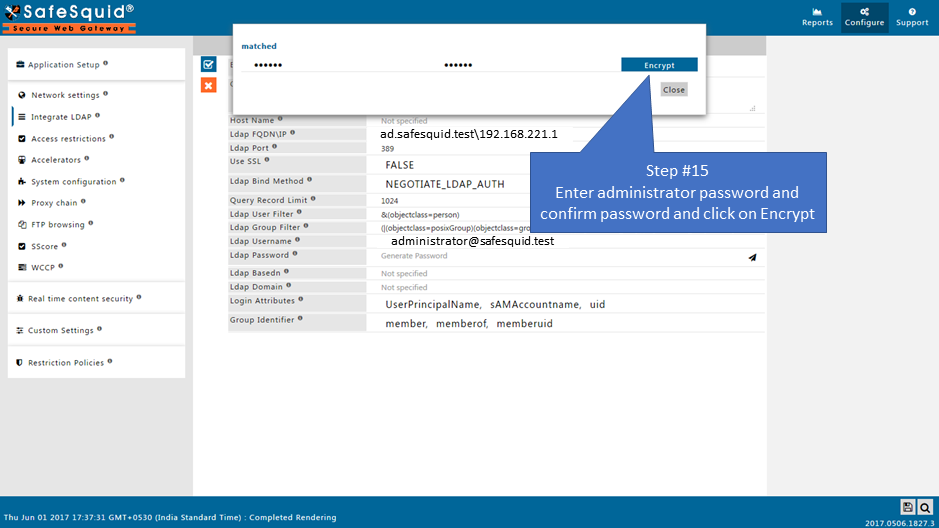
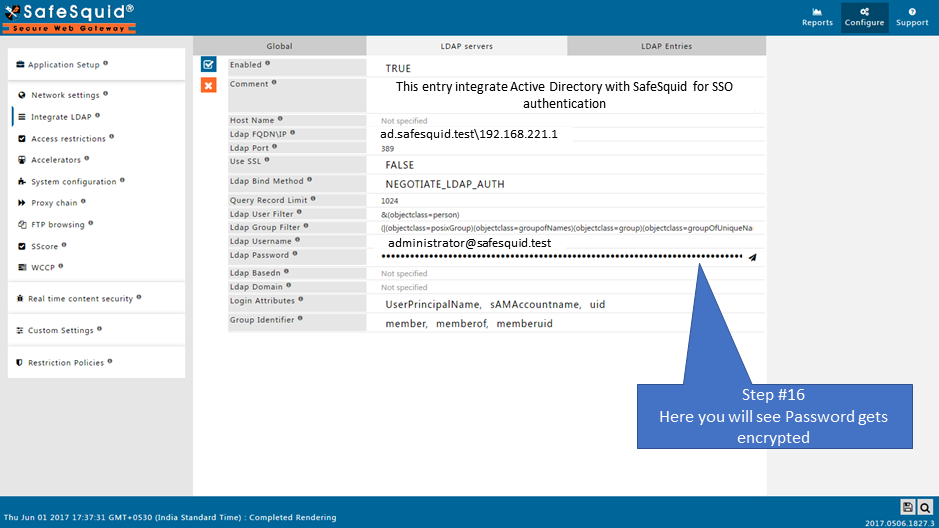
User Name : administrator@safesquid.test (User name should be any user from AD having administrative permissions)
Monit service must be Up. Verify it using command :
|
root@sabproxy:~# |
See more about Integrate LDAP section, here we explained the working of each field in the Integrate LDAP section.
Prerequisites
Make sure that all the values (LDAP server FQDN, LDAP server IP, Username, password, base dn, domain ) while configuration are correct. If any value is inappropriate then SafeSquid will fail to fetch the entries.
Step 1 : Specify Name Server Addresses. Follow Link
Step 2 : Specify Time Synchronization Server. Follow Link
(Note: Time Synchronization of AD server and Proxy server should be same. Verify it using "date" command)
Step 3 : Add DNS entry of SafeSquid server in your Active Directory Server. Follow Link
Step 4 : Make sure that your AD Domain must be resolvable from all clients and SafeSquid Server. For troubleshooting. Follow Link
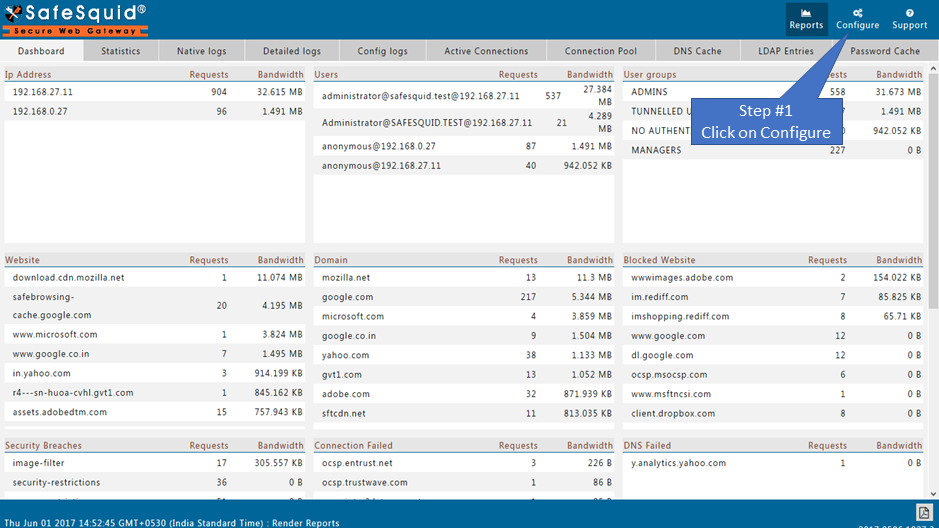
Access the SafeSquid User Interface
|
|
|
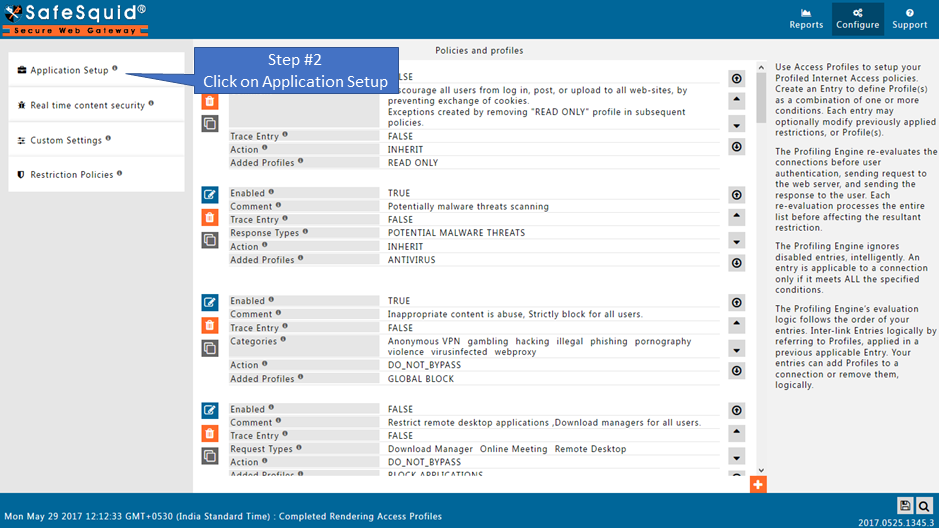
Go to Application Setup |
|
|
|
|
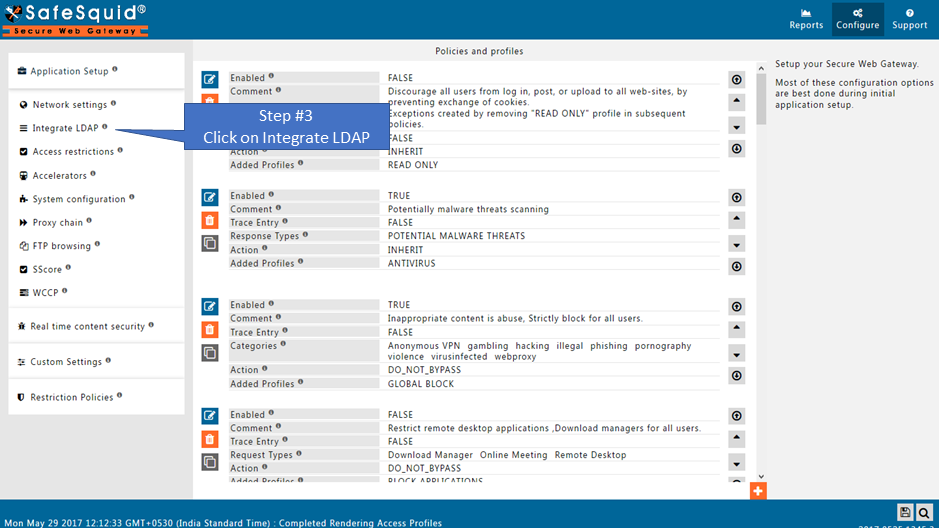
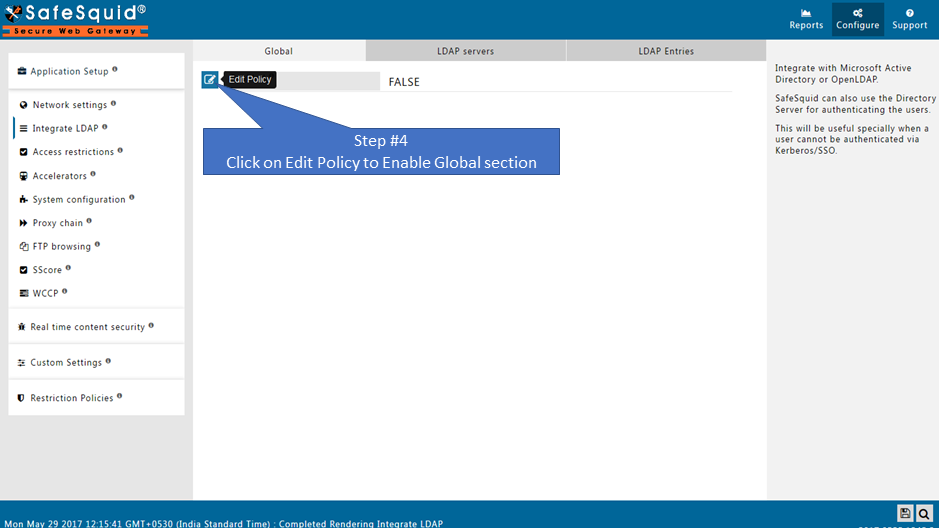
Go to Integrate LDAP |
|
|
|
|
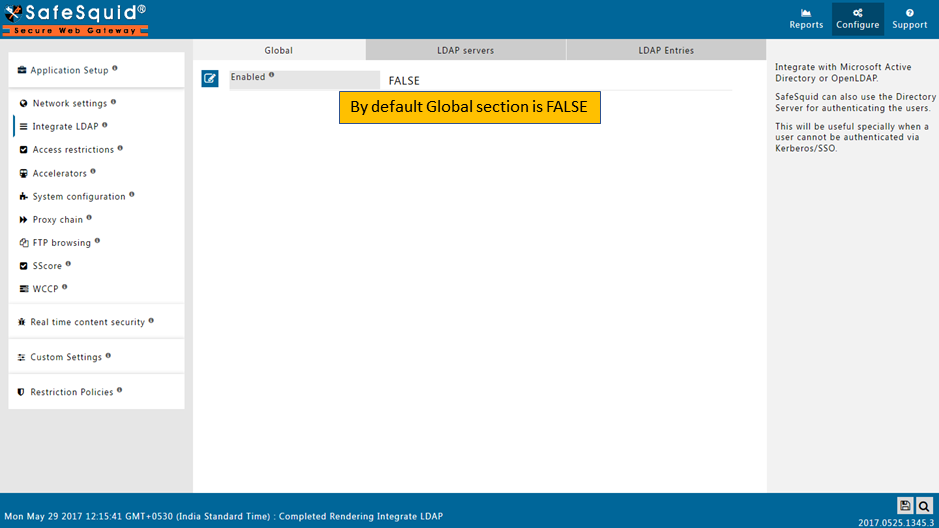
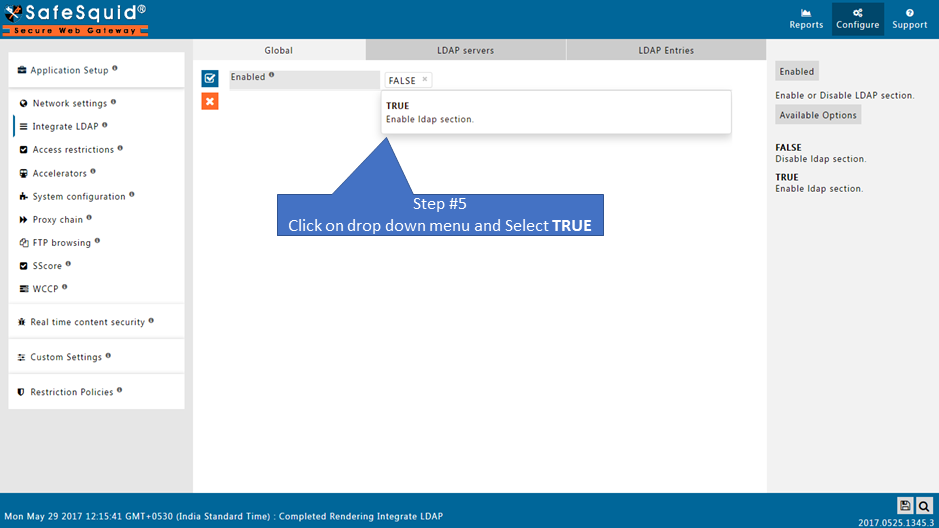
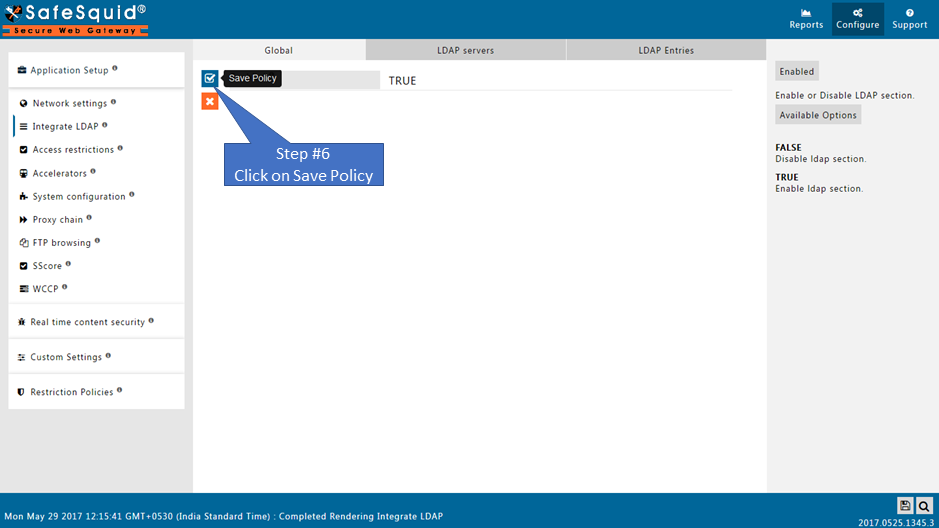
Ensure LDAP Section is enabled |
|
|
|
|
|
|
|
|
|
|
|
|
|
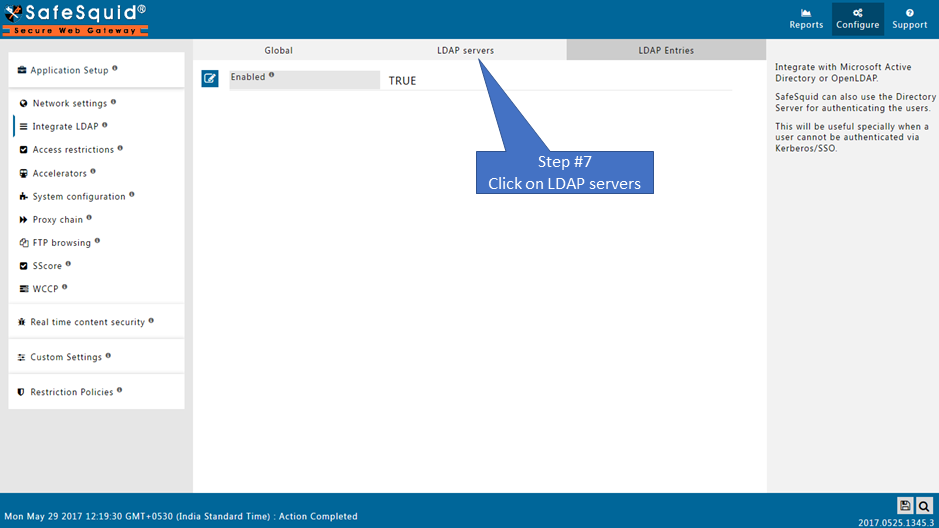
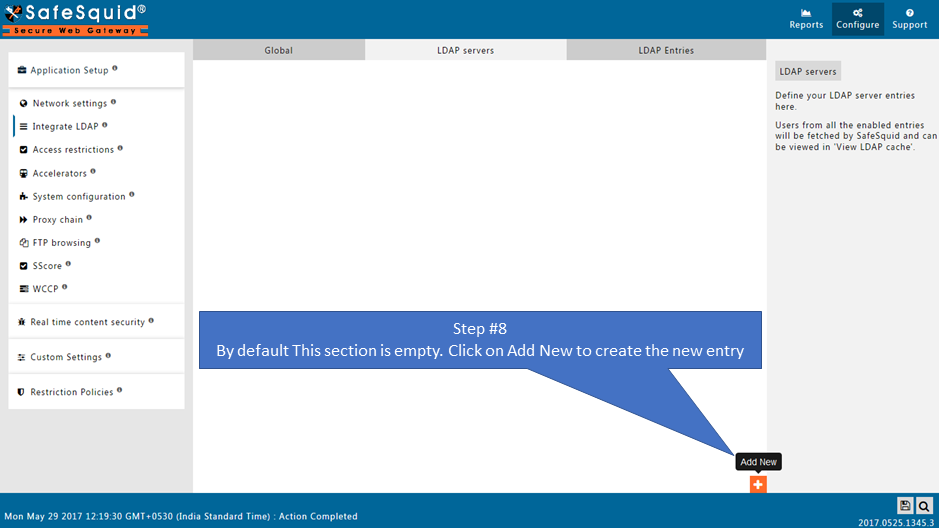
Go to LDAP servers |
|
|
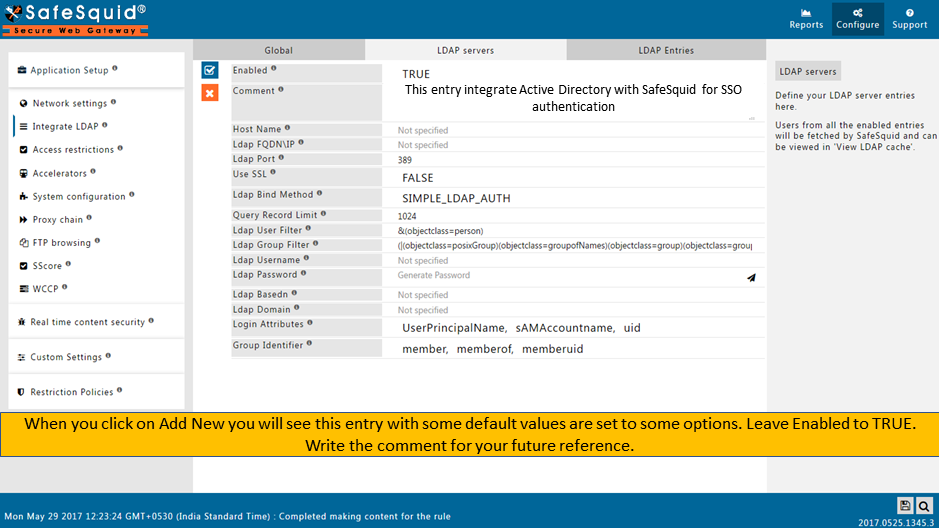
Creating new entry |
|
|
|
|
|
|
|
|
|
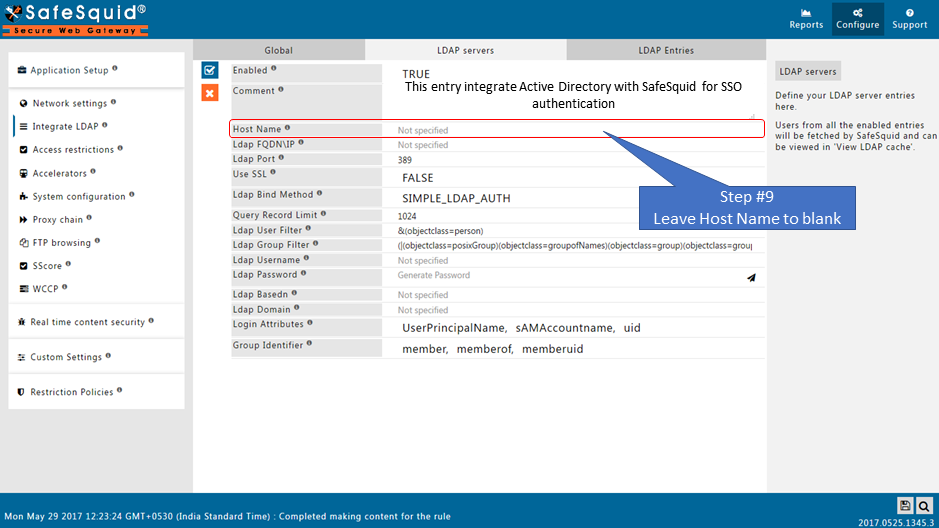
why? In a network with multiple LDAP Servers, and multiple SafeSquid Proxy Servers deployed in Master-Slave mode, this field can be used to specify the Host Name of the Proxy Server, which will communicate with the LDAP Server configured. |
|
|
|
|
|
|
|
|
|
|
|
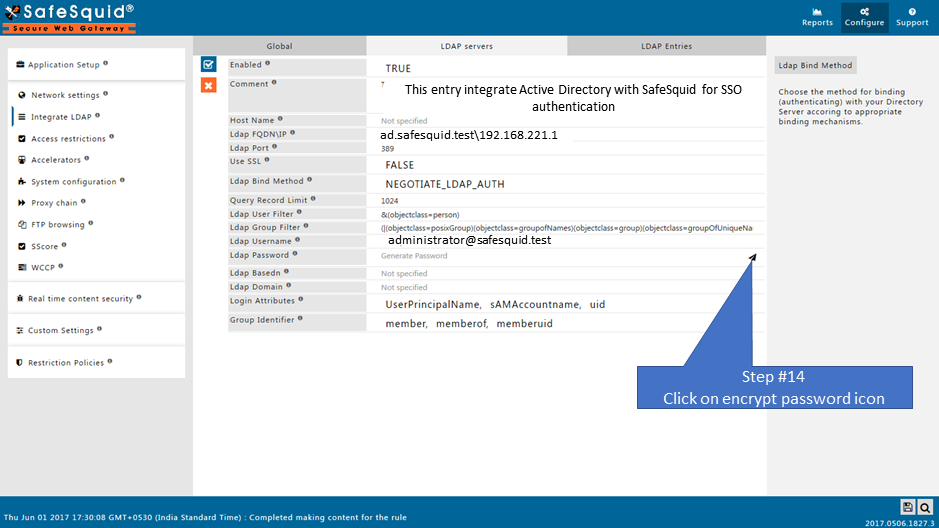
You can use any user from Active Directory who is having Administrator permissions
|
|
|
|
|
|
|
|
|
|
|
|
|
|
|
|
|
|
|
|
Test User Extraction |
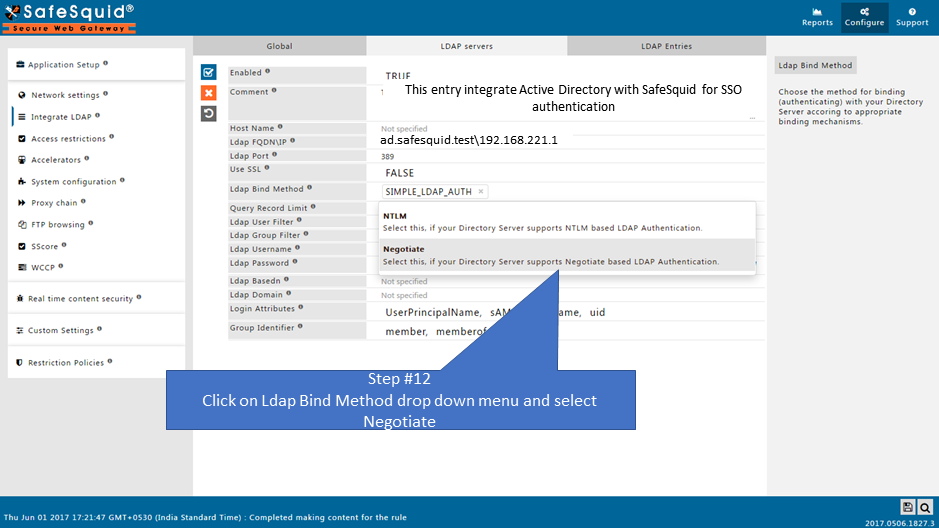
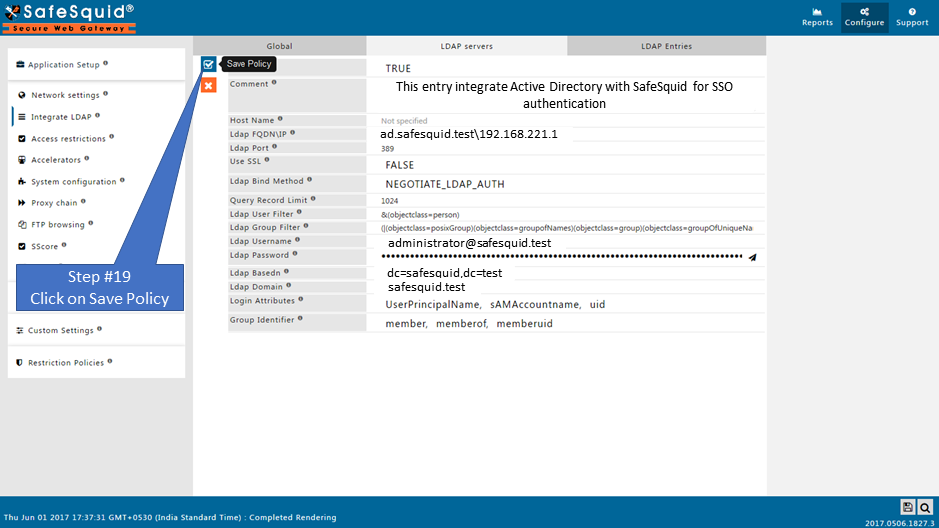
Troubleshooting : As soon as you Save policy by selecting NEGOTIATE_LDAP_AUTH kerberos.sh* script will automatically run from path 1.Verify below files at path:
The file with stub zone will create with the name : safesquid.dns.conf At path :
Run command: zone safesquid.test { Also it will automatically copy at given path:
Run command: zone safesquid.test { (Note: Monit service must be up.) |
|
|
Step : Make sure that your AD Domain must be resolvable from all clients and SafeSquid Server. For troubleshooting Follow Link |
|
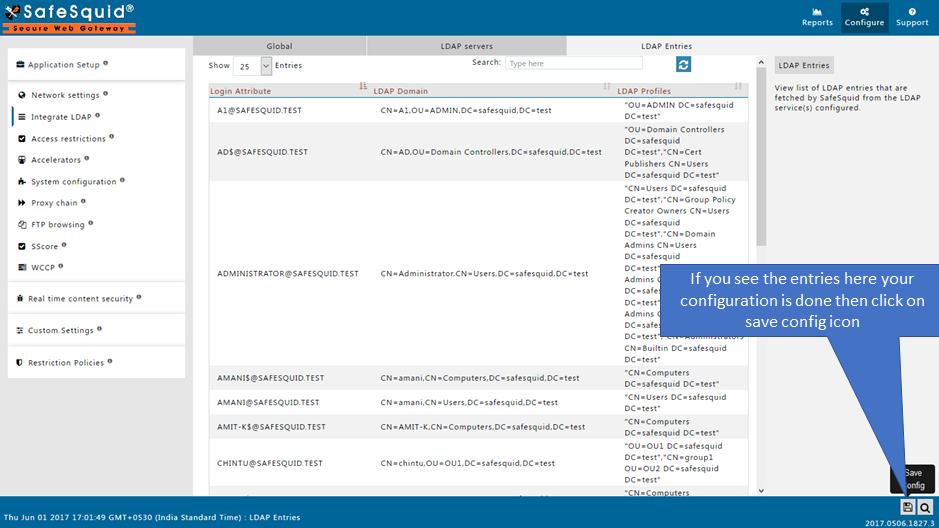
Save Configuration |
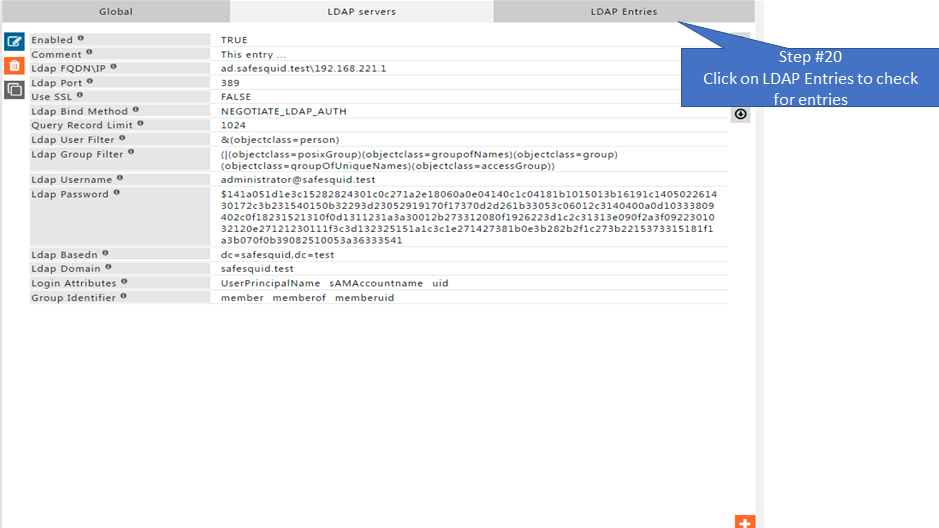
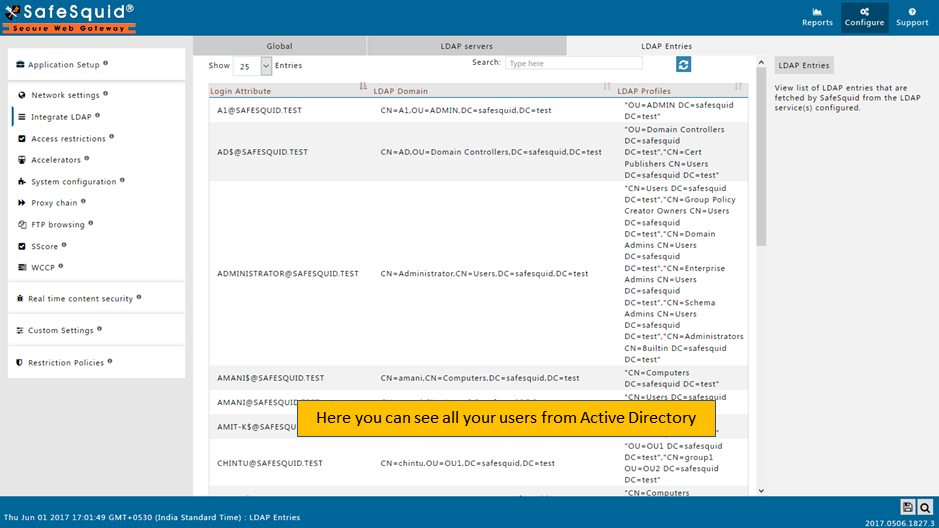
If you did not find any entries on LDAP Entries subsection, then validate whether all fields in LDAP servers subsection are correct or not. If all fields are correct then Find the error cause
|
|
When you click on Save config, it will give a prompt for asking the confirmation to store your configuration into the cloud. Select Yes only in below cases:
Otherwise select No and click on submit button.
|
Enable SSO authentication for LDAP users
Read more about Testing your Kerberos SSO authentication setup
