How To Setup Your Secure Web Gateway With SafeSquid Appliance Builder
Overview
We can use SafeSquid Appliance Builder (SAB) to setup your secure web gateway. SAB enables you to transform a standard Intel hardware architecture for servers, into a hardware web security appliance, or setup a virtual appliance on any virtualization infrastructure like VmWare or Microsoft Hyper-V.
SAB is an Ubuntu Linux operating system ISO, customized to provide automatic setup of all the necessary files and services. The setup process is quite easy, and self-intuitive. If you have a reasonably fast Internet connection the SAB downloads and installs the latest security patches and updates during the installation process, in less than 20 minutes.
Prerequisites
- Download latest version of SafeSquid ISO from - http://downloads.safesquid.net/appliance/safesquid.iso
- Make sure that you have to provide the direct internet access to the SafeSquid server IP while installation.
- If you're behind the network Firewall or Proxy, allow all traffic to ports 80 & 443.
- There should not be any blocking.
- While installation you have to provide below details:
- IP address to the SafeSquid server
- Gateway
- Netmask
- DNS server
- Provide sufficient hardware. See the Hardware Requirements here - Hardware requirements
Hardware Appliance
Use a standard Intel® hardware to setup a SafeSquid based secure web gateway. Create a bootable CD or USB pen-drive using the SAB ISO. Utilities like Rufus, UNetbootin, Universal USB Installer, etc. can be used to create a bootable USB easily. When the system is booted up with the SAB, the installation process automatically detects the attached hardware.
Virtual Appliance
Use the preferences for SAB ISO similar to any 64-bit Ubuntu Linux distribution. The SAB does not require any other special consideration.
Select Installation Mode
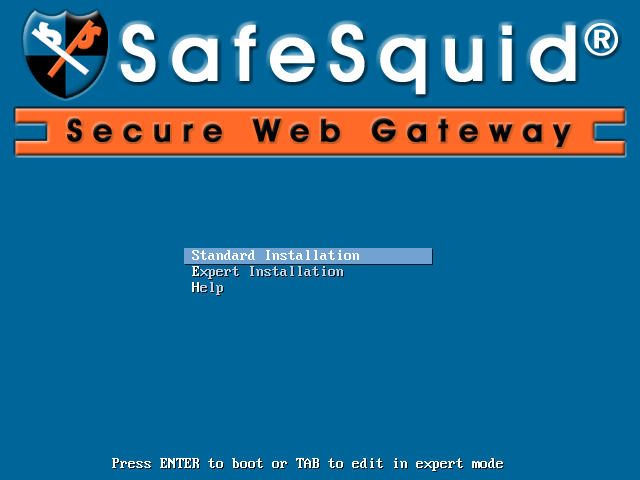
Upon boot-up, the SAB detects the hardware and awaits your choice of installation mode.
You may choose either the Standard Installation or the Expert Installation.
The Standard Installation Mode is recommended, and the setup uses mostly pre-configured sub-choices.
Read more about Standard Installation.
Use the Expert Installation Mode if the pre-configured choices may not serve your requirements.
Read more about Expert Installation.
The installation proceeds to the next steps as per your selection.

Next : Standard Installation Mode
Expert Installation Mode
Activate the SafeSquid