

Register and Download the Activation Key
SafeSquid activation starts before installation. The Self-Service Portal issues theactivation_key file that binds a SafeSquid deployment to licensing, subscription, update, and cloud-linked operational workflows. Without this key, operators cannot complete the activation checkpoint before SSL inspection, URL filtering, malware scanning, DLP, or production policy rollout.
Treat the key as deployment evidence and operational secret material. Keep it under the same change-control and storage discipline used for firewall credentials, certificate private keys, and recovery runbooks.
Control the activation path
The activation key establishes the trust path between the organization, the Self-Service Portal, and the SafeSquid instance. A controlled registration process reduces deployment delays, prevents key loss, and gives operations teams a clear audit trail for who created the account and where the key is stored. Use one portal account ownership model for the deployment. Do not let individual engineers register independent keys for the same production environment unless the change record explicitly requires separate test, staging, or production activation contexts.Validate prerequisites
Before registering, confirm:- The deployment owner has an approved business email address.
- The organization has assigned a team or role to own the Self-Service Portal account.
- The activation key will be stored in an approved secret vault or deployment-evidence repository.
- The deployment record has a target instance, cluster, or environment name.
- The operator can receive external email from SafeSquid.
- The SafeSquid instance will later have outbound access for license and subscription validation.
Why the account must use a corporate domain
Why the account must use a corporate domain
Beyond traceability, registering from a corporate email domain rather than a personal one — Gmail, Yahoo, or personal Outlook — enables enterprise account handling on the portal:
- Priority support during a proof of concept.
- The ability to invite team members to the same account.
- Extended trial options.
Create the portal account
1
Open the Self-Service Portal
Open the SafeSquid Self-Service Portal from an approved administrator workstation.Confirm the portal registration form loads over HTTPS.If the page does not load, verify DNS, outbound HTTPS access, and the administrator workstation network path.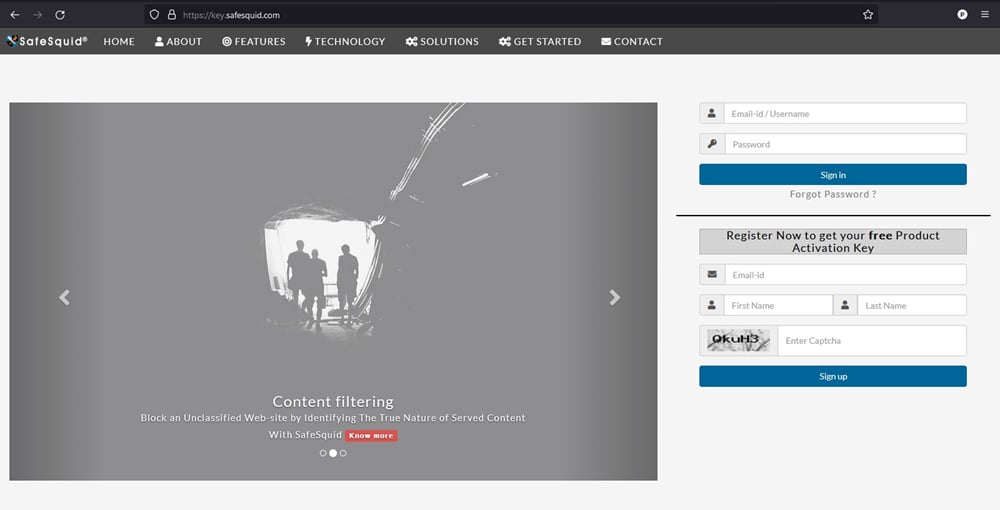
2
Submit the registration form
Enter the approved email address, first name, last name, and captcha, then click Sign up.Confirm the portal accepts the registration request and prompts the operator to check email.If submission fails, recheck the email address, captcha, required fields, and browser session state.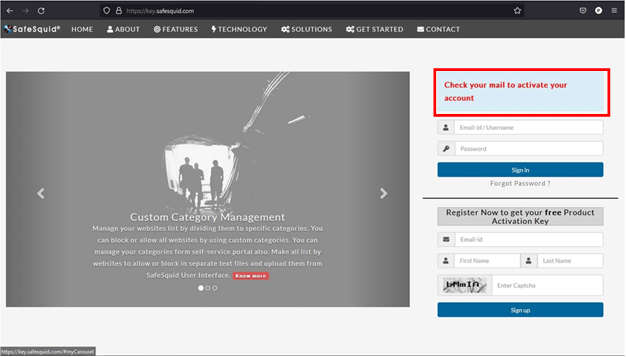
3
Record the request
Add the registration request to the deployment record so the account owner and target environment are traceable.Confirm the deployment record includes the registered email address, operator, date, and target environment.If ownership is unclear, pause activation until the account owner and storage process are approved.
Activate the account
1
Open the activation email
Open the activation email sent to the registered address and click Click here to activate your account.Confirm the activation page opens for the registered account.If the email does not arrive, check spam, quarantine, and the registered address before retrying registration.
2
Set the portal identity
On the activation page, keep the suggested username or choose an approved username.Confirm the username matches the deployment owner or approved operational mailbox.If the username conflicts with an existing account, use the portal reset workflow or register with the approved shared account.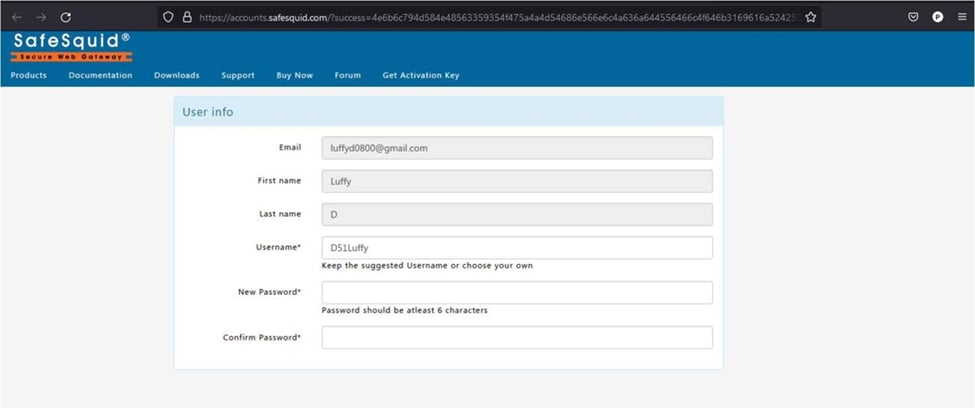
3
Set the password
Enter a new password and confirm it. The password must be at least 6 characters; use the organization’s password and vaulting requirements when they are stricter.Confirm the account activates and the portal accepts sign-in with the approved credentials.If sign-in fails, confirm the account was activated and use the portal password reset workflow.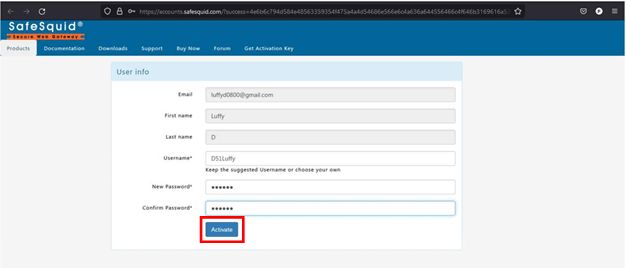
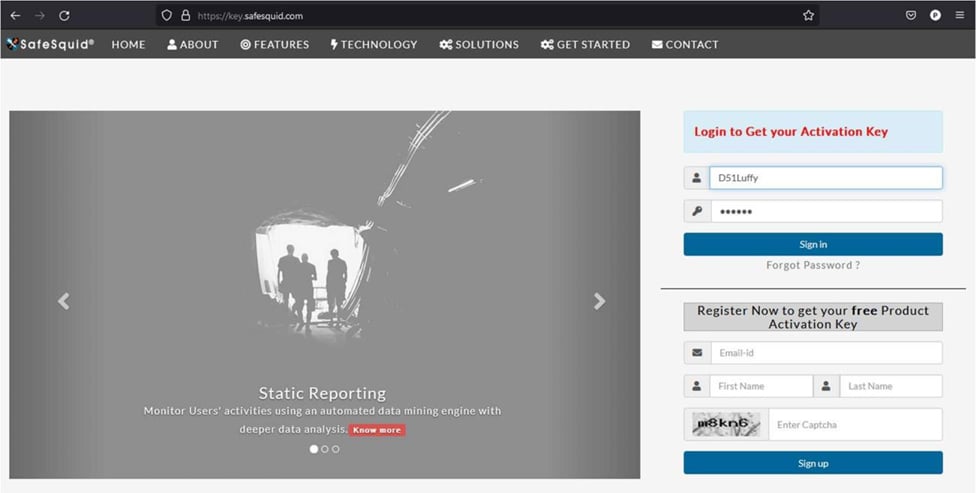
https://key.safesquid.com, enter the username and password, and click Sign in.Complete the profile
After first sign-in, complete the profile and contact details required to generate the activation key.1
Review account identity
Review the first name and last name. Confirm the account represents the approved owner or shared operational mailbox.Confirm the portal identity matches the deployment record owner.If the owner is wrong, stop and register the correct approved account before key generation.
2
Select subscription context
Select the correct subscription option. For first setup, select Freemium unless the organization has a commercial subscription entitlement.Confirm the selected subscription matches the approved deployment context.If entitlement is unclear, confirm subscription status with the account owner before saving the profile.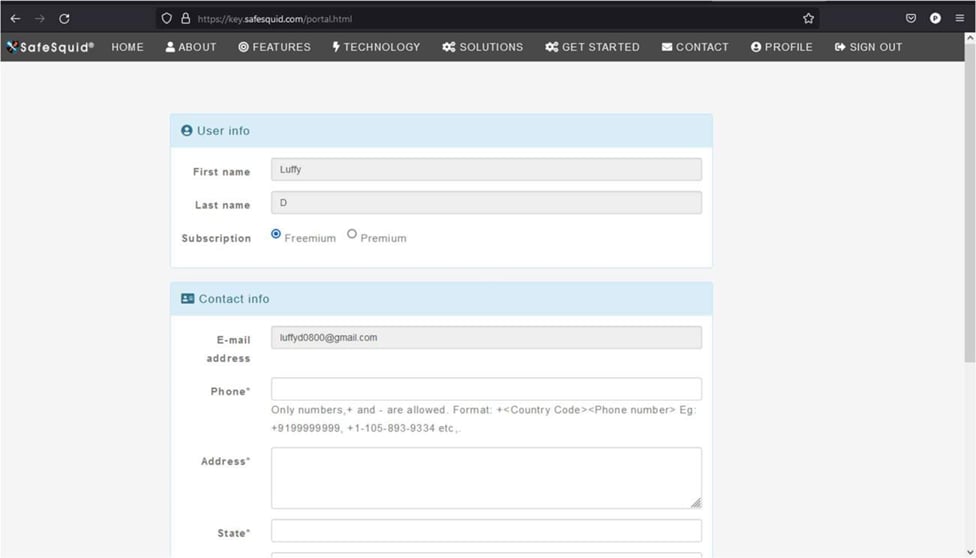
3
Complete contact details
Enter the required contact details, including phone, address, state, city, and country.Complete any remaining optional contact fields required by the organization’s process, then click Save Profile.Confirm the portal saves the profile and allows key generation.If the key is not visible, complete missing profile fields and save the profile again.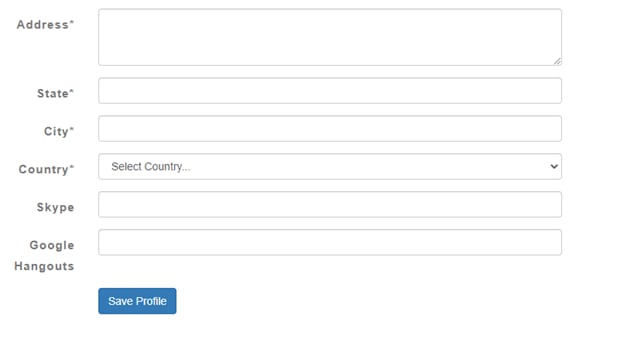
Generate and download the key
After the profile is saved, the portal generates the activation key.1
Record key generation
In the New Activation Key generated dialog, record the generation event in the deployment record, then click Close.Confirm the deployment record includes the generation event and portal account owner.If the dialog does not appear, confirm the profile was saved and the account subscription state is ready.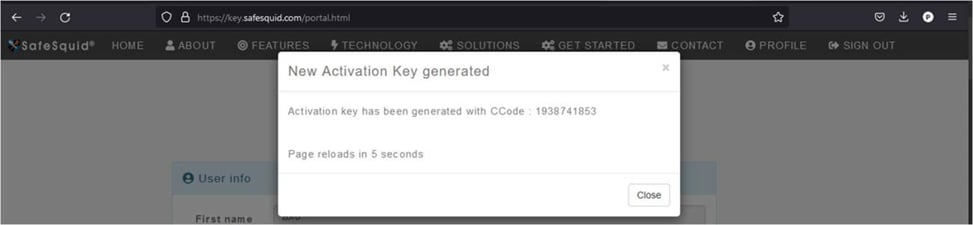
2
Download the key
On the Manage Key tab, click Download Key.Confirm the browser downloads an activation key file.If download is blocked, allow the browser download from the portal or retry from an approved administrator workstation.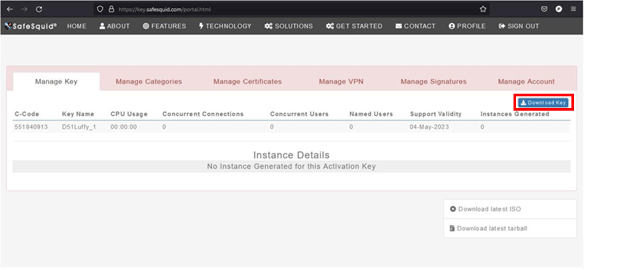
3
Validate the filename
Confirm the downloaded file is named exactly
activation_key.Confirm the file name is exactly activation_key with no extension or renamed copy suffix.If the file was renamed, re-download the key and preserve the exact file name and contents.4
Store the key securely
Store the file in the approved secure location and record only the storage reference in deployment evidence.Confirm the deployment record stores only the secure storage reference, not the key contents.If the key was pasted into an unapproved channel, treat it as a secret-handling incident and regenerate or replace it through the approved process.
activation_key file. SafeSquid expects the file name and contents to remain intact during license activation.
The same activation key can be used across multiple SafeSquid instances when the deployment requires synchronized instance behavior, such as cluster members sharing the same activation context.
Two further properties affect how the key should be handled operationally:
- The key does not expire. It can activate a SafeSquid instance at any time, including a rebuild months later. Subscription entitlement is separate and does expire; see Activate Your License.
- It can be downloaded again. Sign in to the Self-Service Portal to retrieve the key if the stored copy is lost. Re-downloading is preferable to circulating a copy through unapproved channels.
Store registration evidence
Capture the following evidence with the deployment record:- Portal account owner.
- Registered email address.
- Registration date.
- Subscription choice.
- Target deployment, instance, or cluster name.
- Secure storage reference for
activation_key. - Operator responsible for activation.
Verify the key is ready
Before moving to installation or activation, confirm:- The
activation_keyfile was downloaded successfully. - The file name is exactly
activation_key. - The key was stored in the approved secure location.
- The deployment record identifies the environment that will use the key.
- The activation operator can retrieve the file without copying it through unapproved channels.
Troubleshoot key and activation failures
For detailed post-install activation steps, service checks, listener checks, and log evidence, continue with Activate Your License.
Next steps
- Deployment - size and prepare the deployment.
- Deployment Checklist - confirm host, network, and trust readiness.
- Activate Your License - upload the key after SafeSquid is installed.