

Serve Repeated Requests Locally
Every request that reaches the origin costs bandwidth and latency the user feels. Caching stores local copies of requested content and serves later requests from disk; prefetching goes further and retrieves resources referenced in an HTML page before the user asks for them. They are complementary, and they are configured separately. Caching is the store; prefetching is what fills it ahead of demand.Choose which to enable
Enable caching first and confirm objects land in the store. Prefetching without a working cache generates origin traffic and discards it.
Configure content caching
Create the access policy
-
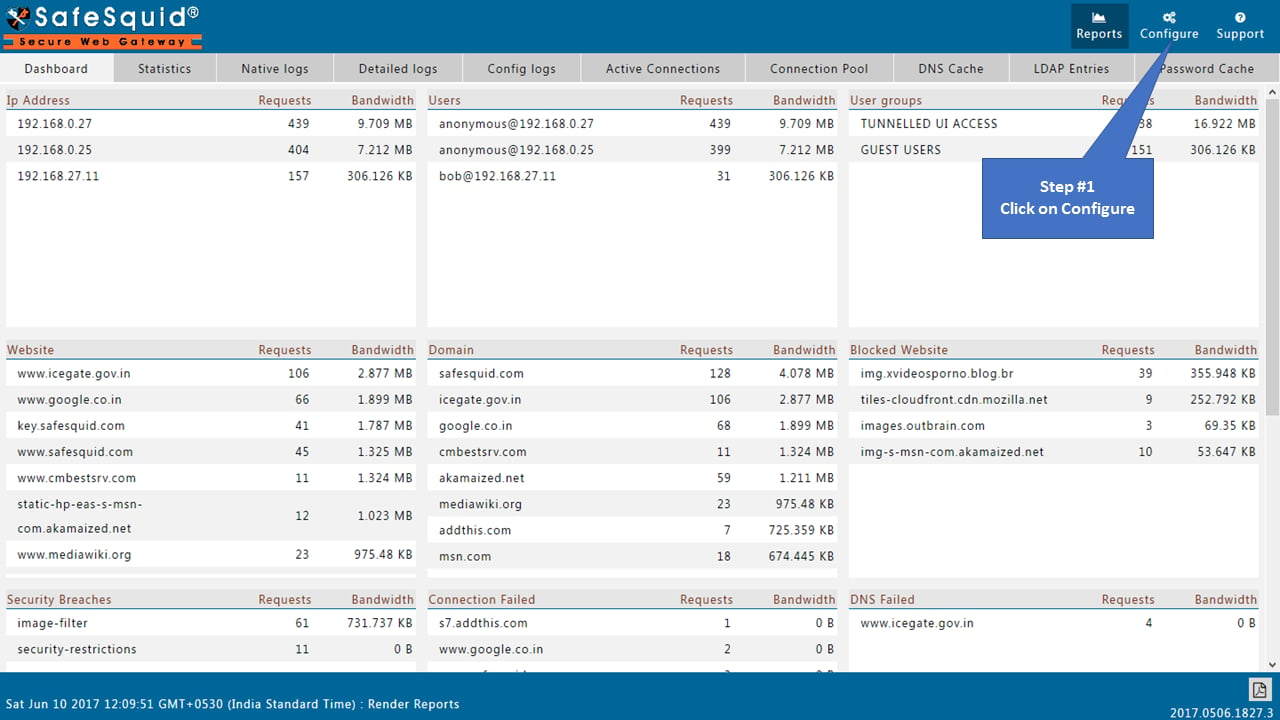
Access the SafeSquid User Interface and click Configure.
-
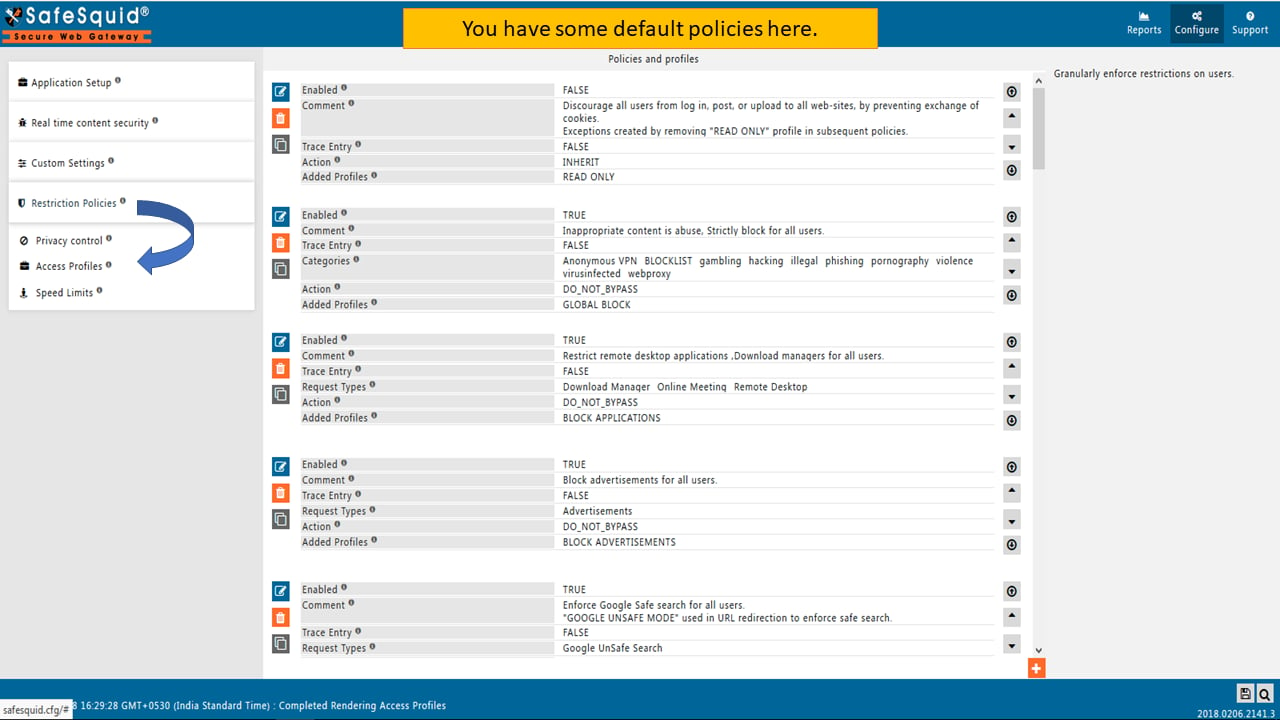
Navigate to Access Profiles under Restriction Policies.
-
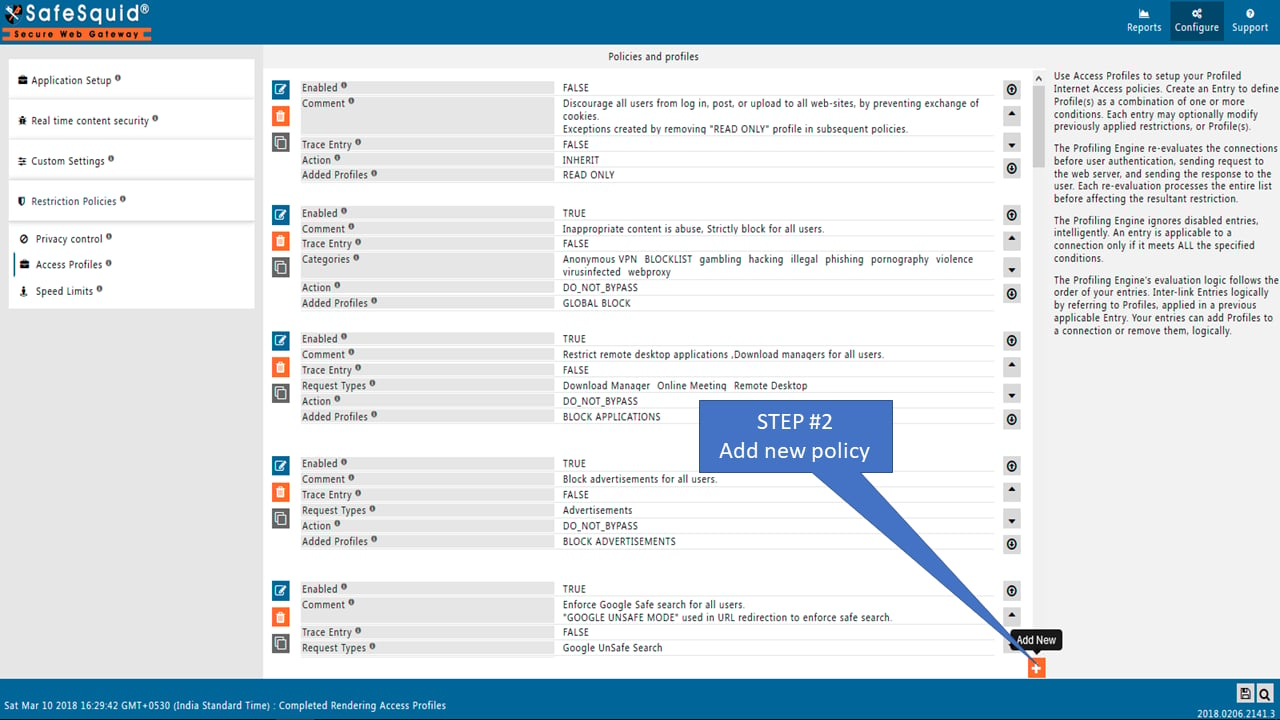
Click Add New to create a new policy.
-
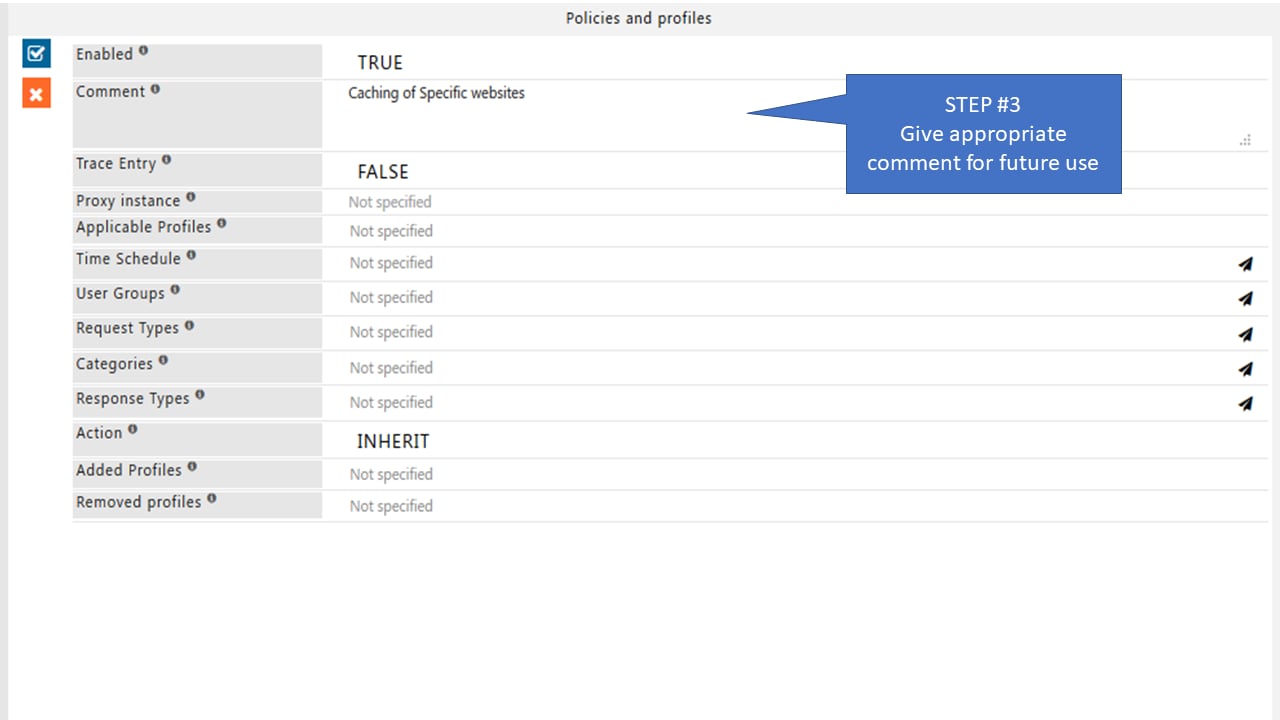
Enter a descriptive comment for reference.
-
Select the desired categories from the Categories dropdown.
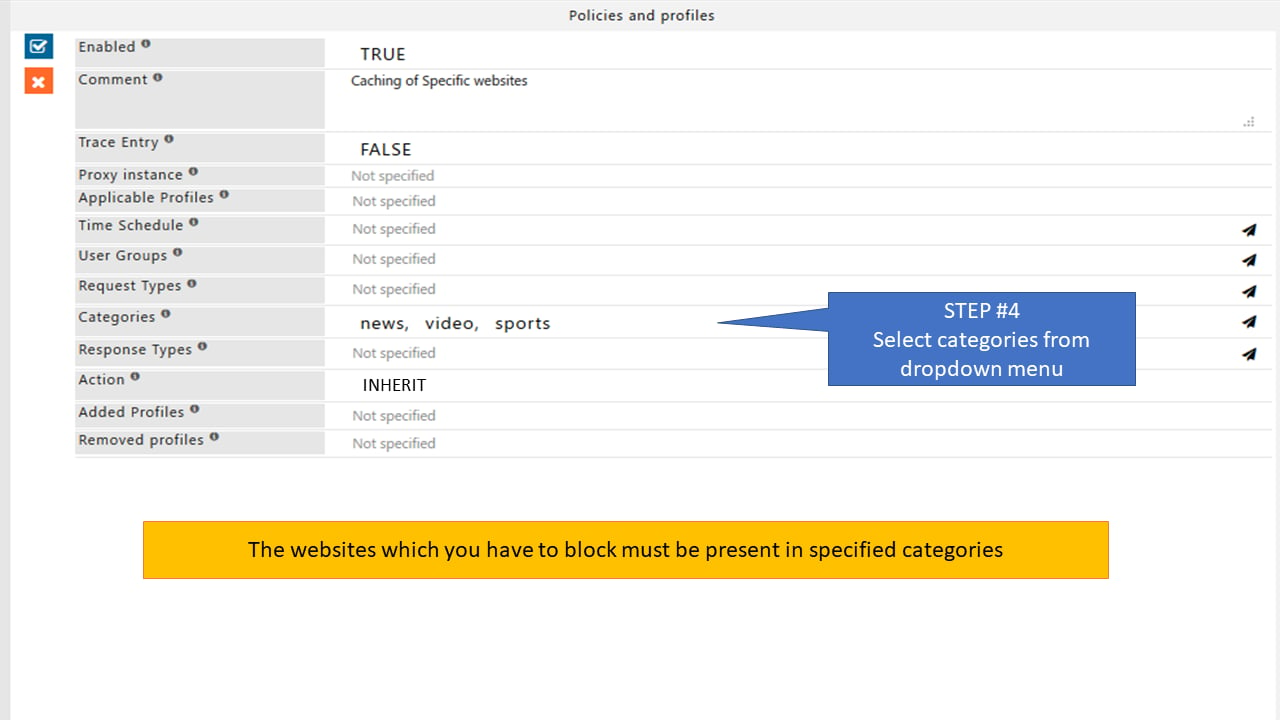
-
Set Action to Allow.
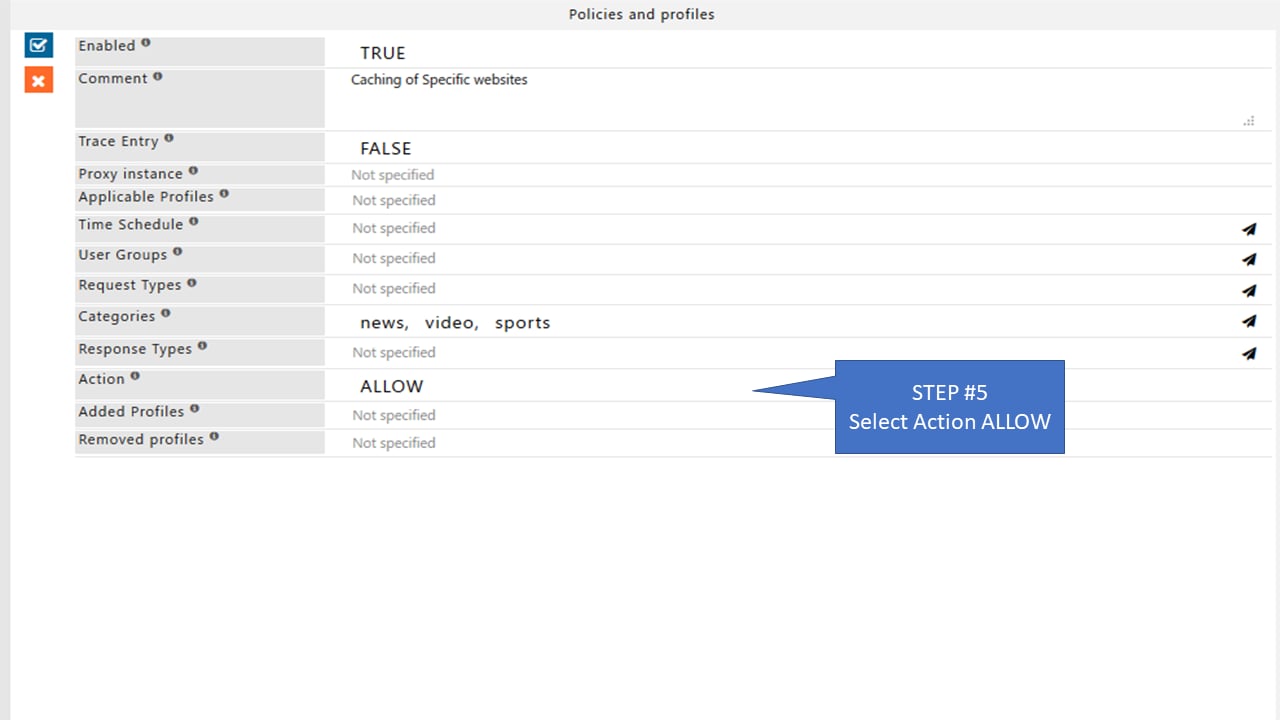
-
Assign a unique name in Added Profiles.
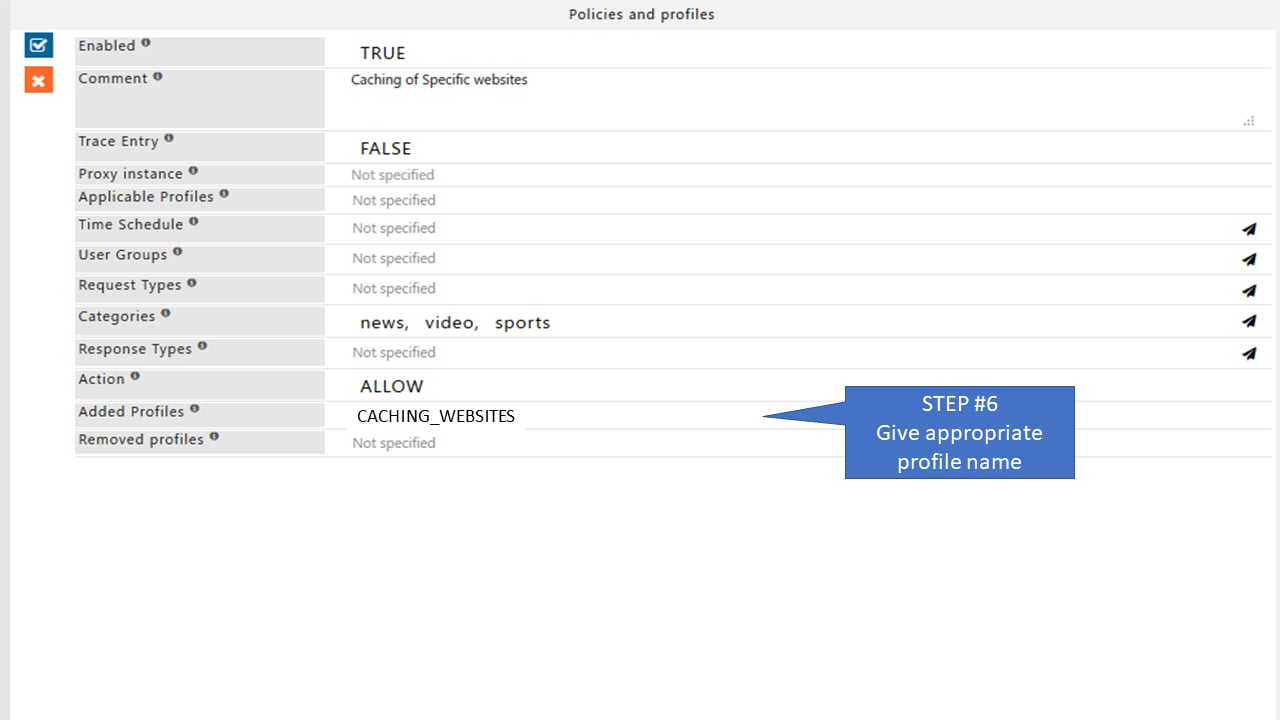
-
Click Save Policy.
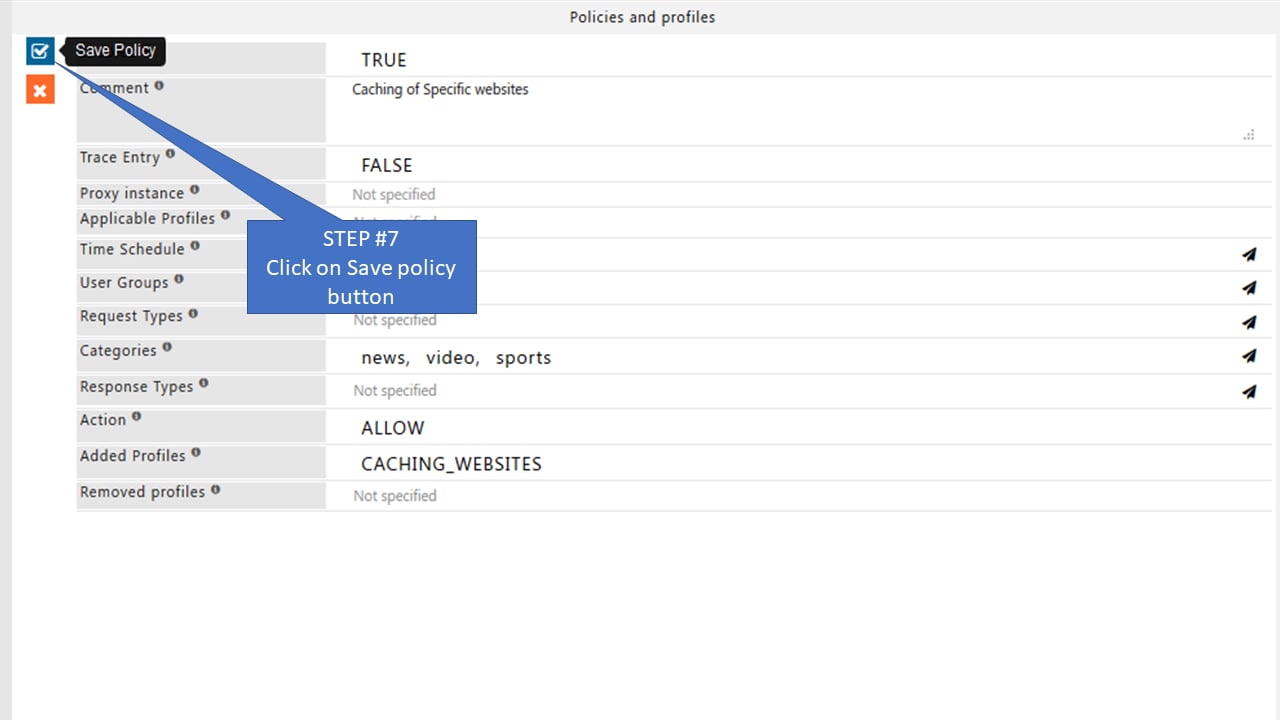
Configure the caching store
-
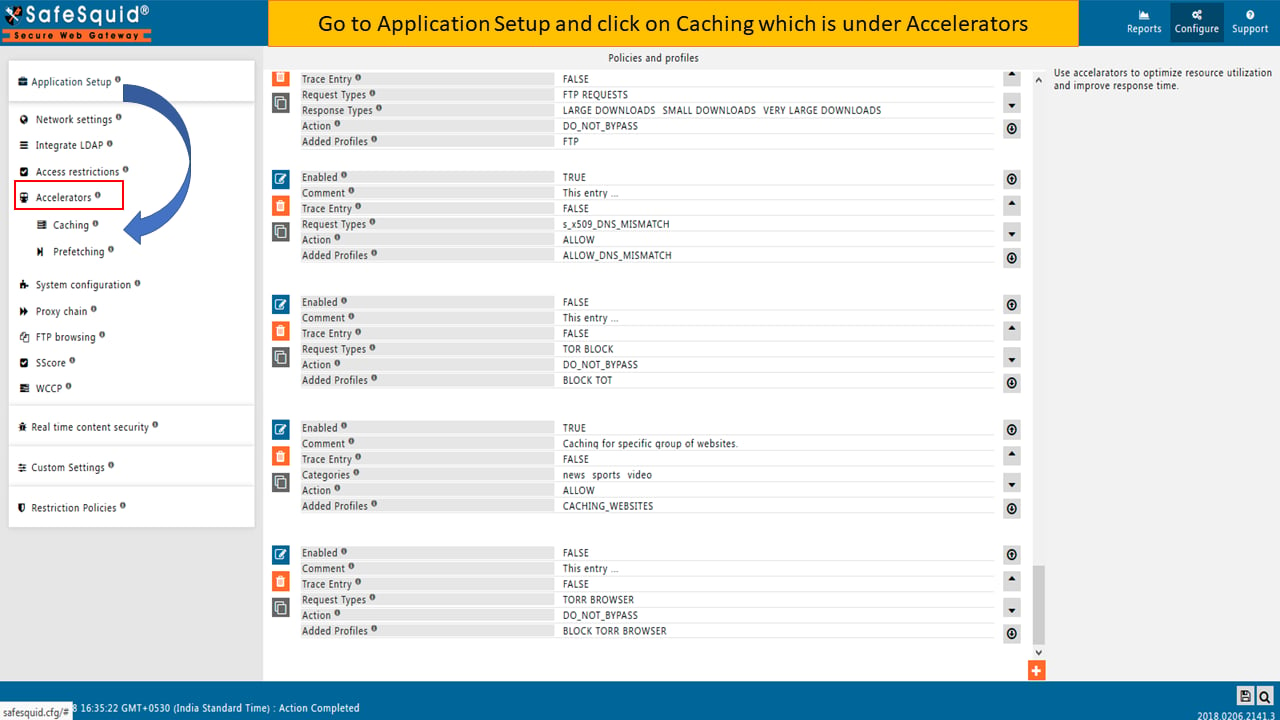
Navigate to Caching, under Accelerators in Application Setup.
-
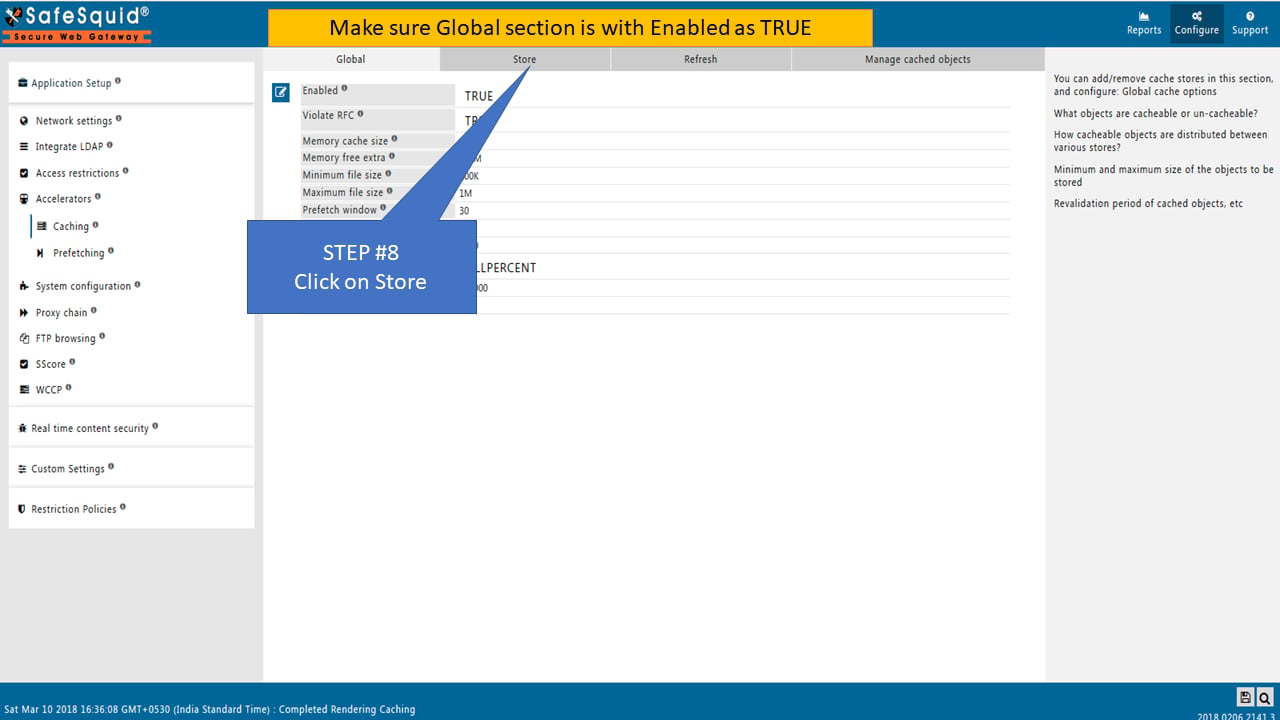
On the Global tab, confirm Enabled is set to
TRUE— Caching, like Prefetching, only takes effect once its own Global switch is on, separate from any individual Store entry’s own Enabled field. -
Click the Store tab.
-
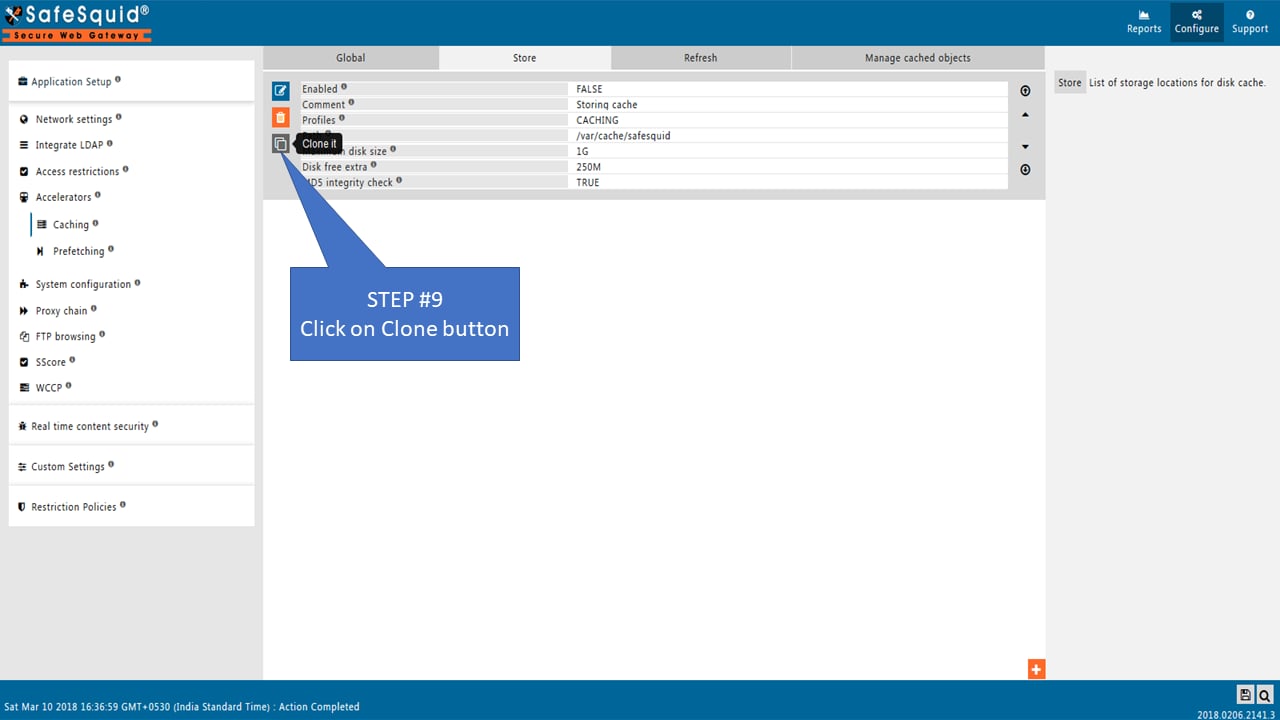
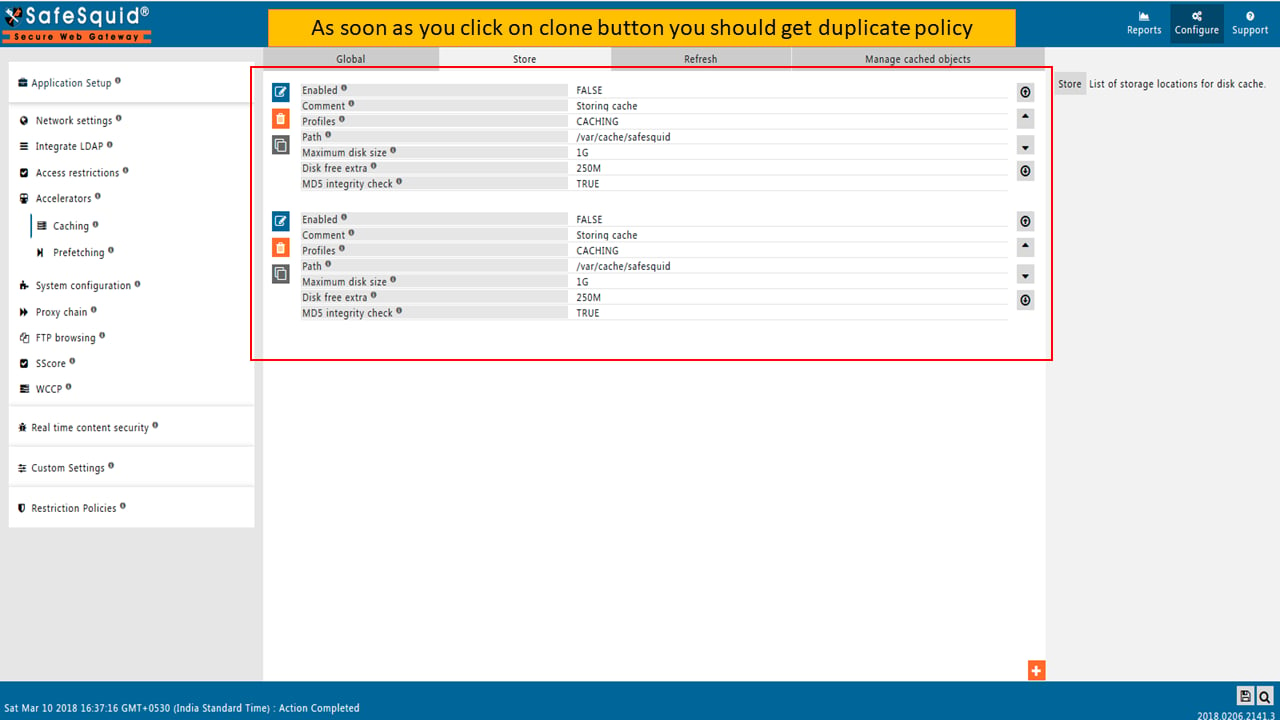
Click Clone it to duplicate an existing policy.
-
Click Edit Policies on the cloned entry.
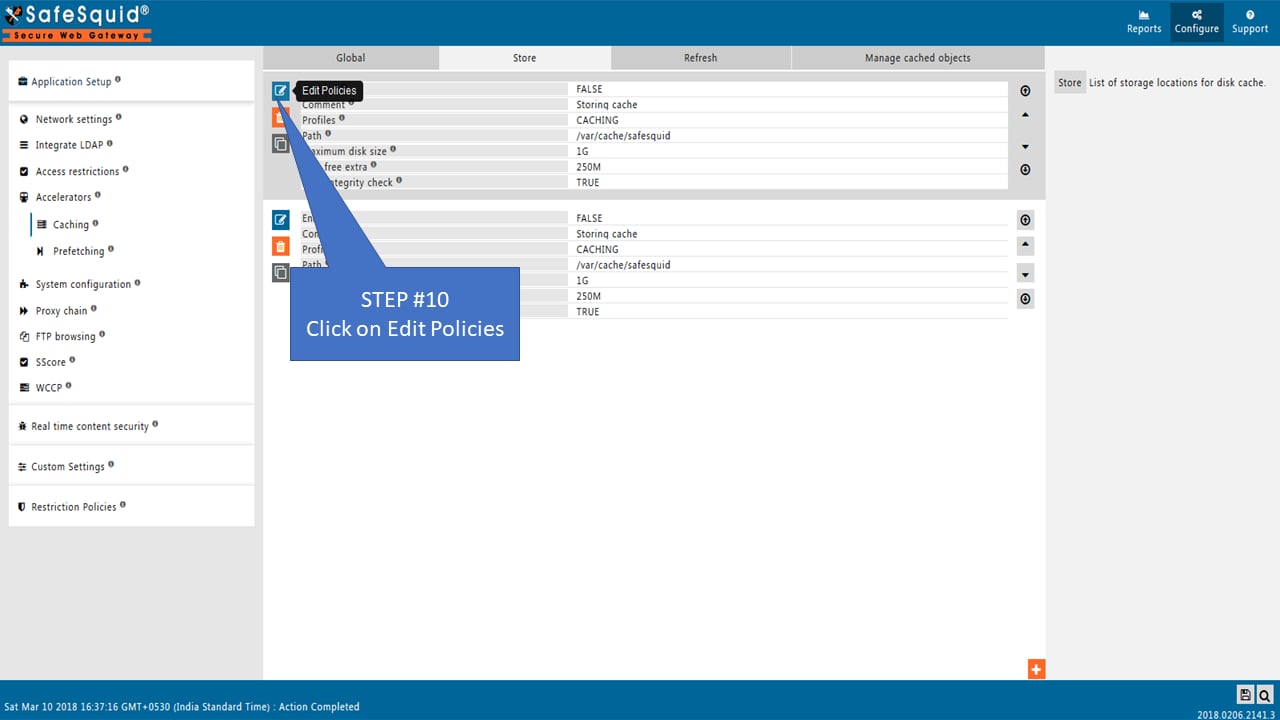
-
Set Enabled to True.
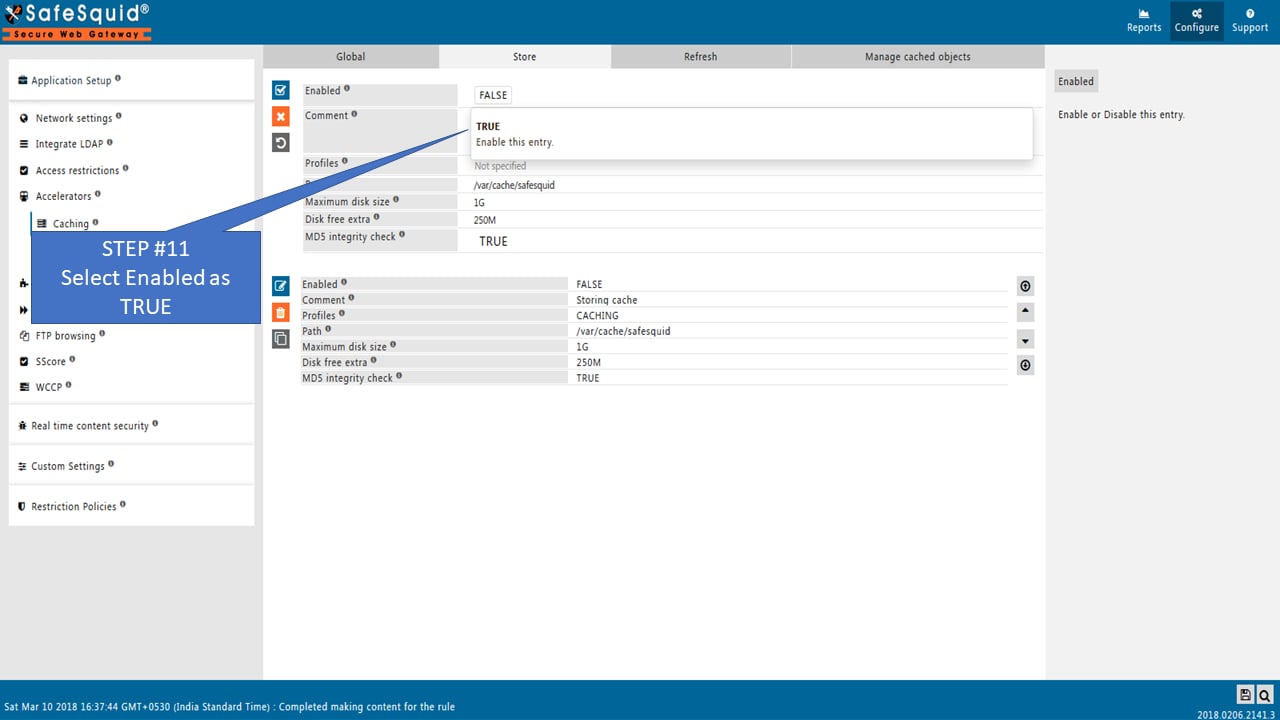
-
Add an appropriate comment for future reference.
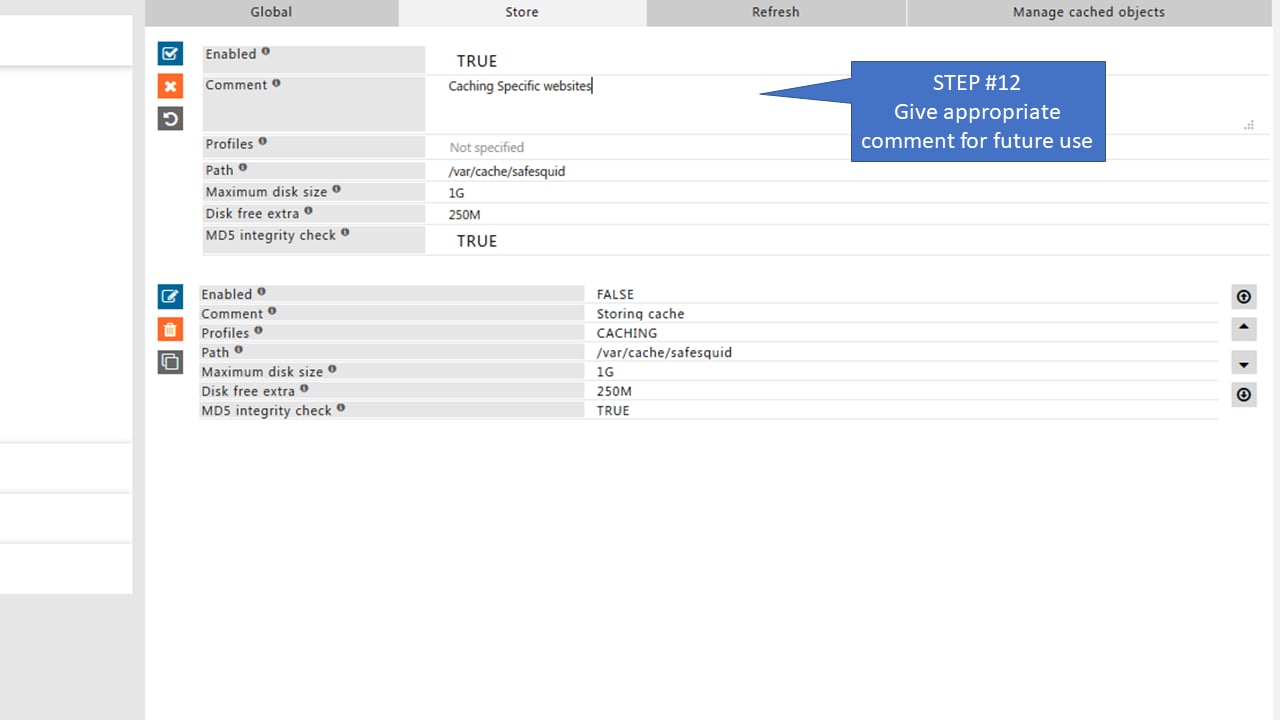
-
Select the profile created earlier from the Profiles dropdown.
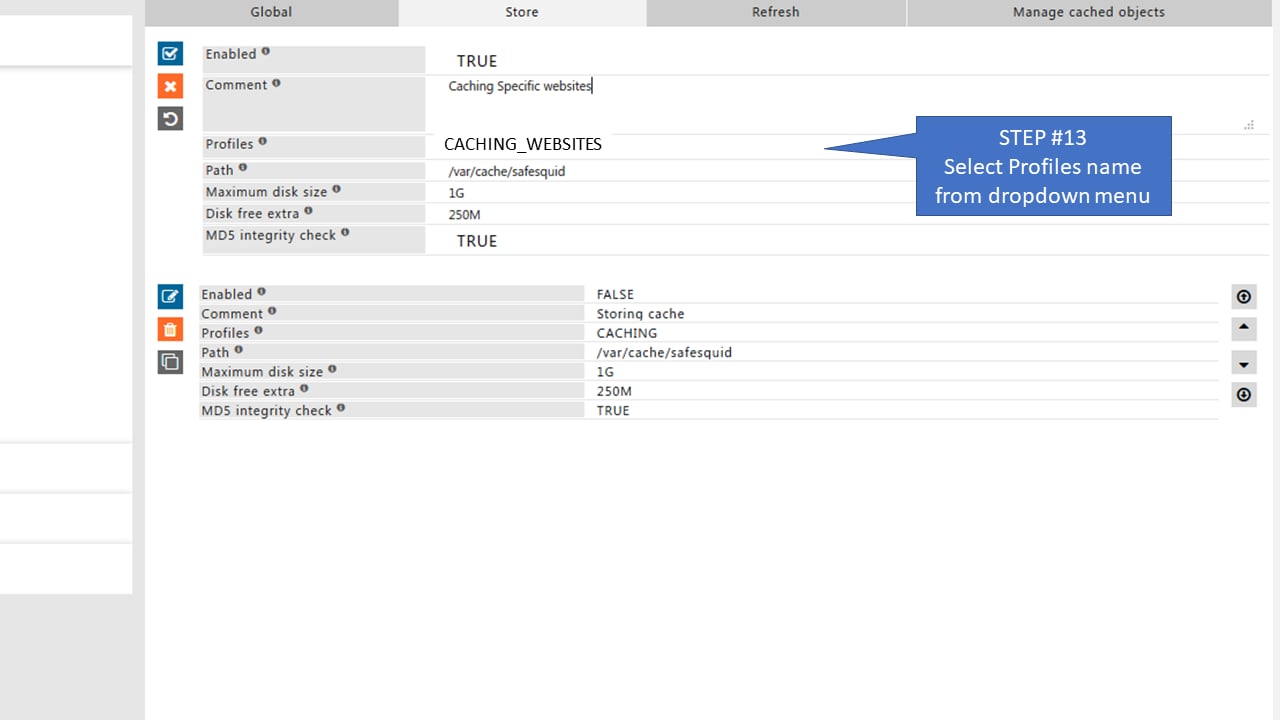
-
Click Save Policy.
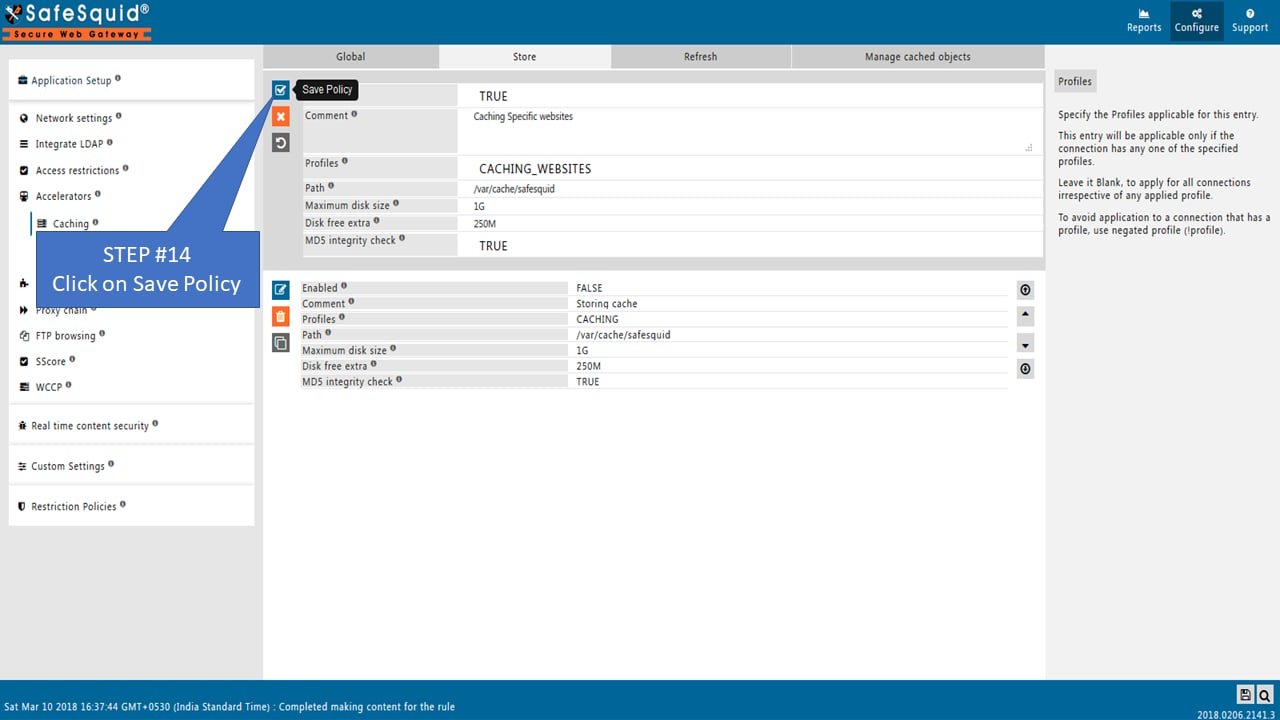
-
Click Save Config to apply the configuration globally.
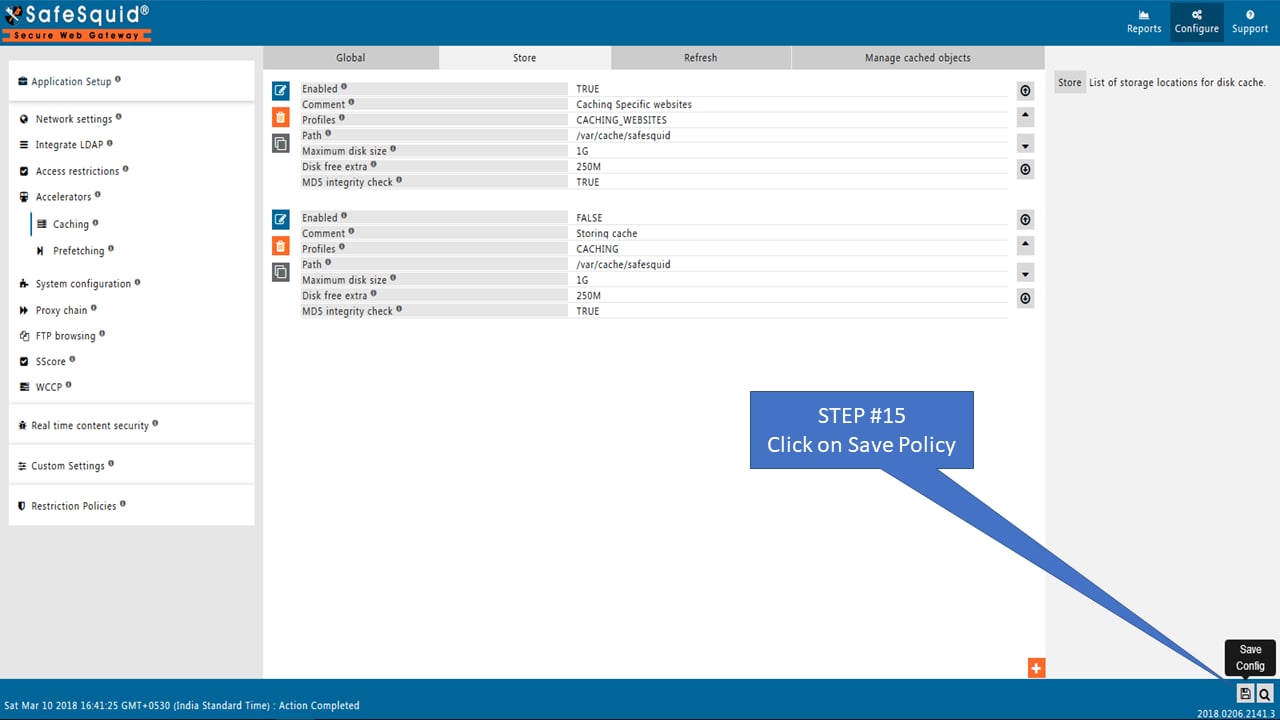
Configure prefetching
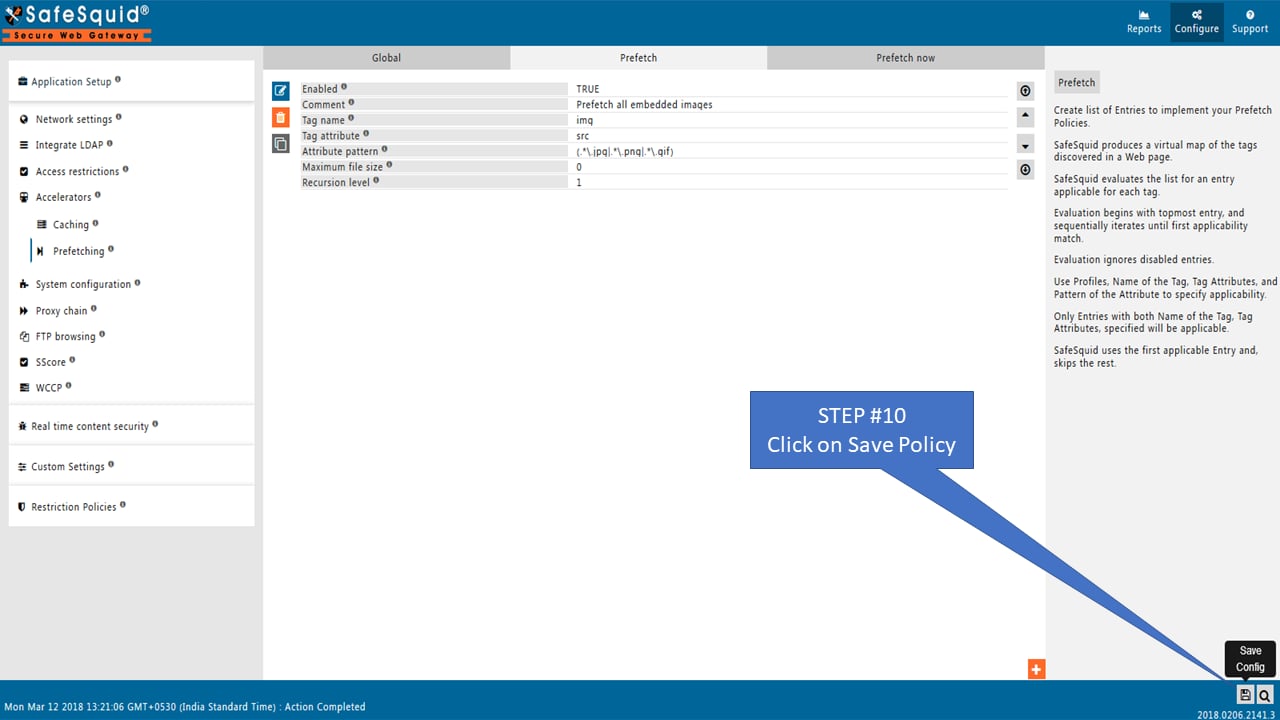
Prefetching fetches and caches files referenced in HTML before the user requests them. It applies to a wider set of resources than caching alone.-
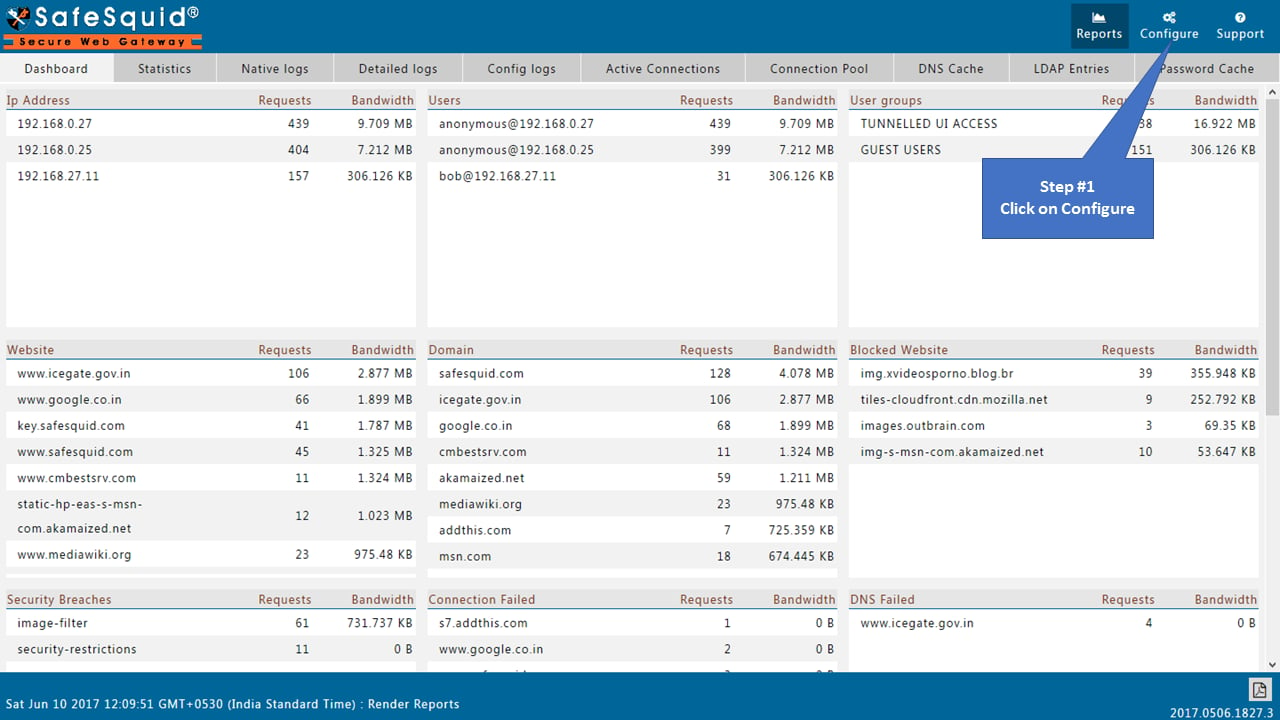
Access the SafeSquid User Interface and click Configure.
-
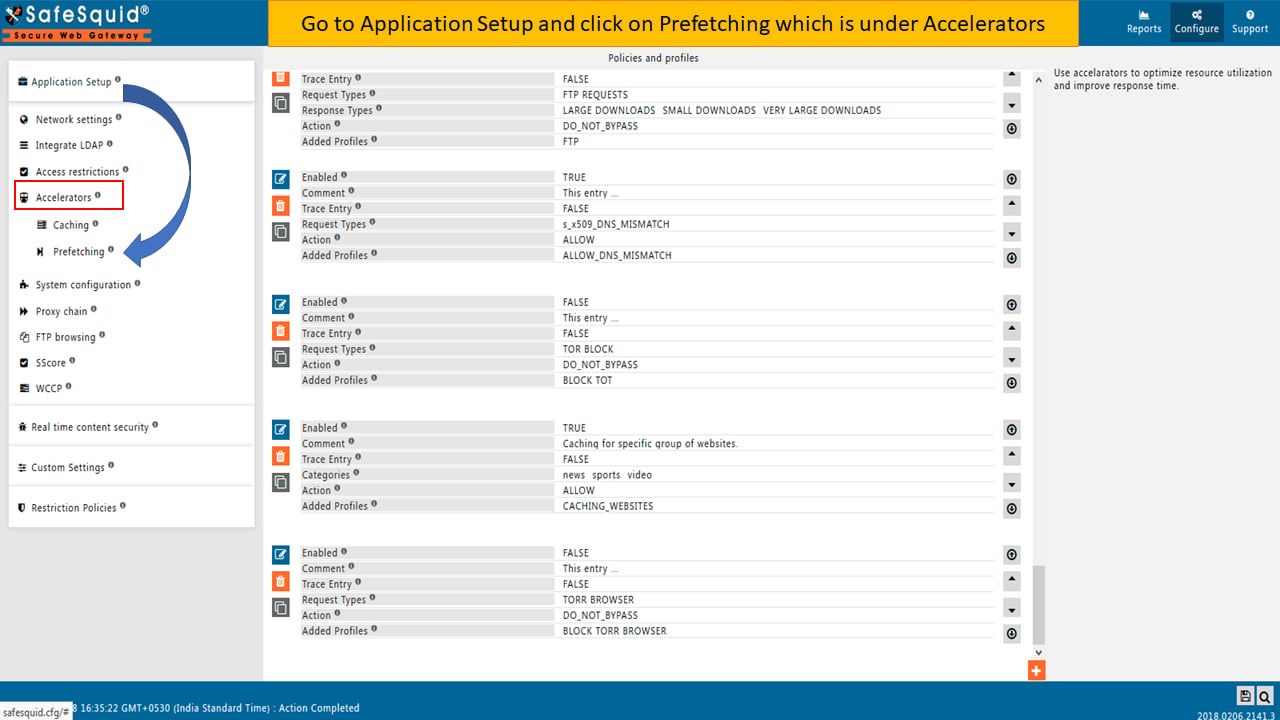
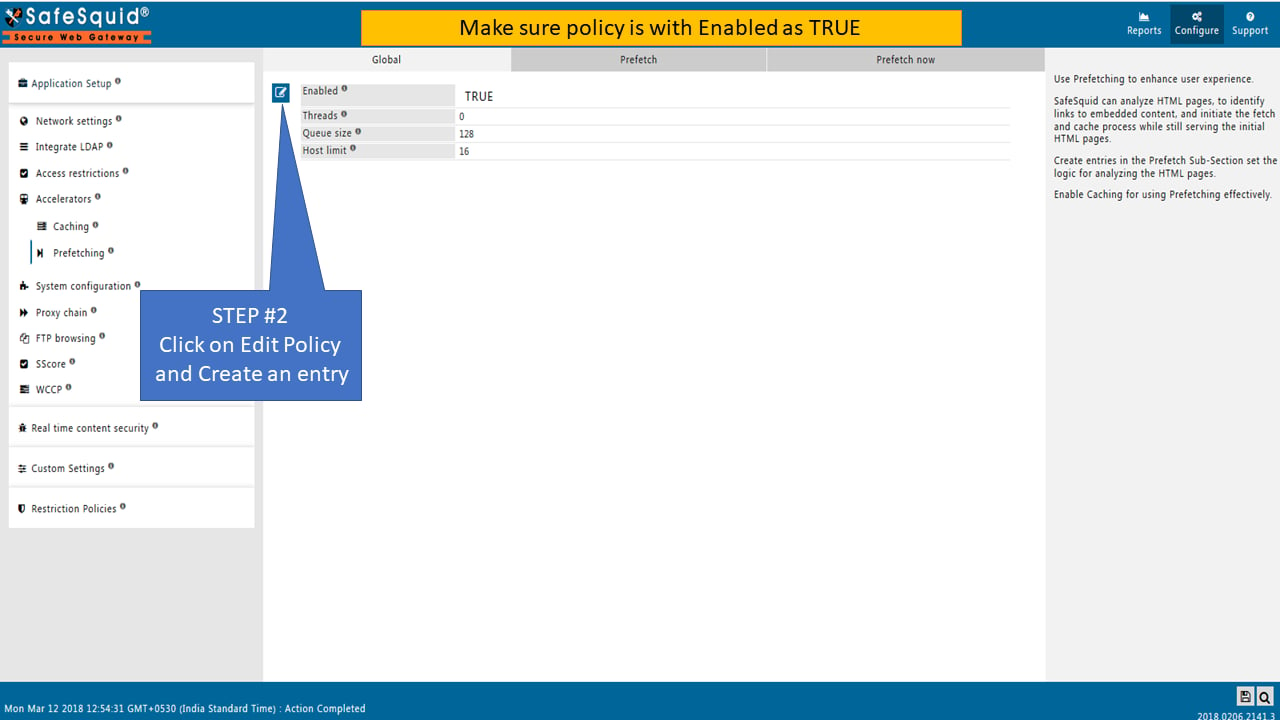
Navigate to Prefetching, under Accelerators in Application Setup.
-
Ensure the Global section has Enabled set to True.
-
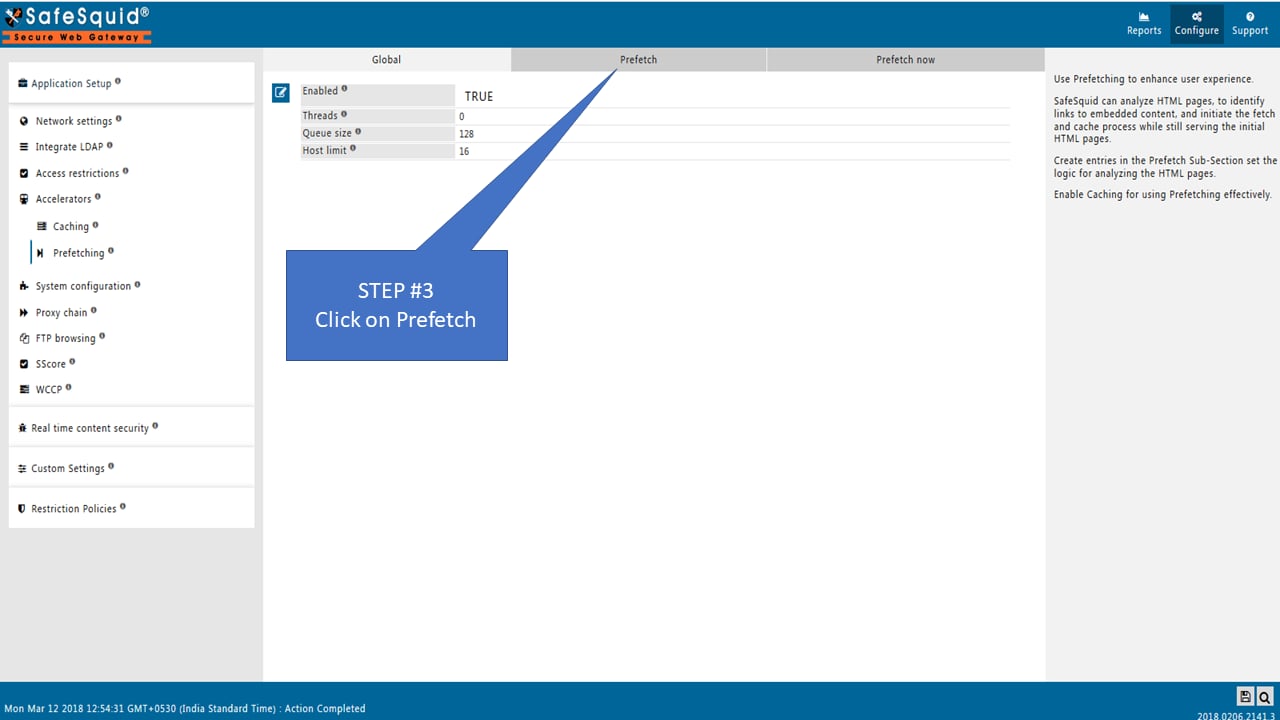
Click the Prefetch tab.
-
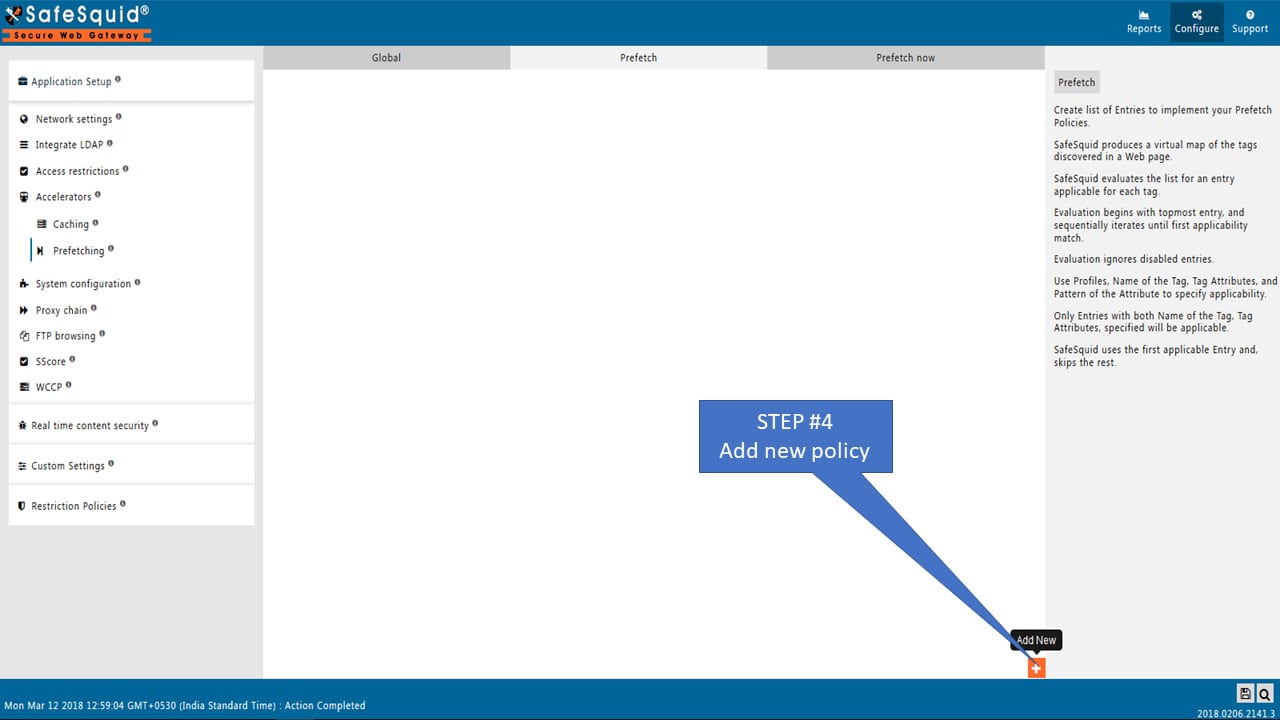
Click Add New to create a new policy.
-
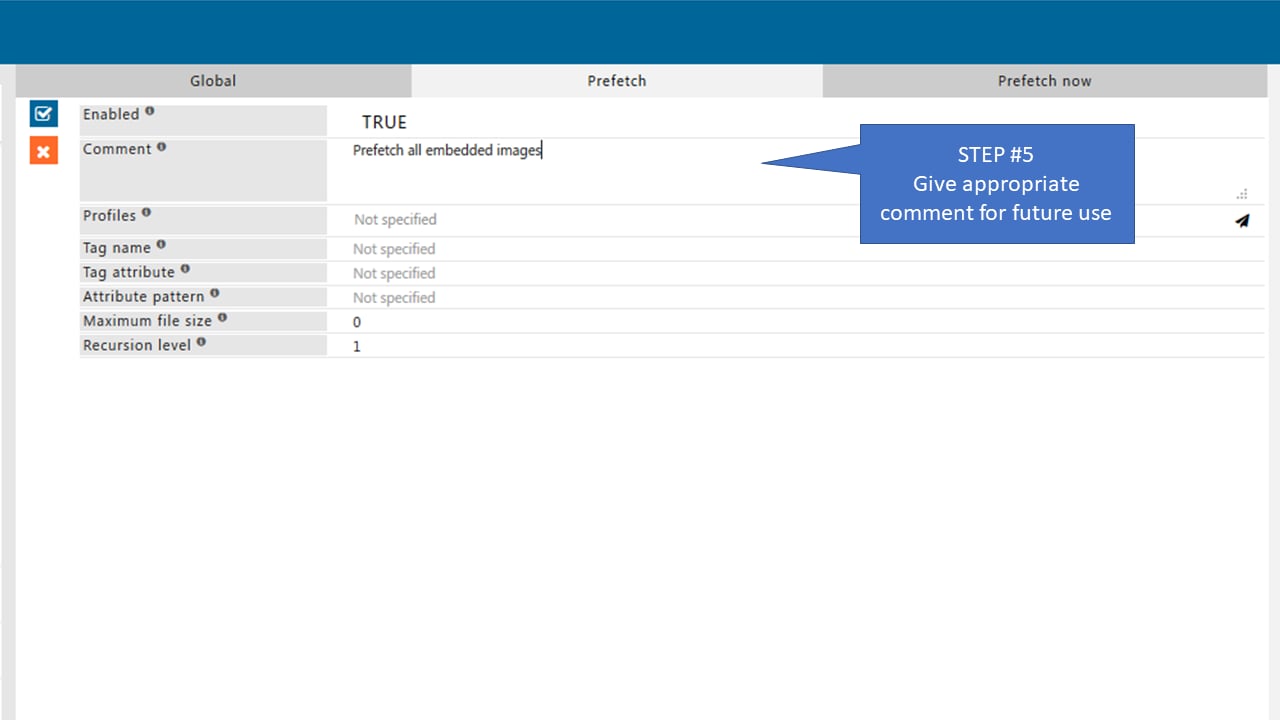
Enter an appropriate comment for future reference.
-
Specify the HTML tag to analyze for prefetchable URLs.
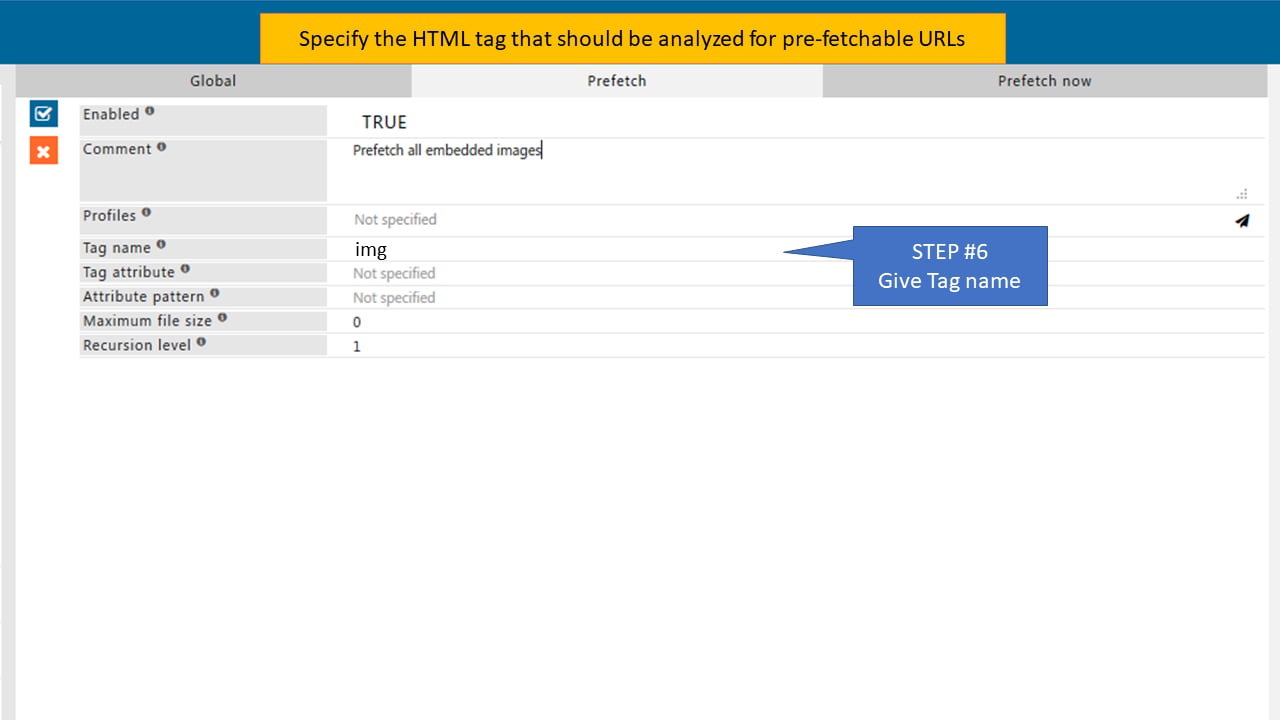
-
Specify the attribute of the HTML tag holding the URL to prefetch.
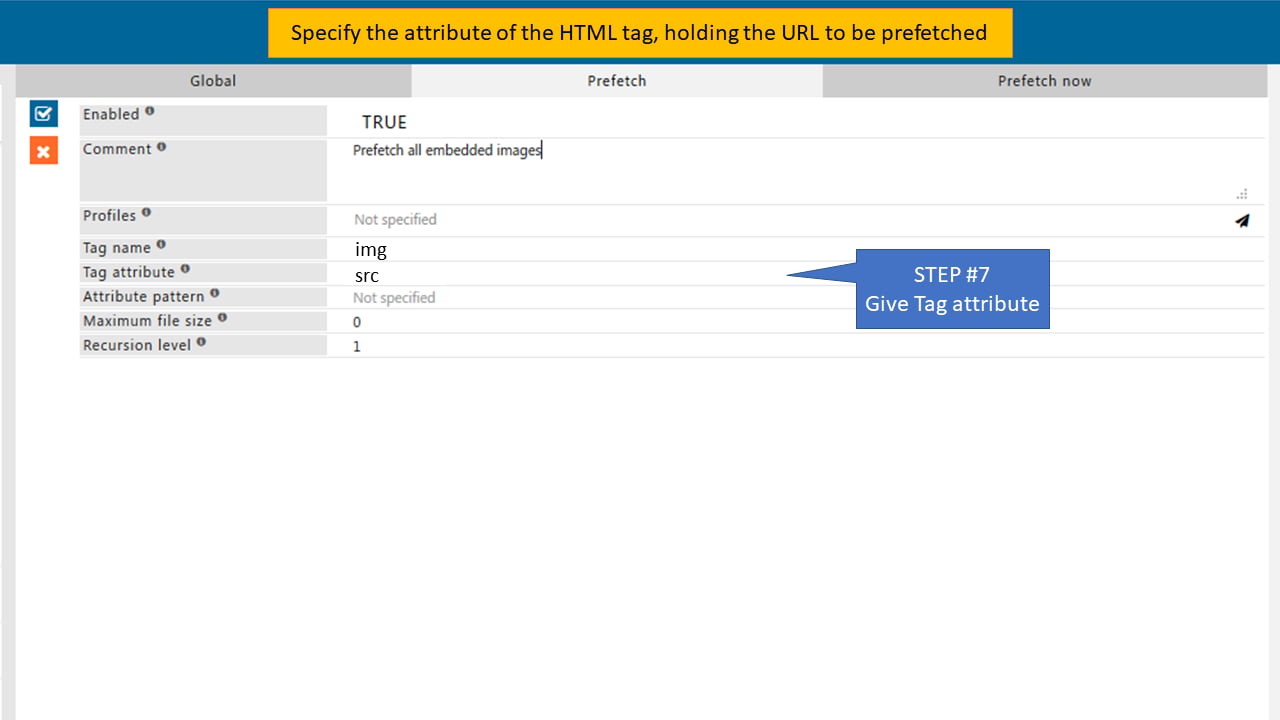
-
Specify the regular expression to evaluate discovered URLs in the tag attribute.
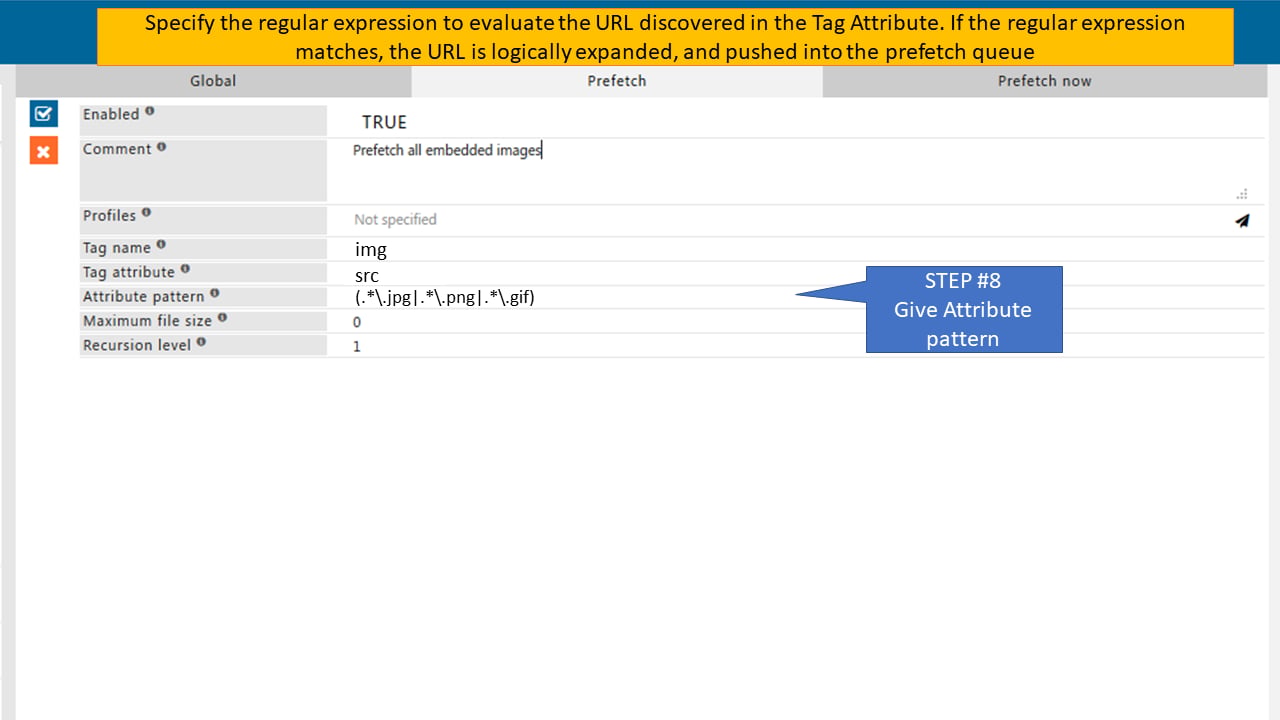
-
Click Save Policy.
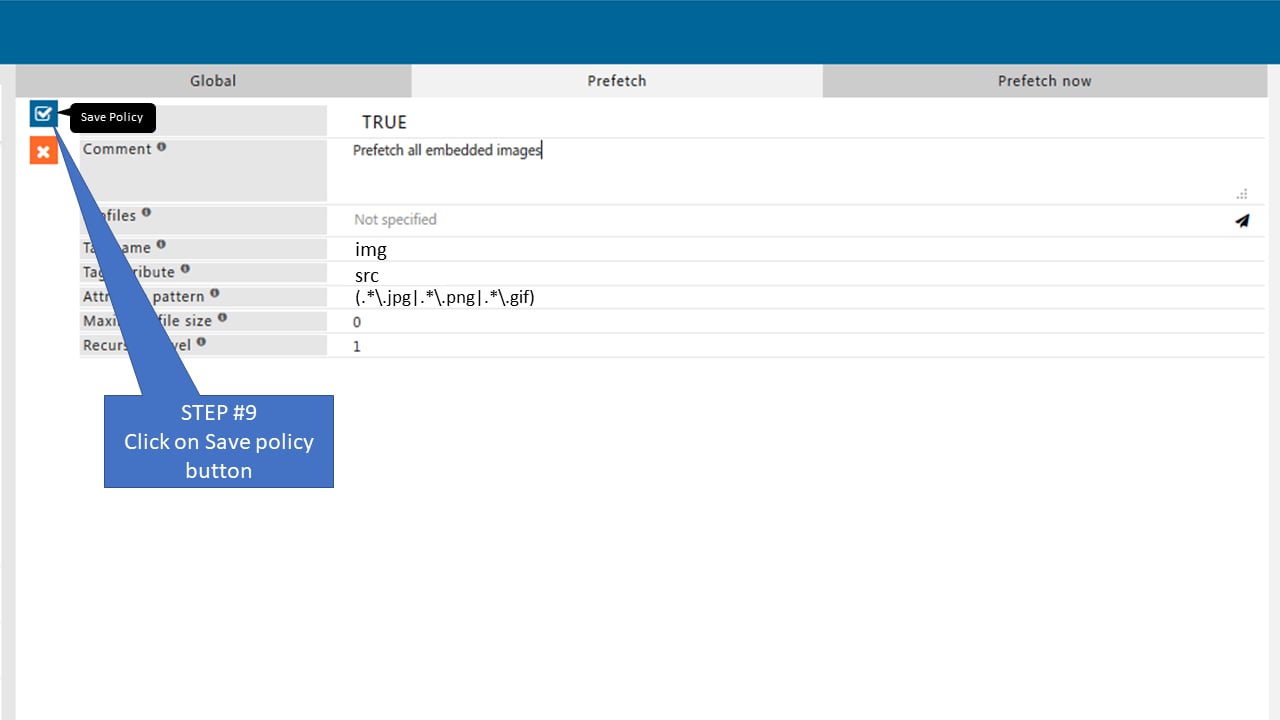
-
Click Save Config to apply the configuration.
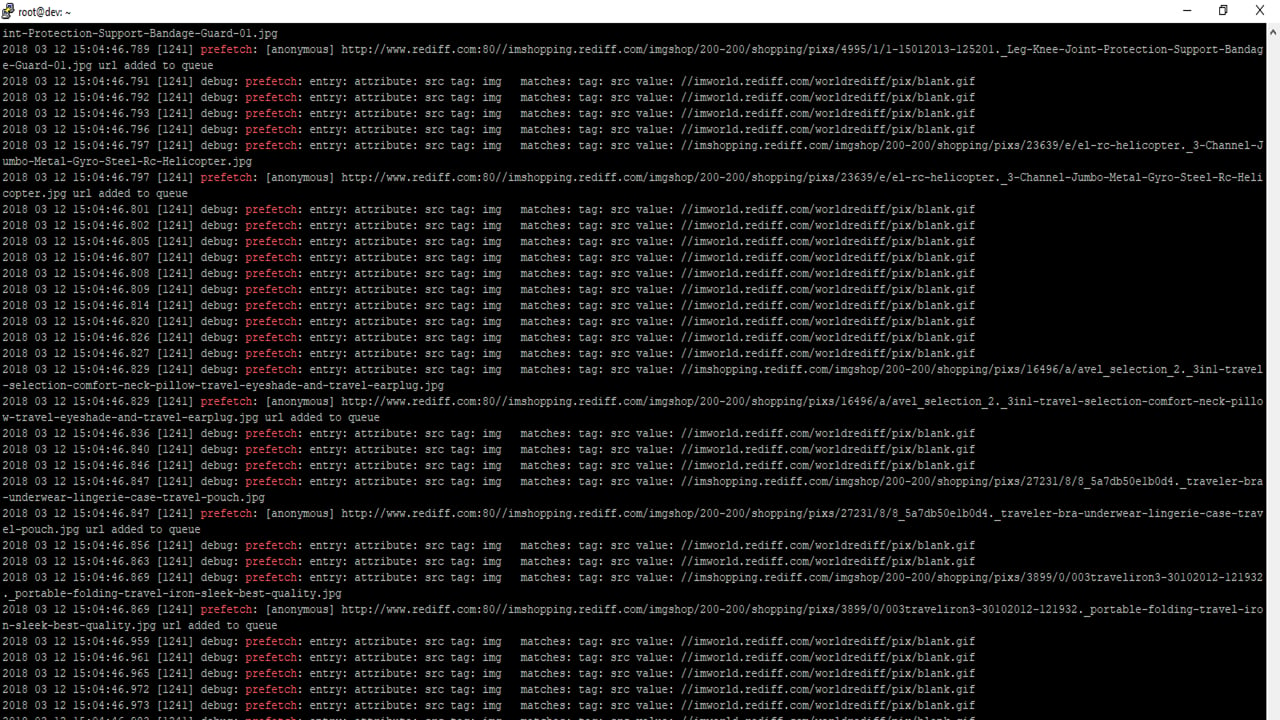
Verify objects are cached
-
Navigate to Manage cached objects in the Caching section.
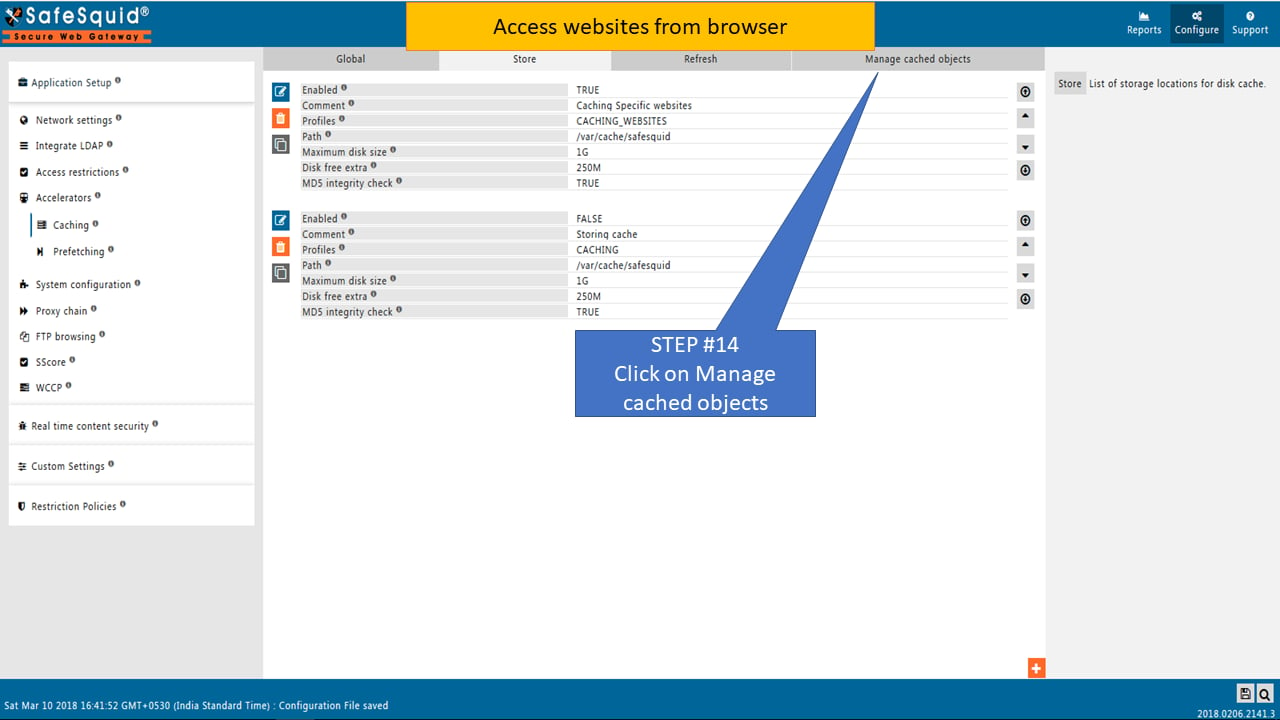
-
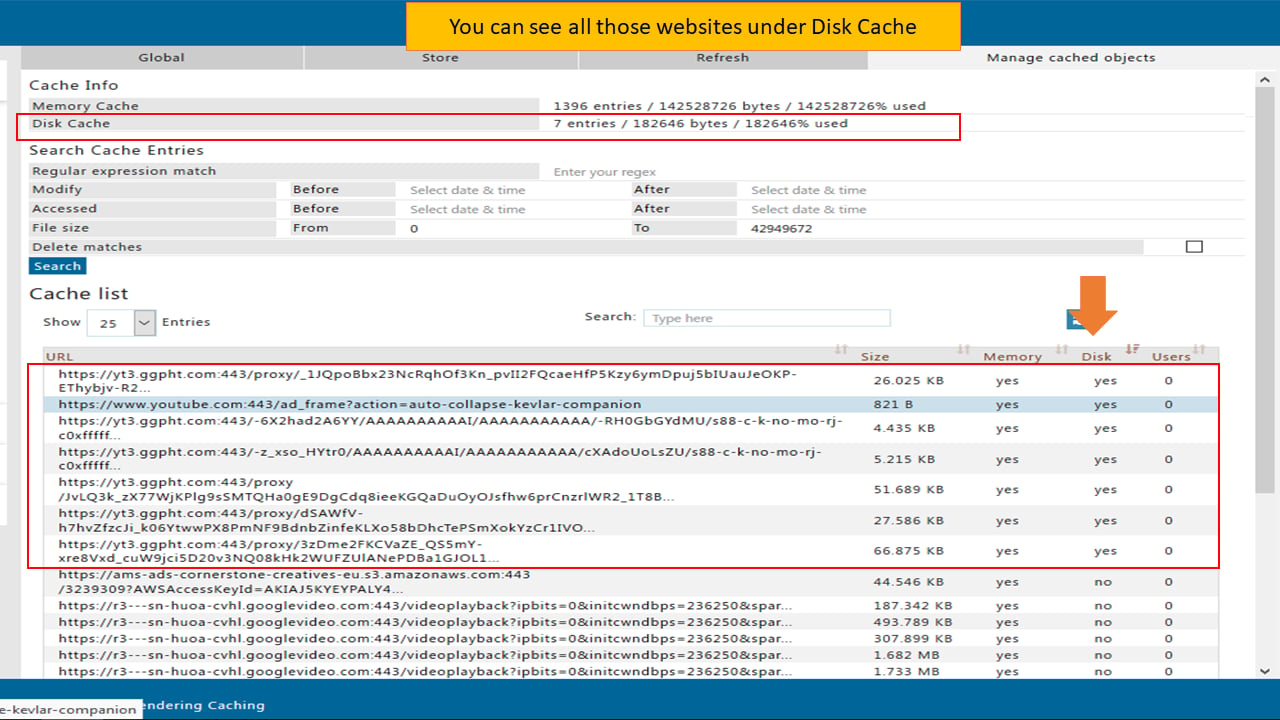
Verify cached websites appear under disk cache.
Capture caching evidence
Store these artifacts with the change record:- The access profile name and the categories it matches.
- Confirmation that the store policy references that same profile.
- A Manage cached objects listing showing entries after a test browse.
- The prefetch tag, attribute, and regular expression used.
- Confirmation from the policy owner that cached categories are appropriate to share.
Troubleshoot caching and prefetching
Next steps
- Manage Bandwidth - shape traffic once caching is in place.
- Performance Plot - measure the effect on latency.
- Hardware Sizing - confirm the cache volume is on the right storage.