

Network Signature
Maps client IP addresses or ranges to user-groups so access restriction rules and reporting apply by network segment. No user login required; policy is enforced by source IP or subnet. Use when user identity is unavailable (device-only access, legacy apps, shared kiosks). SafeSquid evaluates Network Signature rules (Allow List) top to bottom and applies the first matching rule. Place specific IP rules above broader ranges to ensure correct policy application. See Rule Order Matters below for details.When to use Network Signature
- SafeSquid deployed and operational
- Admin access to Configuration Portal
- Known client IP addresses or subnets (static or predictable ranges)
Configure IP-based user-groups
- Access SafeSquid Configuration Open the Configuration Portal and click Configure.
- Navigate to Access Restrictions Application Setup -> Access Restrictions -> Allow List
- Create New Policy Click Add New.
-
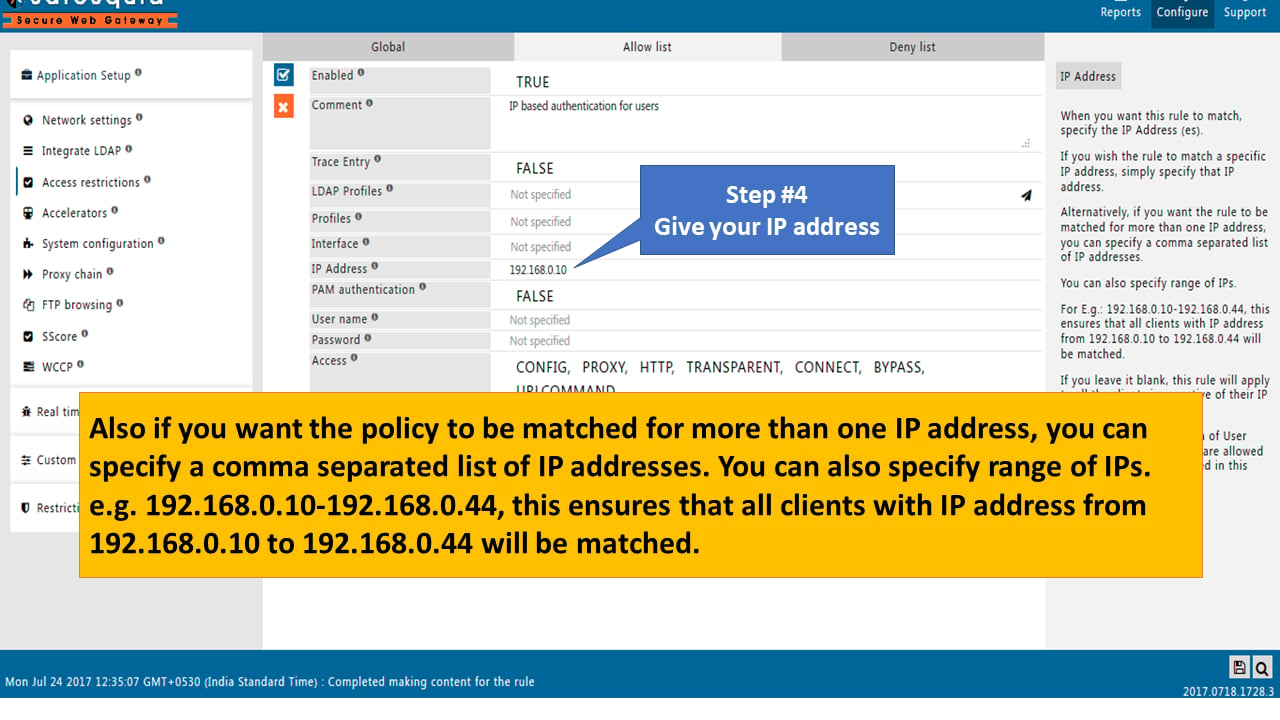
Define IP Range Enter the IP address or range in the IP Address field. Supported formats: Single IP:
192.168.1.50Multiple IPs:192.168.1.50, 192.168.1.51, 192.168.1.52IP range:192.168.1.50-192.168.1.100CIDR notation:192.168.1.0/24 -
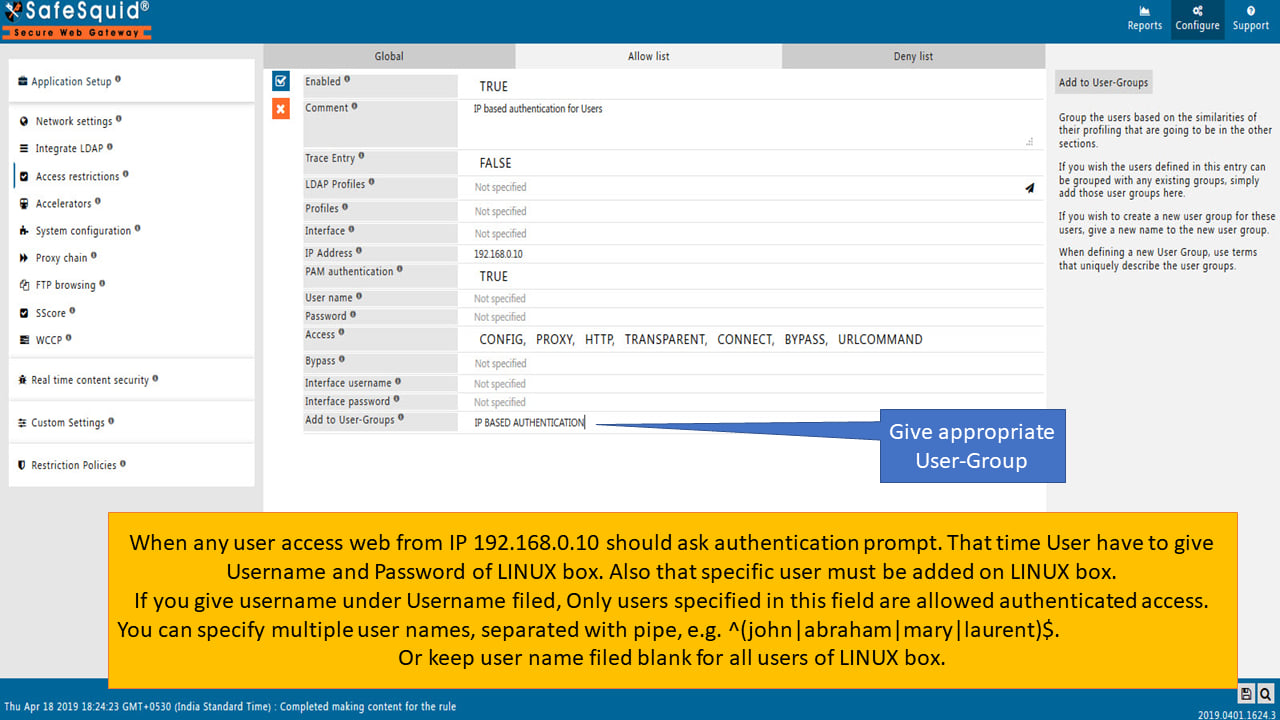
Assign User-Group In Add to User-Groups, specify a unique group name (e.g.,
FINANCE_DEVICES,GUEST_KIOSKS,IOT_SENSORS). - Save Policy Click the checkmark to save.
Configuration screenshots
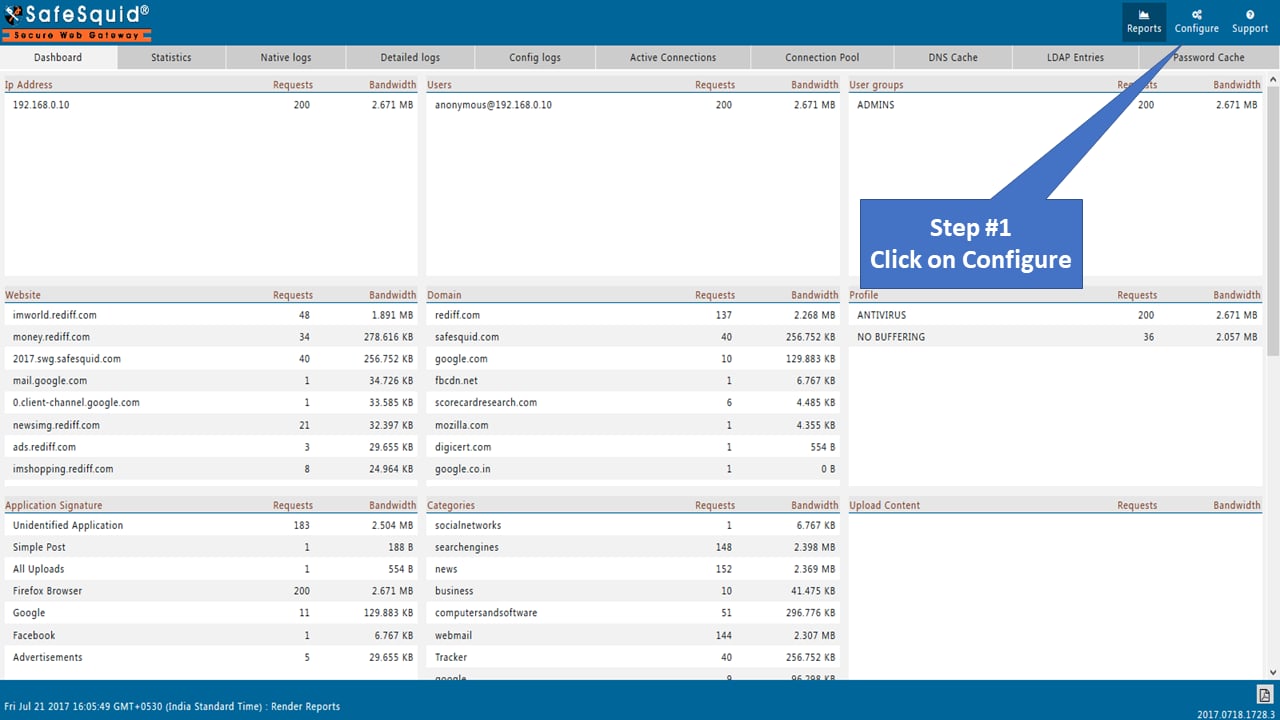
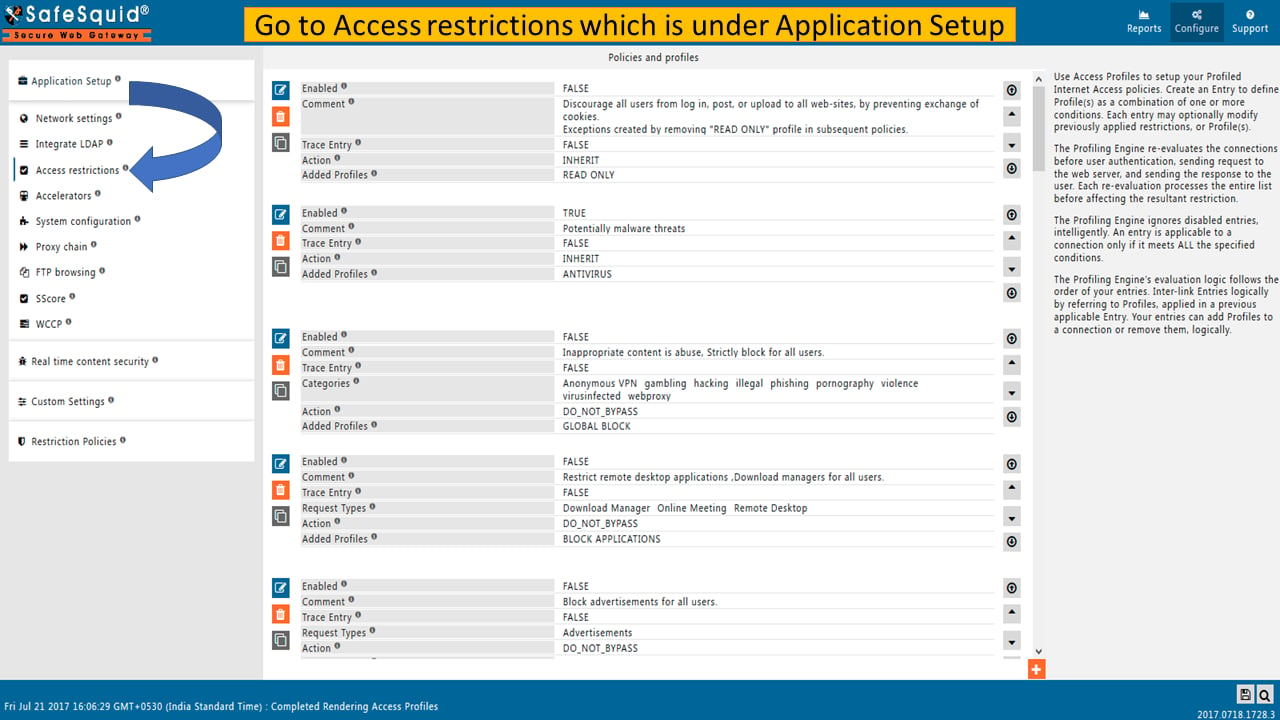
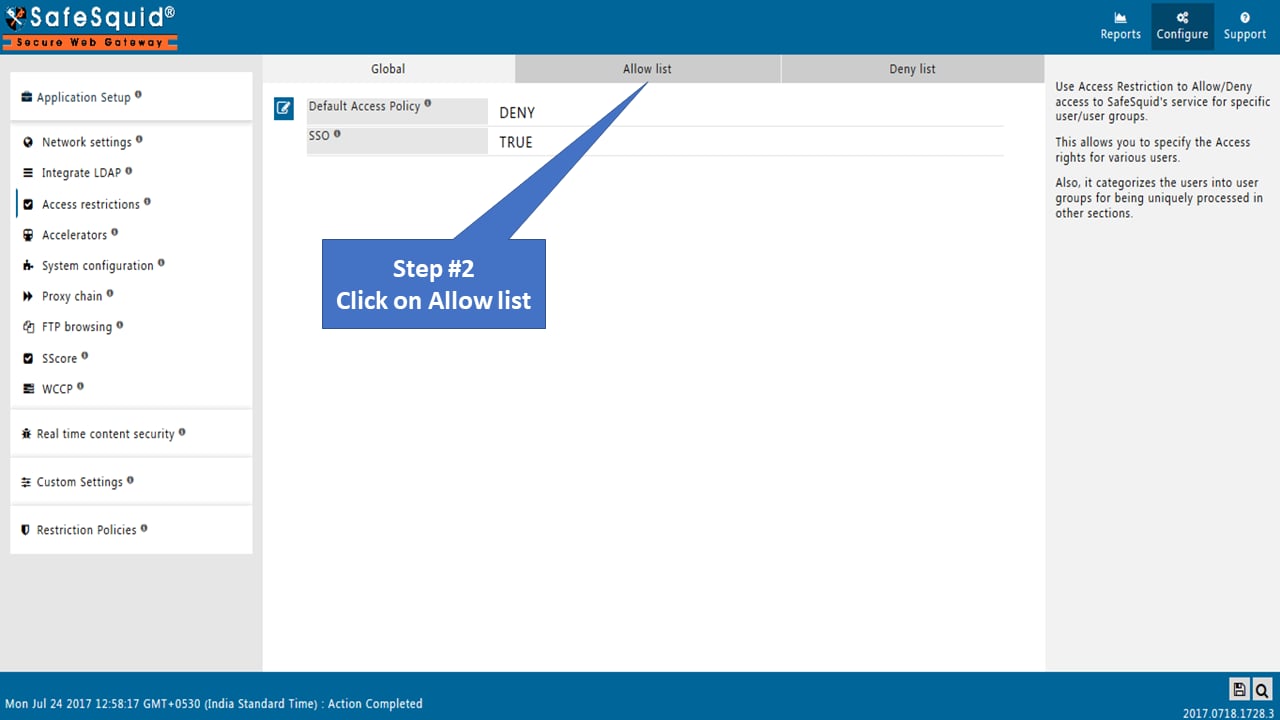
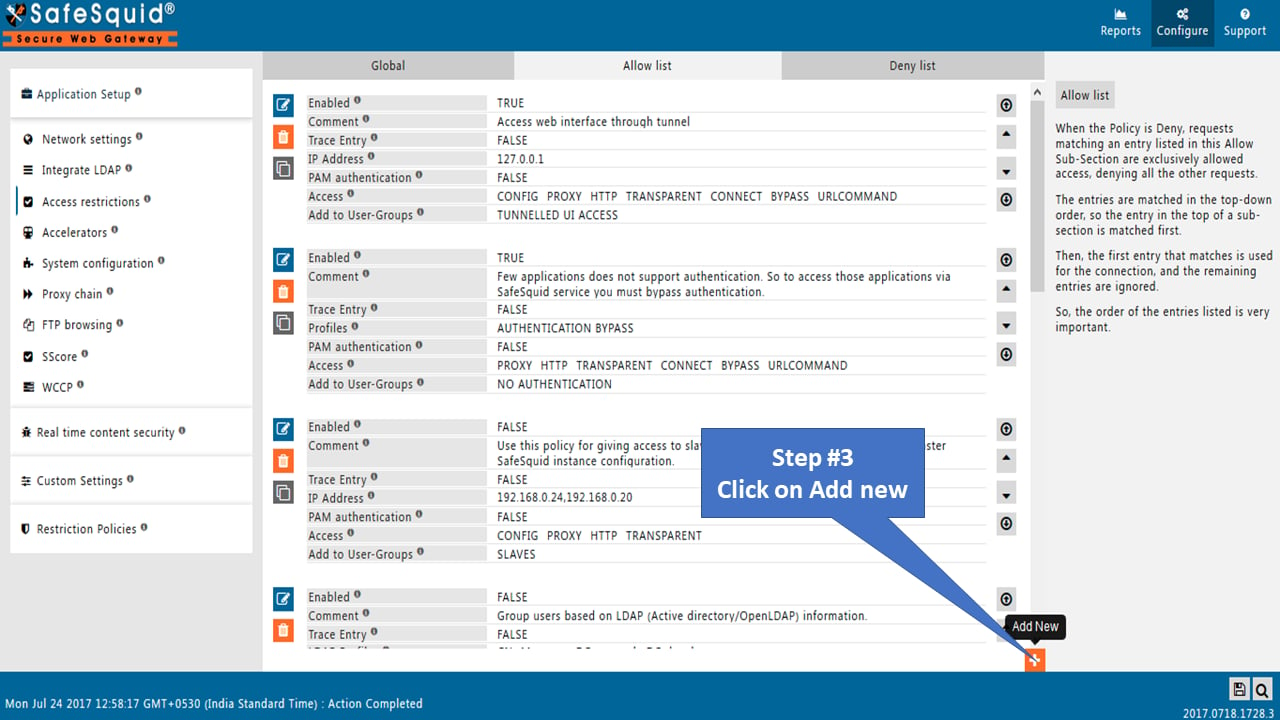
Example: Segmented network policies
Verification
- Test from Client Send traffic through the proxy from a client in the configured IP range. The client is assigned the configured user-group and matching access rules apply.
- Check Interface Access Restrictions -> Allow List shows the rule with IP range and user-group
-
Review Logs
tail -f /var/log/safesquid/identity.logOr Reports -> Detailed Logs Logs show client IP and assigned user-group - Confirm Policy Application Access a restricted site from the client; confirm the group-specific policy is enforced (allowed/blocked as configured)
Troubleshooting
SafeSquid evaluates Allow List rules top to bottom. Place narrow, specific IP rules above broad ones:
- 192.168.10.50 (single executive IP with premium access)
- 192.168.10.0/24 (department subnet with standard access)
- 0.0.0.0/0 (default policy for all others)
Advanced: Dynamic IP assignment
For environments with DHCP where client IPs change:- DHCP reservations: Assign static IPs via DHCP for critical devices
- VLAN-based ranges: Use predictable ranges per VLAN; map VLAN subnets to user-groups
- Combine with MAC-based DHCP: Tie MAC addresses to IP reservations, then use Network Signature on those IPs
- Upgrade to user auth: For dynamic endpoints (laptops, mobile), use Directory Services instead
Next steps
- Add user authentication: Combine Network Signature with Directory Services or BASIC for user-aware policies
- Refine access rules: Use Access Restriction to define what each user-group can access
- Enable SSL Inspection: Configure SSL Inspection to inspect HTTPS traffic from IP-based groups
- Report by group: Use SafeSquid reports to analyze bandwidth and activity per user-group