

Setup Active Directory Integration
Establish a connection between SafeSquid and Active Directory (AD) to synchronize user and group entities. This is the foundational step for both Simple and SSO authentication.Problem statement
If SafeSquid cannot reliably read AD users and groups, every later authentication flow becomes brittle. This setup step is where directory truth enters the proxy. :::note Prerequisites- SafeSquid installed and operational.
- Windows Server with Active Directory installed and reachable from the SafeSquid server.
- LDAP Admin installed (optional, used for verifying AD structure).
- A domain account with read permissions to the directory (Administrator or a dedicated service account).
- Working DNS and time synchronization between SafeSquid and the AD environment. :::
1. Verify Active Directory structure
Before configuring SafeSquid, ensure your users and groups are organized in AD. Use Active Directory Users and Computers on your Windows Server.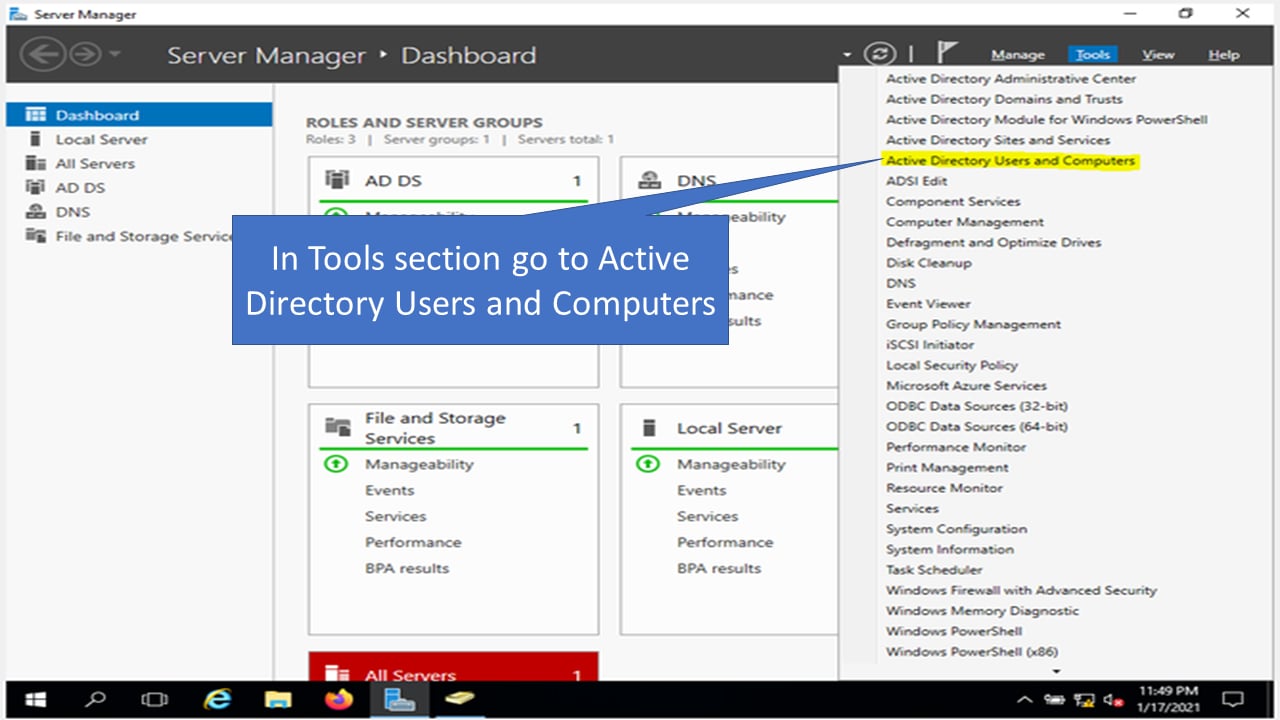
safesquid.test → DC=safesquid,DC=test.
:::
2. Link LDAP Admin with AD (Optional Verification)
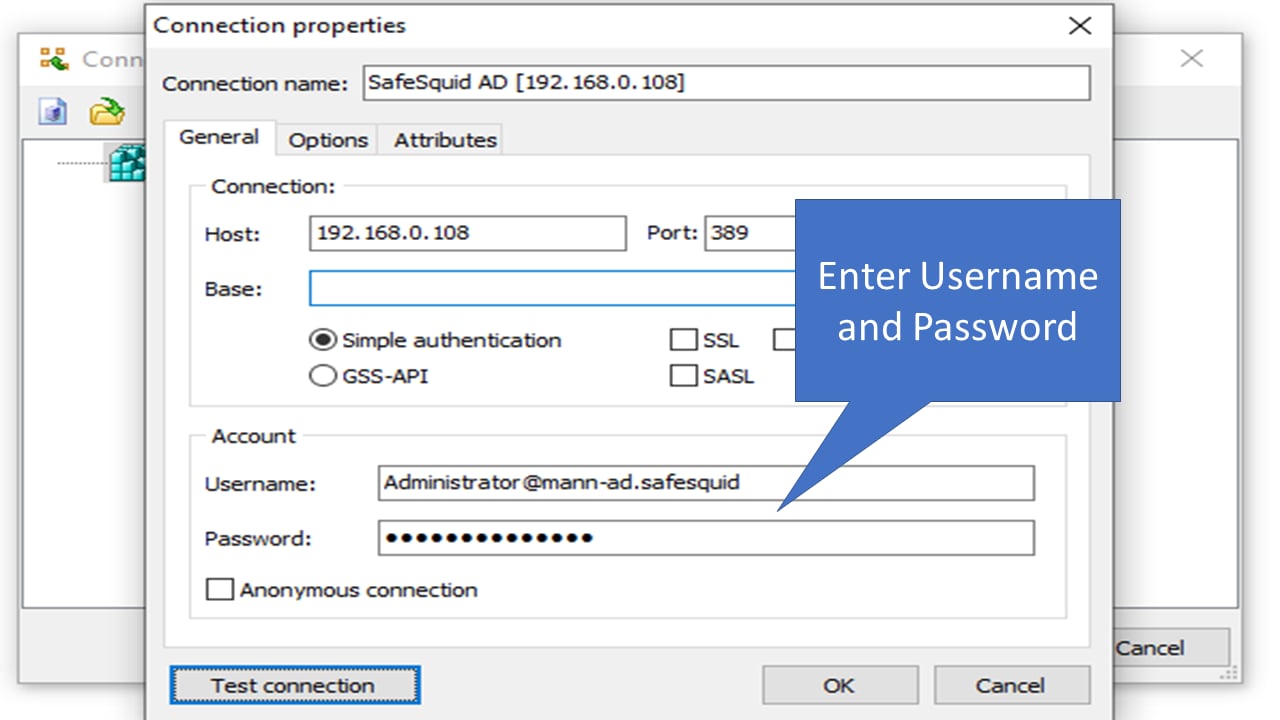
Use LDAP Admin to test connectivity and find the correct DNs (Distinguished Names) for your configuration.- New Connection: Enter the AD Host IP and your credentials.
- Test Connection: Click Test connection to verify connectivity before proceeding to SafeSquid.
- Fetch DNs: If the tree is empty, right-click the connection → Properties → Fetch DNs.
3. Integrate LDAP with SafeSquid
- Access SafeSquid Interface: Open the Configuration Portal and click Configure.
- Navigate to LDAP Integration: Application Setup → Integrate LDAP. Click the + (Add new) icon.
- Configure Connection Details:
- LDAP Server FQDN / IP: Enter your AD server details.
- Bind DN: Enter the service account username (e.g.,
Administrator@safesquid.test). - Password: Click the arrow to enter and confirm the password.
- Base DN: Enter your directory base (e.g.,
DC=safesquid,DC=test). - LDAP Domain: Enter your AD domain (e.g.,
safesquid.test).
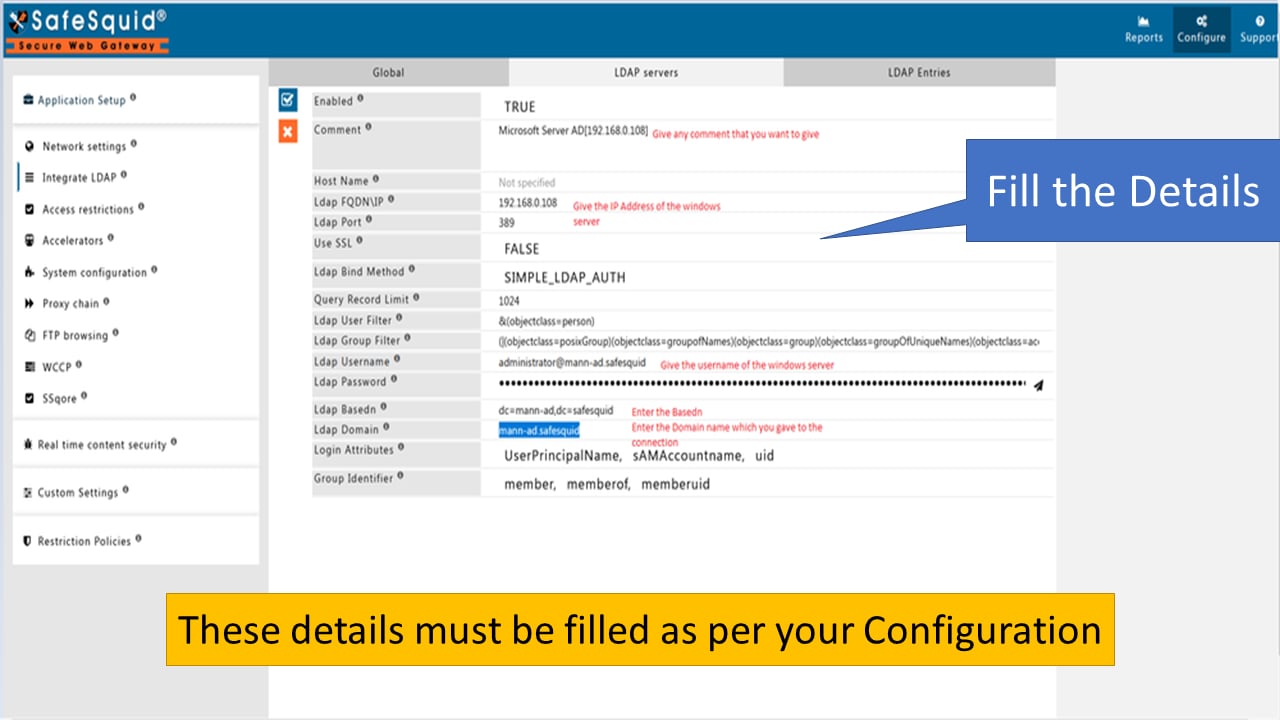
- Save Policy: Click the checkmark to save.
Operational notes
- Use a dedicated service account where possible instead of embedding broad administrative dependency in the long-term configuration.
- Record the Base DN, bind format, and LDAP domain values in deployment notes so later troubleshooting does not begin from guesswork.
- This step establishes the data plane for later simple-auth or Kerberos-based flows, but it does not by itself prove end-user authentication is working.
Verification
Troubleshooting
Troubleshooting
Source register
Next steps
- Configure Simple Authentication (Browser Prompt)
- Configure SSO Authentication (Kerberos/Transparent)
- Access Restriction (Apply policies by AD group)