

Import SafeSquid Root CA into Chrome or Internet Explorer
Chrome, Edge, and Internet Explorer use the Windows certificate store. Follow this guide to import the SafeSquid Root CA into Trusted Root Certification Authorities so HTTPS inspection works without certificate warnings. Time to complete: 2-5 minutes per machineProblem statement
HTTPS inspection fails visibly on Windows clients if the SafeSquid Root CA is not trusted. The result is certificate warnings, failed browsing, and a rollout that looks broken even when the proxy-side configuration is correct. :::tip Automated Deployment For enterprise environments, deploy the certificate via Group Policy (GPO) instead of manual installation:- Copy certificate to
\\domain.com\SYSVOL\domain.com\Policies\ - GPO → Computer Configuration → Policies → Windows Settings → Security Settings → Public Key Policies → Trusted Root Certification Authorities
- Import → Select SafeSquid certificate → Apply
Prerequisites
:::note Before You Start- SafeSquid Root CA certificate downloaded (from Self-Service Portal or SafeSquid Configuration Portal)
- Windows machine with administrative privileges
- Chrome, Edge, or Internet Explorer installed
- SafeSquid HTTPS inspection already enabled on the proxy side
Import Steps
1. Open the Certificate File
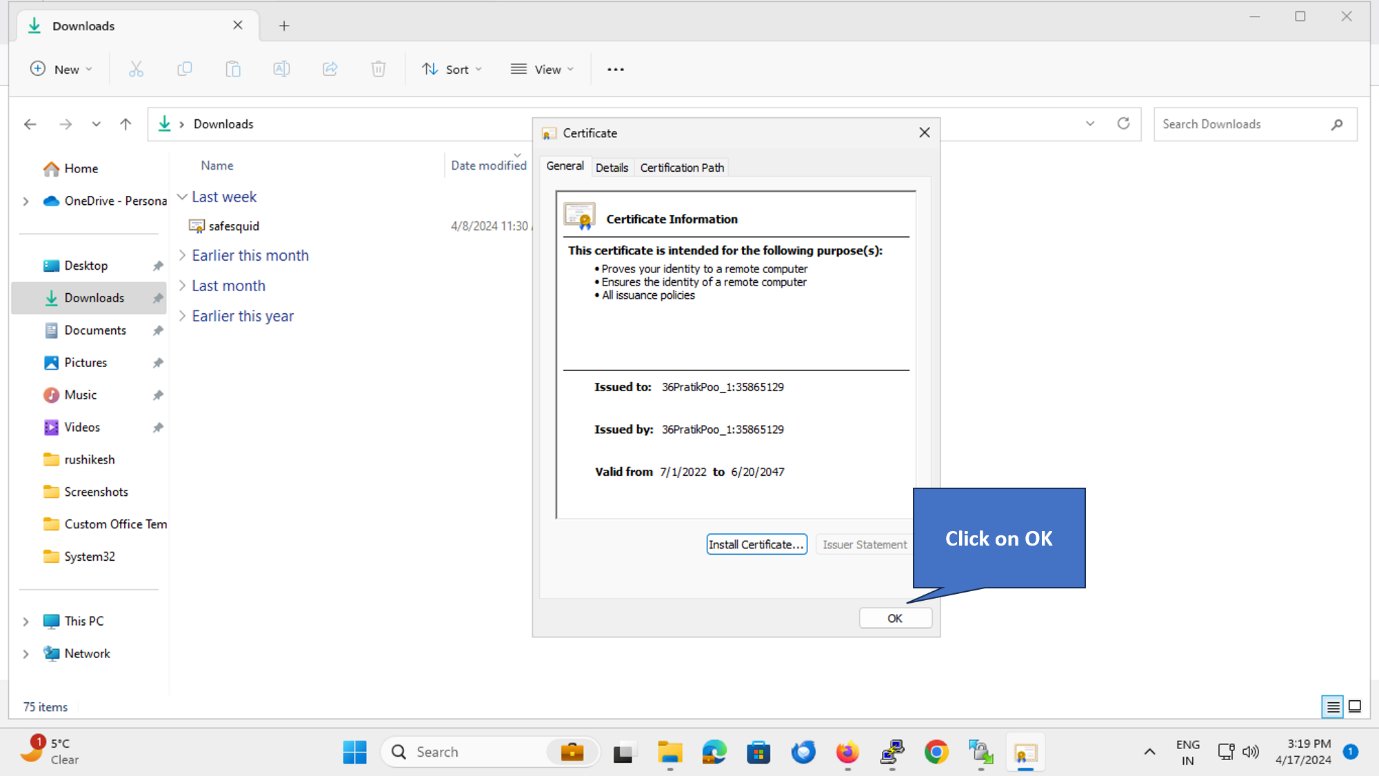
Double-click the downloaded SafeSquid certificate file (usuallysafesquid.crt or safesquid.cer).
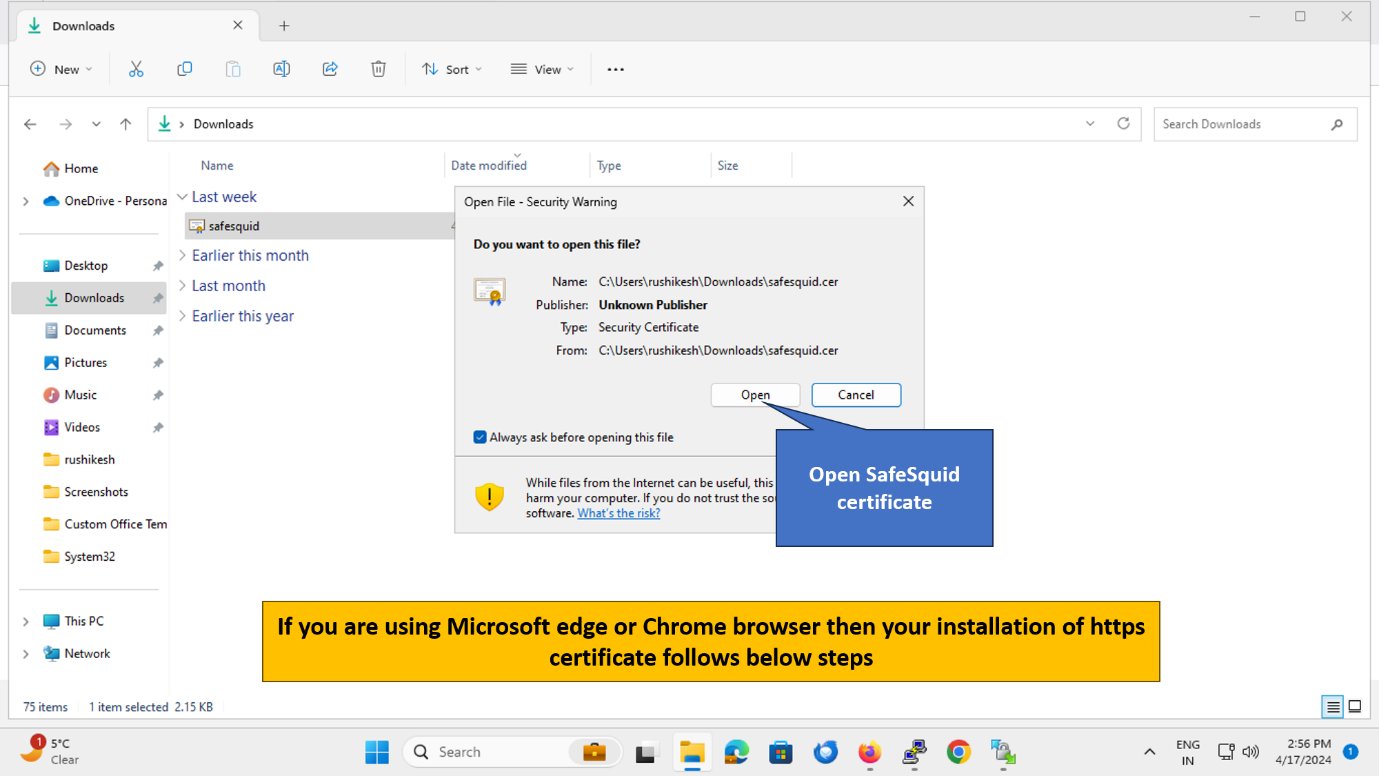
2. Click “Install Certificate”
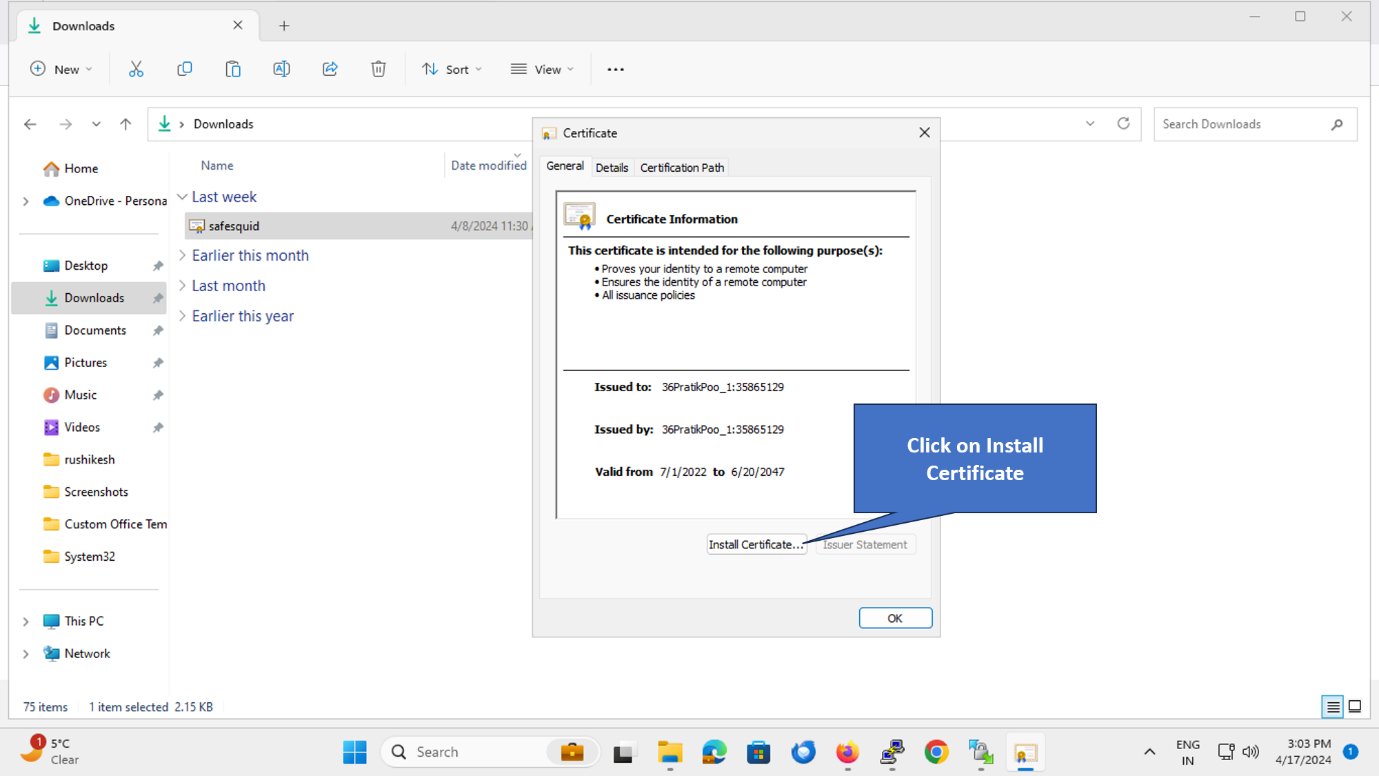
3. Select Store Location
Choose “Local Machine” (for all users on this computer) or “Current User” (for your account only). Recommended: Local Machine (requires admin rights, applies to all users) Click Next.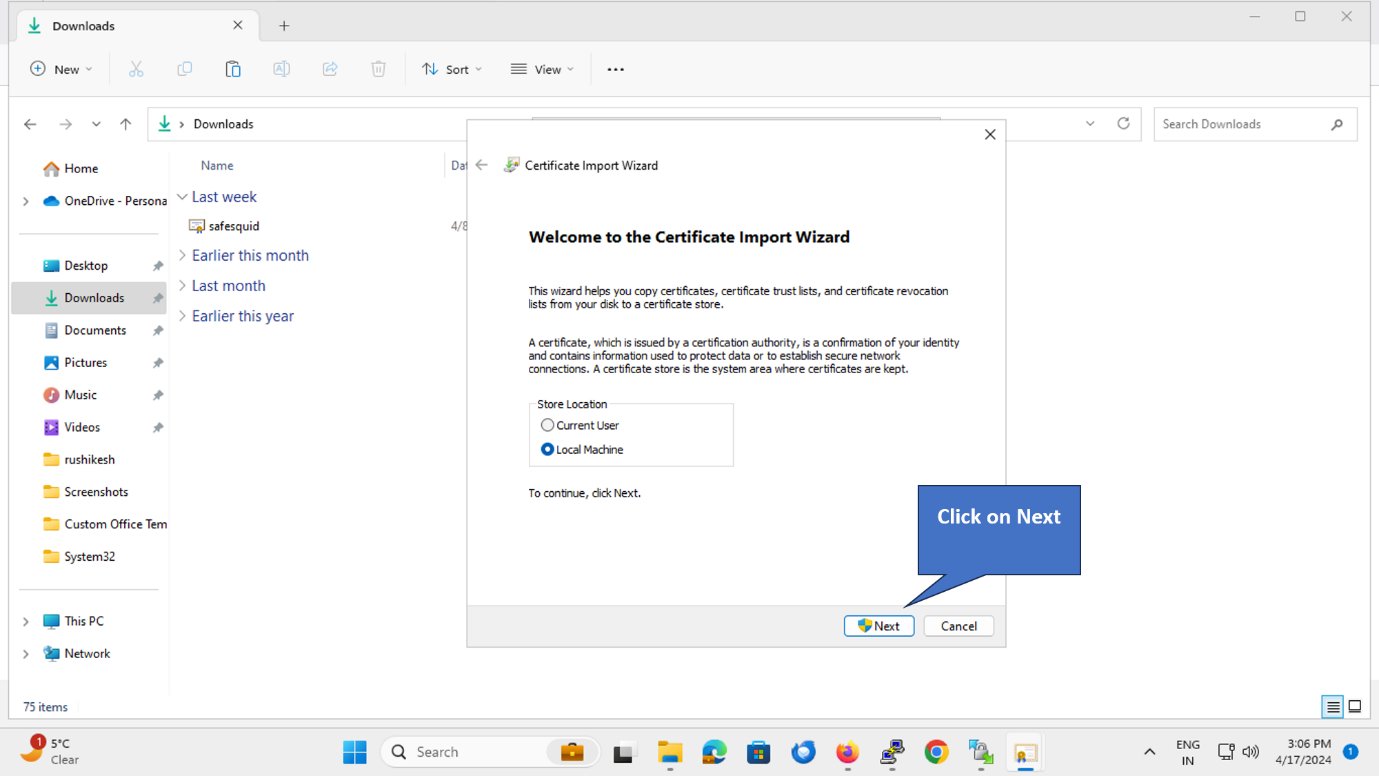
4. Select Certificate Store
Click “Browse” to select the certificate store.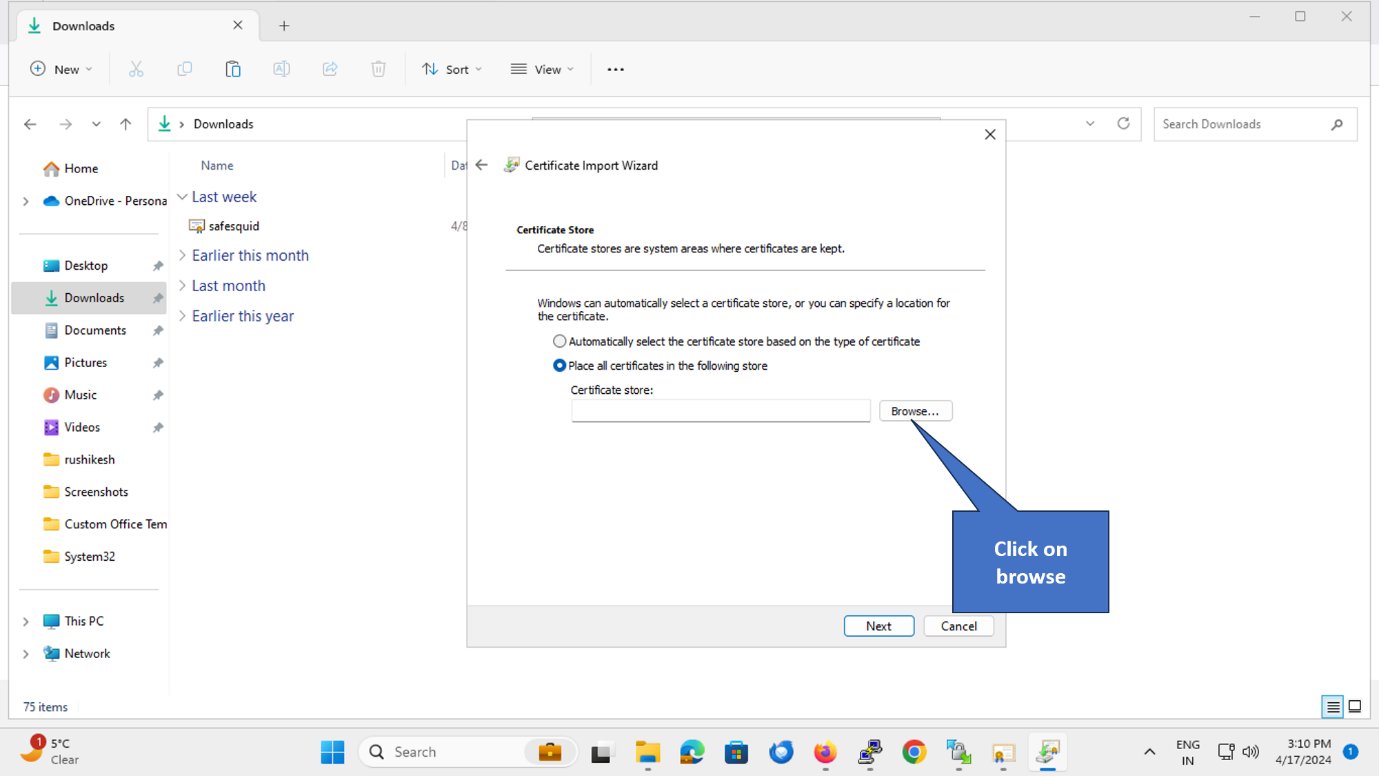
5. Choose “Trusted Root Certification Authorities”
Important: Select “Trusted Root Certification Authorities” (NOT “Intermediate Certification Authorities”). Click OK.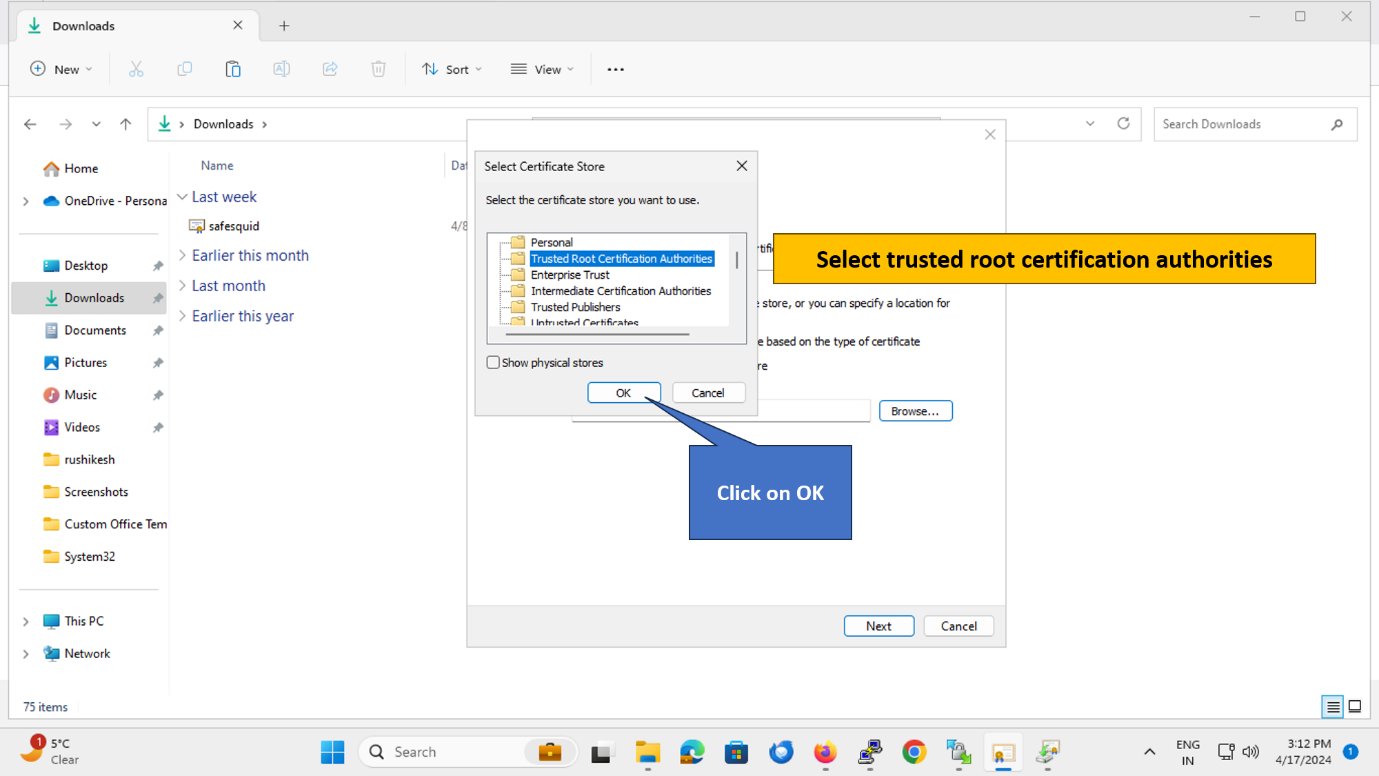
6. Continue with Import
Click Next to continue.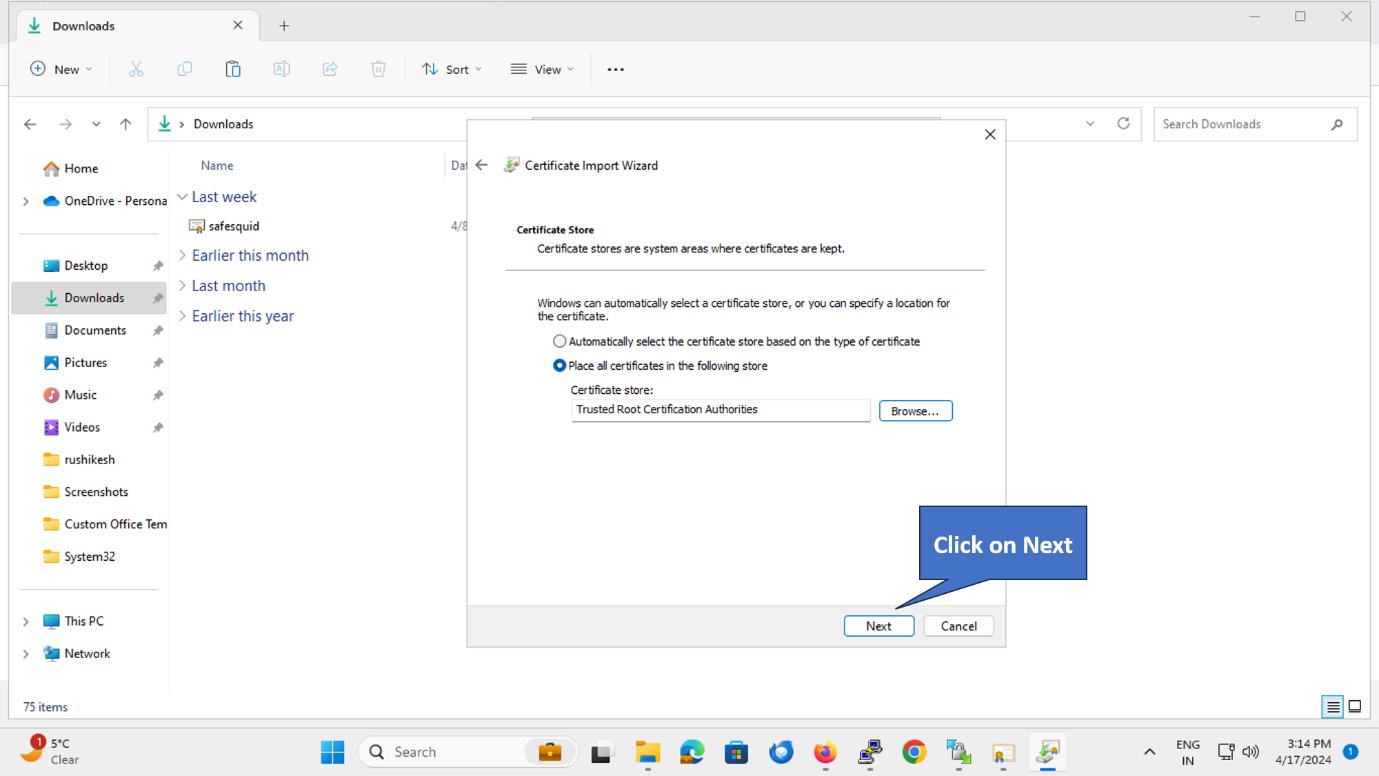
7. Finish Import
Click Finish to complete the import.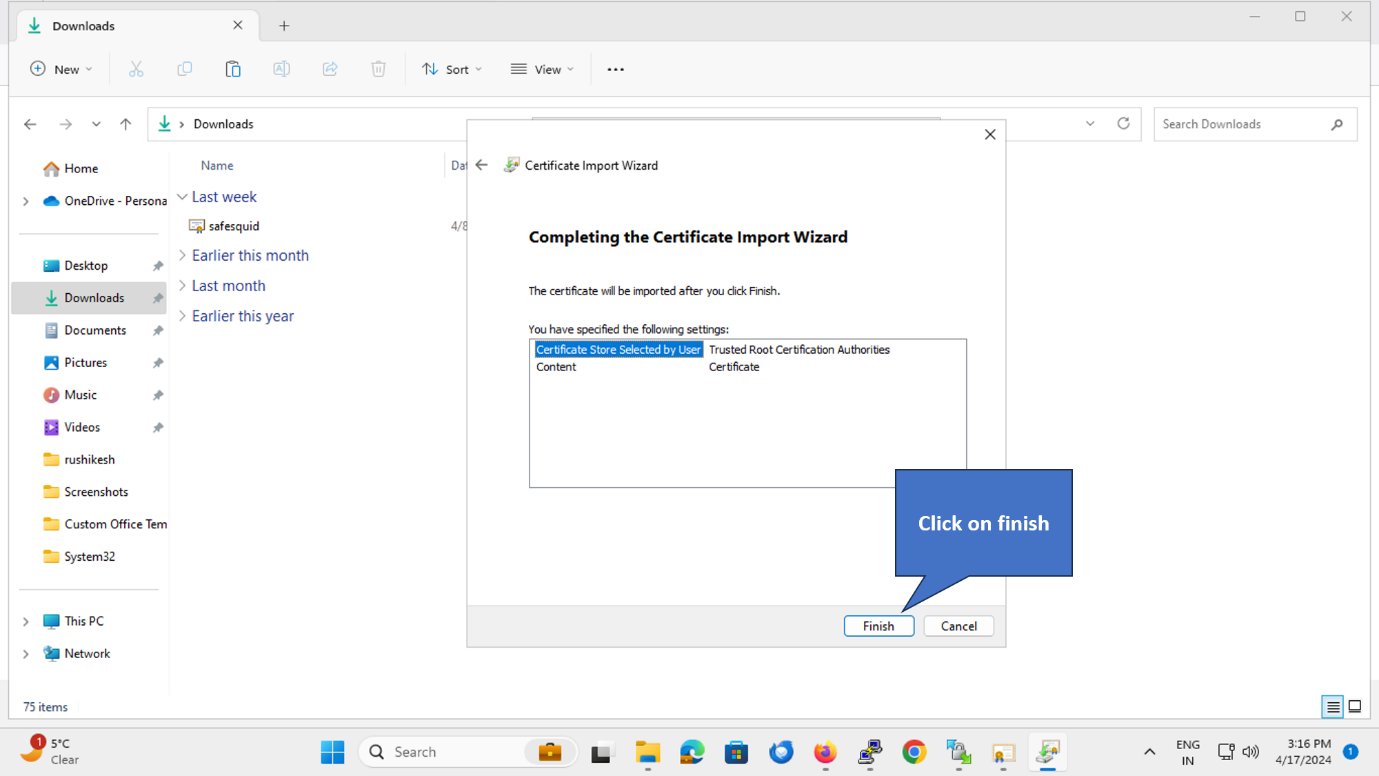
8. Confirm Success
A confirmation message appears: “The import was successful.” Click OK.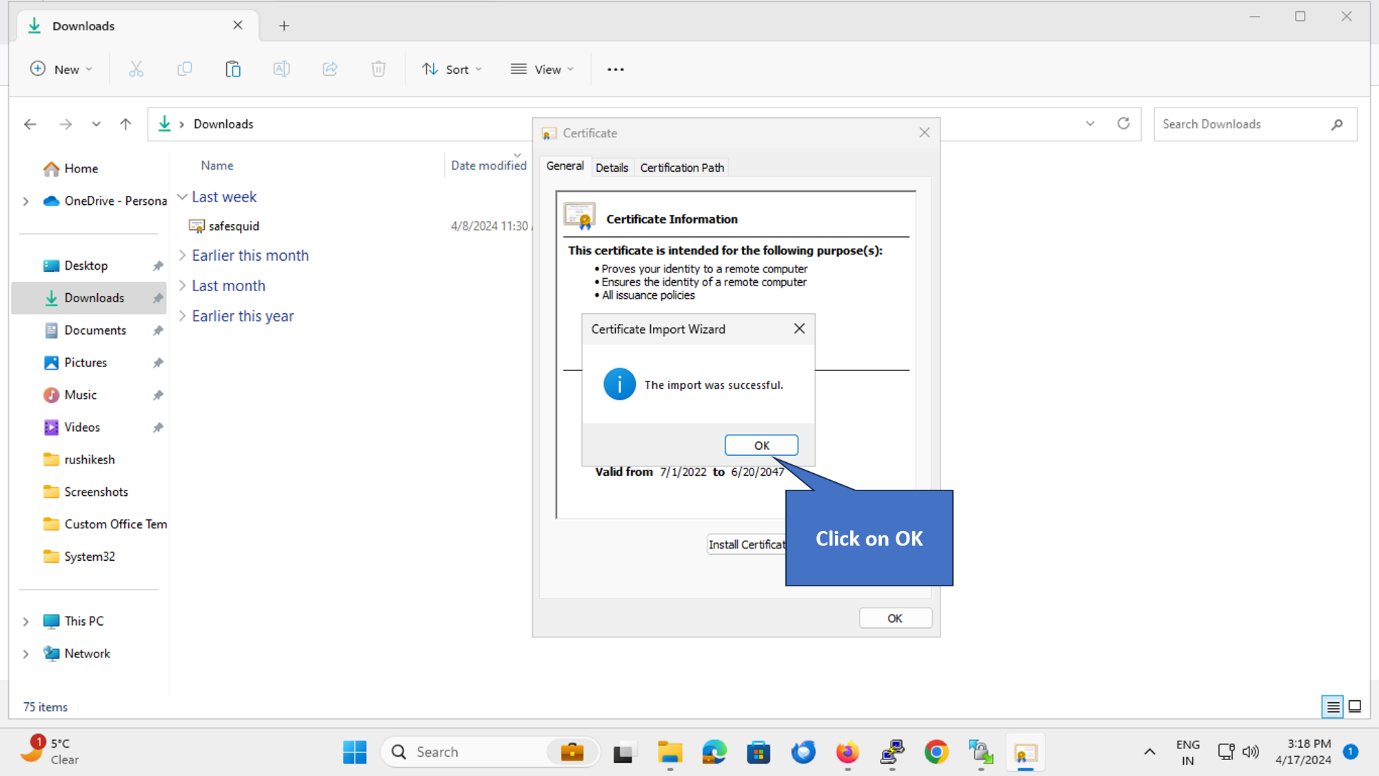
Verify Installation
Test in Chrome/Edge
- Open Chrome or Edge
- Browse to
https://www.google.com(via SafeSquid proxy) - Click the padlock in the address bar → Connection is secure → Certificate
- Verify: Certificate chain shows SafeSquid Root CA as the issuer
Verify Certificate is in Trust Store
- Press Windows + R → Type
certmgr.msc→ Enter - Expand “Trusted Root Certification Authorities” → Certificates
- Find “SafeSquid” (or your organization name) in the list
Operational note
For enterprise rollouts, GPO or another managed certificate-deployment path is safer than manual import because it reduces inconsistency across users and machines.Troubleshooting
Still not working?
- Restart browser completely (close all windows)
- Check proxy settings:
- Chrome:
chrome://net-internals/#proxy - Edge:
edge://net-internals/#proxy
- Chrome:
- Verify SafeSquid HTTPS Inspection is enabled:
- Navigate to SafeSquid Configuration Portal
- Real-time Content Security → HTTPS Inspection → Global → Enabled = True
Source register
Next Steps
- Configure HTTPS Inspection — Complete setup guide (if you haven’t enabled inspection yet)
- Import certificate into Firefox — Firefox uses separate trust store
- Deploy to all clients:
- Windows enterprise: Use GPO (see tip at top of page)
- macOS: Use MDM or manual Keychain import
- Mobile: Use MDM or manual installation
- Verify your setup — Confirm proxy and SSL Inspection are working